Chapter 03: Object oriented programming
Conceptos de programacion orientada a objetos aplicados a PHP: clases, herencia, interfaces, namespaces y autoloading.
{sample: true}
Chapter 03: Object oriented programming
Classes and Objects
Object oriented programming is a paradigm that has been tried and proved for years. If we want to make a living as professional php developers then there is zero chance that you won’t be using it.
So, what is it exactly?
In the procedural paradigm, we write functions to accomplish our goals. Functions receive parameters and execute (ideally) one specific task. Functions perform operations on data.
In order to use a particular function, we need to include the file containing that function. That means that we can encounter clashes if we include two files containing functions with the same name. This is because functions reside in the global scope.
Object-oriented programming groups functions and data in a single entity, that represents an aspect of the problem. In this form, we can organize our code more efficiently, and with less repetition.
The entities are called objects, and are abstractions of the real world. We build those objects (instantiate them) from a blueprint. This blueprint is called a class.
The code inside a class is hidden from the global scope; that is, the code is encapsulated in the class scope. We access this code instantiating the object.
We’ll see some examples.
Create a folder called “oop” at the same level of the databases folder.
Let’s say we are working on a simple blogging system. We can identify that our blog we’ll have at the very least users, posts and comments.
Create a folder called “blog” inside the oop folder. Add a file called User.php
We can write the class user like this:
<?php
class User {
    public $first_name;
    public $last_name;
    public $email;

    public function __construct(
        $first_name, $last_name, $email
    )
    {
        $this->first_name = $first_name;
        $this->last_name = $last_name;
        $this->email = $email;
    }
}
$first_name, $last_name and $email are attributes of the class User, known as properties. They are declared public. “public” is an access modifier. Access modifiers are used to determine if we can access the property or function from outside the class. Normally we won’t be having many public properties, but we leave it like this for now.
Then we have a function called __construct. Functions inside classes are called methods. The constructor method is a special method that is executed automatically when an object is instantiated.
In the constructor, you can see the keyword $this. Let’s talk about it.
$this
$this represents the current object of the class. The $this keyword allows access to properties and objects of the current object of the class using the operator ->
So, in the example, to reference the “first_name” property we use $this->first_name.
Now we’ll add a new class representing the posts.
<?php
class Post {
    public $title;
    public $text;

    public function __construct($title, $text)
    {
        $this->title = $title;
        $this->text = $text;
    }
}
And the comments:
<?php
class Comment {
    public $message;

    public function __construct($message)
    {
        $this->message = $message;
    }
}
Let’s put these classes to test adding a file called blog.php:
<?php
require_once "Post.php";
?>
<html lang="en">
<head>
    <meta charset="UTF-8">
    <meta http-equiv="X-UA-Compatible" content="IE=edge">
    <meta name="viewport" content="width=device-width,
        initial-scale=1.0">
    <title>Simple Blog</title>
</head>
<body>
    <div>
        <h1>Simple Blog</h1>

        <?php
            $post1 = new Post("Why PHP?",
            "PHP powers most of the sites in the web.");
            $post2 = new Post("What is OOP?",
            "OOP is a paradigm that encapsulates
                data and operations.");

            $posts = [$post1, $post2];

            foreach ($posts as $post) {
                echo "<h2>$post->title</h2>";

                echo "<p>$post->text</p>";
            }
        ?>
    </div>
</body>
</html>
You can see that we use a foreach loop to go through the different posts of the array. We need to display the title and the text, so we reference this as $post->title and $post->text.
Internally, the class sees these sentences as $this->title and $this->text. The interpreter knows who the current object is, so we display the appropriate property values for each object.
We get the following output (Figure 19):
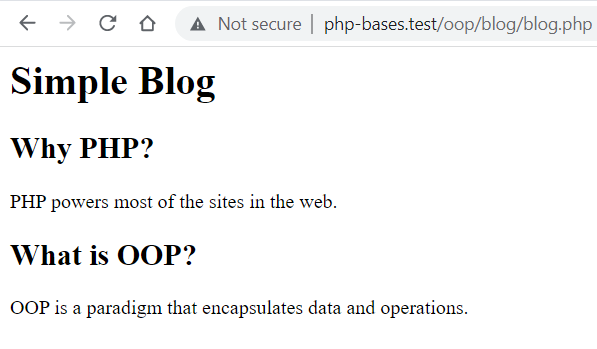
Not very impressive, I know, but we are integrating concepts to build increasingly larger applications.
At the moment, we can change properties values from outside the object. For example we could write something like this:
$post = new Post("Title", "Text");

echo $post->title , "<br/>";

$post->title = "New title";

echo $post->title;
We don’t normally want this, because that means we are exposing the system to uncontrolled changes outside the class. We should have very good reasons to leave the properties as public. And that brings us to the next subject.
Access modifiers
Access modifiers determine from where we can access the properties or methods of a class. We have 3 access modifiers:
public: We already saw these in action. We can access public properties and methods from outside the class.
protected: A property or method declared as protected can be accessed from inside the class and derived classes. We’ll see examples when we talk about inheritance.
private: This is the most restrictive of all. Properties and methods declared as private can be accessed only from within the class.
Going back to our Post class, let’s change the “title” and “text” properties from public to private:
<?php
class Post {
    private $title;
    private $text;

    public function __construct($title, $text)
    {
        $this->title = $title;
        $this->text = $text;
    }
}
Now if we run blog.php we get an error (Figure 20):
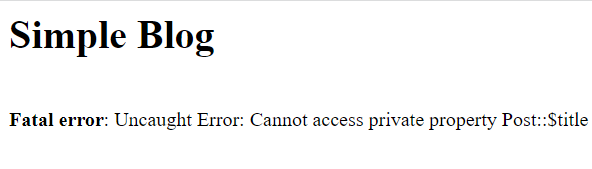
This is because private properties can not be accessed from outside the class. So, how can we access this property?
Getters and setters
We can use setters and getters to change and obtain the value of a private property. Add the following two methods to the Post class:
public function setTitle($title)
{
    $this->title = $title;
}

public function getTitle()
{
    return $this->title;
}
With these two methods, we have access to the “title” property. Now add other two methods to deal with the text property:
public function setText($text)
    {
        $this->text = $text;
    }

    public function getText()
    {
        return $this->text;
    }
Now, we need to make a change to our blog.php script. Change these lines:
echo "<h2>".$post->getTitle()."</h2>";

echo "<p>".$post->getText()."</p>";
Now the error should go away.
You may be wondering why to use setters and getters if that makes our code longer. Well, one of the purposes of the oop paradigm is to provide encapsulation, and public properties go against it. Ahoner reason is that we can enforce checks on validations on the setters, maintaining data consistency. As an example, change the setTitle method as follows:
public function setTitle($title)
    {
        if (strlen($title) > 45) {
            $title = wordwrap($title, 45);
            $title = substr(
                $title, 0, strpos($title, "\n")
            );
        }

        $this->title = $title;
    }
Now, in the blog.php script add these lines after the foreach loop:
$post2->setTitle("This is a very long title and should
    be cut. This part won't be displayed");
echo $post2->getTitle();
If you run the script, you should see the title being cut.
If you are curious, the wordwrap wraps a string to a given number of characters using a string break character, this character defaults to newline “\n”.
Then with substring we take the firstline.
Magic methods
Magic methods are special methods in a class that override the normal behavior. The names of these methods start with a double underscore. We already saw one of them in action, the __construct method, used for initialization.
The constructor has its counterpart, the destructor. You can use the destructor to do some clean up, for example, closing a file:
public function __destruct()
{
    fclose($this->handle);
}
Another magic method is __get, which is invoked when writing a value to a non-existing or inaccessible property.
We can use this method, for example, to shorten our class definition if we don’t need any checking to read a private property. Remove the setters from the Post class, and add this method:
public function __get($name)
    {
        if (method_exists($this, "get".ucfirst($name))) {
            $method = "get".ucfirst($name);
            return $this->$method();
        }

       return $this->$name;
    }
The magic method we’ll search for a getter. For example, if it receives the parameter “title” we’ll search for a method called getTitle. If the method exists then it returns it. If there is not method, then it returns the property indicated by the parameter “name”.
Note that in the final line we write $this->$name and not $this->name. This is because $name will hold the name of whatever method or property we are requesting. But if we write $this->name then we are looking for a property called “name”.
Just to be sure, this is the complete code of the Post class:
<?php
class Post {
    private $title;
    private $text;

    public function __construct($title, $text)
    {
        $this->title = $title;
        $this->text = $text;
    }

    public function setTitle($title)
    {
        if (strlen($title) > 45) {
            $title = wordwrap($title, 45);
            $title = substr(
                $title, 0, strpos($title, "\n")
            );
        }

        $this->title = $title;
    }

    public function setText($text)
    {
        $this->text = $text;
    }

    public function __get($name)
    {
        if (method_exists($this, "get".ucfirst($name))) {
            $method = "get".ucfirst($name);
            return $this->$method();
        }

       return $this->$name;
    }
}
Building a fileuploader
We are now ready to build something a little more complicated. In many applications, there is the need for an upload file functionality. We could follow a procedural approach, but this is the kind of functionality that is perfect to be encapsulated. Think of a set of reusable classes that you can bring to a new project, that you can use without worrying about function names clashing.
Add a folder called uploader inside the oop folder. Then add a file called FileUploader.php. We start with this content:
<?php
class FileUploader {
  private $fileName;
  private $targetDir;
  private $targetFile;
  private $errors;

  public function __construct(
    $fileName, $targetDir = ''
  )
  {
    $this->fileName = $fileName;
    $this->targetDir = $targetDir;

    $this->targetFile = $this->targetDir .
      DIRECTORY_SEPARATOR .
      basename($_FILES[$this->fileName]["name"]);
  }
}
We have the class definition, with four private properties. One to hold the filename, that is, the value of the “name” attribute of an input of type file in a form; and the folder to which the image should be uploaded. The targetFile represents the full path to the uploaded file. Finally, a property to hold and display any possible errors. The constructor deals with the initialization of these properties. Note the use of the globarl constant DIRECTORY_SEPARATOR. This constant represents whatever character the operating system of the server uses as the separator for directories in a path, that is “/” or “\”.
After the constructor, add the following method:
private function checkIsImage()
{
    if (!getimagesize(
            $_FILES[$this->fileName]["tmp_name"]
        )) {
        $this->errors.= "File is not an image.";

        return false;
    }

    return true;
}
This method will check if the file is indeed an image, using the function getimagesize. This function will return false on any file that is not an image. We could have used a single line:
return getimagesize($_FILES[$this->fileName]["tmp_name"]);
But we want to save an error message. Then let’s add a function to allow only some types of images:
private function checkImageType()
{
    $imageType = strtolower(
        pathinfo(
            $this->targetFile, PATHINFO_EXTENSION
        )
    );

    if (!in_array($imageType, ["jpg", "jpeg", "png"])) {
        $this->errors = "Image type not allowed";

        return false;
    }

    return true;
}
For this example, we will only allow jpg, jpeg or png images. This could be a place to future improvement, for example this could be the default values, and allow for the user to define the desired types in the constructor.
On to the next method.
private function fileNotExists()
{
    if (file_exists($this->targetFile)) {
        $this->errors.=" File already exists";

        return false;
    }

    return true;
}
We use this method to check if the file already exists. Again, we could set the value of a property to indicate if we want to override the file, but this is enough for now.
Until now, with the exception of the constructor, all methods are declared as private. Our last method is a public one, and is in fact the responsible for the upload of the file:
public function uploadFile()
{
    if (
        $this->checkIsImage()
        && $this->checkImageType()
        && $this->fileNotExists()
    ) {
        if (move_uploaded_file(
            $_FILES[$this->fileName]["tmp_name"],
            $this->targetFile)
            ) {
            return true;
        } else {
            throw new Exception(
                "File could not be uploaded",
                E_USER_ERROR
            );
        }
    } else {
        throw new Exception($this->errors,
            E_USER_ERROR);
    }
}
That’s it, it’s a very simple class, but a very useful one. Now we’ll put it to the test.
Inside the “uploader” folder, add a file called form.php
<?php
if ($_SERVER["REQUEST_METHOD"] == "POST") {
    require_once "FileUploader.php";

    $uploader = new FileUploader(
        "file",
        $_SERVER['DOCUMENT_ROOT'] . DIRECTORY_SEPARATOR
            . "uploads"
    );

    try {
        $uploader->uploadFile();
        echo "File uploaded succesfully";
    } catch (Exception $e) {
        echo $e->getMessage();
    }
}
?>
<html lang="en">
<head>
    <meta charset="UTF-8">
    <meta http-equiv="X-UA-Compatible" content="IE=edge">
    <meta name="viewport" content="width=device-width,
        initial-scale=1.0">
    <title>File Upload</title>
</head>
<body>

    <form action="<?= $_SERVER["PHP_SELF"] ?>"
        method="POST" enctype="multipart/form-data">
        <label for="file">Upload your image</label>
        <input type="file" name="file">

        <input type="submit" value="Send">
    </form>

</body>
</html>
Now add a folder called “uploads” at the root of the site, at the same level of the oop folder (Figure 21).
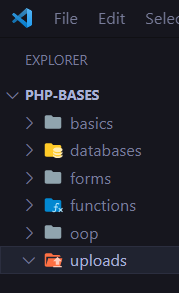
Just to be sure, here are the gists to the FileUploader and the Form
Go ahead and try the form. You should see the file uploaded to the “uploads” folder.
I hope you can see how a class like this can be useful, favoring code reuse and maintainability.
Inheritance
Inheritance is one of the most useful characteristics of a language. It can be defined as the process of deriving classes from other classes, creating a hierarchy. We indicate that one class is derived from another using the keyword extends.
Going back to our blog example, it is reasonable to conclude that our classes will have to interact with some kind of permanent storage. So, it will be a good practice to create a base class to handle all the basic crud (create, read, update, delete) operations. Add a class called Model.php in the blog folder:
<?php
class Model {
    public function all($arrFields = null)
    {
        print_r($arrFields);
    }

    public function find($id, $arrFields = null)
    {
        echo "Searching model with id $id";
    }

    public function save($data, $id = null)
    {
        echo "Saving data";
    }

    public function del($key, $value)
    {
        echo "Deleting key: $key with value: $value";
    }
}
If we make our Post and Comments classes extend from this base class, then they will inherit these methods. Let’s change our Post class:
<?php
require_once "Model.php";

class Post extends Model {
    private $title;
    private $text;

    public function __construct($title, $text)
    {
        $this->title = $title;
        $this->text = $text;
    }

    public function setTitle($title)
    {
        if (strlen($title) > 45) {
            $title = wordwrap($title, 45);
            $title = substr(
                $title, 0, strpos($title, "\n")
            );
        }

        $this->title = $title;
    }

    public function setText($text)
    {
        $this->text = $text;
    }

    public function __get($name)
    {
        if ( method_exists(
                $this, "get".ucfirst($name))
            ) {
            $method = "get".ucfirst($name);
            return $this->$method();
        }

        return $this->$name;
    }
}
We can make some tests to see everything in action. Add a file called test.php at the same level as the blog.php script:
<?php
require_once "Post.php";
?>
<html lang="en">
<head>
    <meta charset="UTF-8">
    <meta http-equiv="X-UA-Compatible" content="IE=edge">
    <meta name="viewport" content="width=device-width,
        initial-scale=1.0">
    <title>Simple Blog</title>
</head>
<body>
    <div>
        <h1>Simple Blog</h1>

        <?php
            $post = new Post("Why PHP?",
            "PHP powers most of the sites in the web.");

            echo $post->all(["title", "text"]);
        ?>
    </div>
</body>
</html>
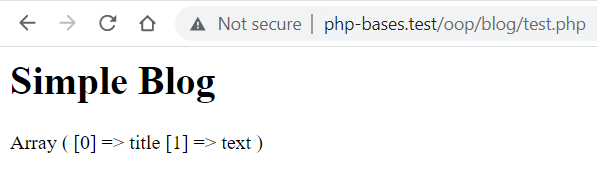
Now we can see that, because the Post class extends from the Model class, we can use the all method (Figure 22).
Interfaces
Interfaces allow you to specify what methods a class should implement. You can think about interfaces as contracts. If a class implements an interface, or a group of interfaces, then it is mandatory for that class to implement all the methods that are declared on those interfaces. Now, why is this useful?
Think about a big codebase. Normally, there will be a group of people working on it. One of the aspects that need to be carefully planned is the architectural one. Whether the title is “software architect” or something else, there should be someone in charge to define the bigger picture. Interfaces can be used to outline what the principal classes of the application should look like. Interfaces enforce a clear design, leaving the implementation to other members of the team and at the same time maintaining consistency. This is sometimes called “programming to the interface”.
We’ll build a db class, the object oriented equivalent to the functions that we used in the passed chapter to interact with a database. This class will adhere to an interface, so we’ll start with it. In the oop folder, add a directory called db. Then add a file called IDatabase.php
<?php
interface IDatabase {
    public function getConnection();

    public function getAll(
        string $table, array $arrFields
    );

    public function getOne(
        string $table, array $arrFields, $key, $value
    );

    public function insertOrUpdate(
        Array $data, string $table, $key, $value
    );

    public function insert(
        array $data, string $table
    );

    public function update(
        array $data, string $table, $key, $value
    );
}
As you can see, we use the keyword interface. Also, the methods are only declared, not implemented. We don’t even have the curly braces for them. This interface is a contract. Every class implementing it must implement the corresponding methods or an error will be thrown.
Now add a file called PDOConnect.php
<?php
require_once "IDatabase.php";

class PDOConnect implements IDatabase {
  private $conn;

  public function __construct(Array $config)
  {
    try {
      $this->conn = new \PDO(
        "mysql:host=".$config["host"].";dbname="
        .$config["dbname"],
        $config["username"],
        $config["password"]
      );
      $this->conn->setAttribute(
        \PDO::ATTR_ERRMODE, \PDO::ERRMODE_EXCEPTION
      );
    } catch (\PDOException $e) {
      trigger_error($e->getMessage(), E_USER_ERROR);
    }
  }

  public function getConnection()
  {
    return $this->conn;
  }

  public function getAll(
    string $table, array $arrFields = []
  )
  {
    $sql = "SELECT ";

    if (!empty($arrFields)) {
      $sql .= implode(",", $arrFields);
    } else {
      $sql .= " * ";
    }

    $sql .= " FROM $table";

    $stmt = $this->getConnection()->prepare($sql);

    if (!$stmt->execute()) return false;

    $stmt->setFetchMode(\PDO::FETCH_ASSOC);

    return $stmt->fetchAll();
  }

  public function getOne(
    string $table, array $arrFields = [], $key, $value
  )
  {
    $sql = "SELECT ";

    if (!empty($arrFields)) {
      $sql .= implode(",", $arrFields);
    } else {
      $sql .= "*";
    }

    $sql .= " FROM $table WHERE $key = :value";

    $stmt = $this->getConnection()->prepare($sql);
    $stmt->bindParam(":value", $value);

    if (!$stmt->execute()) return false;

    $stmt->setFetchMode(\PDO::FETCH_ASSOC);

    return $stmt->fetch();
  }

  public function save(
    array $data,
    string $table, $key = null, $value = null
  )
  {
    $sql = "$table SET";

    foreach ($data as $k => $v) {
      $sql .= "$k = '$v'";
    }

    $sql = trim($sql, ",");

    if (!$value) {
      $sql = "INSERT INTO " . $sql;
    } else {
      $sql = "UPDATE " . $sql
                . " WHERE $key = :value";
    }

    $stmt = $this->getConnection()->prepare($sql);

    if ($value) $stmt->bindParam(":value", $value);

    if ($stmt->execute()) return true;

    return false;
  }

  public function insert(array $data, string $table)
  {
    $this->save($data, $table);
  }

  public function update(
    array $data, string $table, $key, $value
  )
  {
    $this->save($data, $table, $key, $value);
  }
}
The code should look very familiar. In the constructor we initialize the $conn property as a new PDO object, which represents the connection to the database. When we need that connection, we call the method getConnection (a simple getter) to retrieve it.
Then we have methods that are very similar to the functions that we presented in the previous chapter to manage database operations.
Namespaces
We have made a lot of progress. We have an understanding of what classes are, and how they are declared and used. The examples presented try to reflect real world problems, and with that goal in mind, we have to look further and realize that projects tend to grow in complexity. As such, we need to organize our code better. This is of paramount importance in a project with a whole team working on it.
Just think about this situation. You have classes dealing with html tables, such as Table, Row and Col. At the same time, you have another set of classes dealing with Excel files with similar names: Table, Row and Col.
This is known as name colitions. We use identifiers to deal with this problem. A namespace groups a set of related classes. It’s very similar to how directories work. Different directories group files. The name of the files need to be different inside a directory, but different directories can have files with the same name. We’ll be expanding in our blog example to see these concepts.
First create a new folder named blog inside the htdocs folder.
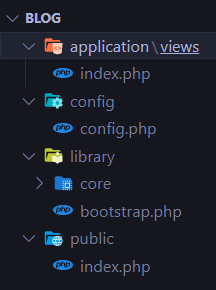
Inside that folder, we’ll be adding four directories to organize the code: application, config, library and public.
Add a file named config.php with the following code:
<?php
define('DEVELOPMENT_ENVIROMENT', true);

const CONFIG = [
    'DB_SERVER' => 'localhost',
    'DB_USER' => 'root',
    'DB_PASSWORD' => '',
    'DB_DATABASE' => 'simpleblog'
];
This file has the connection parameters to a database that doesn’t exist yet, but we’ll create it later.
Inside the library folder, add a file named bootstrap.php with the following content:
<?php
require_once ROOT . DS . 'config' . DS . 'config.php';
It doesn’t do much yet, but it will later.
The the public folder will have an index.php file with the following content:
<?php
define('DS', DIRECTORY_SEPARATOR);
define('ROOT', dirname(dirname(__FILE__)));

require_once(ROOT . DS . 'library'
    . DS . 'bootstrap.php');

require_once(ROOT . DS . 'application' . DS . 'views'
    . DS . 'index.php');
We define two constants and require the bootstrap.php file that we already saw, and another file named index.php, which is in the application -> views folder.
Put the followings content in that file:
<html lang="en">
<head>
    <meta charset="UTF-8">
    <meta http-equiv="X-UA-Compatible" content="IE=edge">
    <meta name="viewport" content="width=device-width,
        initial-scale=1.0">
    <title>Simple Blog</title>
</head>
<body>
    <div>
        <h1>Simple Blog</h1>


    </div>
</body>
</html>
Let’s see what we have until now. We’ll be adding a virtual host in our httpd-vhosts.conf, which is located in C:\xampp\apache\conf\extra. This is not mandatory, but is convenient.
The lines to add are:
<VirtualHost *:80>
    DocumentRoot "C:/xampp/htdocs/blog/public"
    ServerName blog.test
</VirtualHost>
As before, we also need a line in our hosts file:
127.0.0.1 blog.test
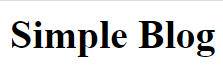
If we go to the browser and type blog.test we should see the following (Figure 23):
Now, add a folder named core inside the library folder. To be sure, the folder structure should look like the following (Figure 24):
Now, copy the file Model.php from the Inheritance section inside the core folder. The file as of now has the following content:
<?php
class Model {
    public function all($arrFields = null)
    {
        print_r($arrFields);
    }

    public function find($id, $arrFields = null)
    {
        echo "Searching model with id $id";
    }

    public function save($data, $id = null)
    {
        echo "Saving data";
    }

    public function del($key, $value)
    {
        echo "Deleting key: $key with value: $value";
    }
}
Now, we need to add just one line before the definition of the class:
namespace core;
We are using a namespace to group a set of classes. In this case, all the classes that are part of the library, will have the namespace core to differentiate them from the application classes. We will never modifying the classes in the core space. Instead, we should extend from the core classes.
This allows reuse of the structure. The classes that are particular to the application we are building we’ll be in the application folder.
In the application folder, add another named models. We can reuse the Comment, Post and User classes from the previous sections (the ones in php-bases->oop->blog). Just copy these models and paste them in the models directory.
The Post.php file right now has the following contents:
<?php
require_once "Model.php";

class Post extends Model {
    private $title;
    private $text;

    public function __construct($title, $text)
    {
        $this->title = $title;
        $this->text = $text;
    }

    public function setTitle($title)
    {
        if (strlen($title) > 45) {
            $title = wordwrap($title, 45);
            $title = substr(
                $title, 0, strpos($title, "\n")
            );
        }

        $this->title = $title;
    }

    public function setText($text)
    {
        $this->text = $text;
    }

    public function __get($name)
    {
        if (method_exists($this, "get".ucfirst($name))) {
            $method = "get".ucfirst($name);
            return $this->$method();
        }

        return $this->$name;
    }
}
Now, we have a require_once line, since the class Post extends the model class. We need to change the path, since the two classes are no longer in the same folder.
But using require_once statements to include the necessary files. For example, the file with the PDOConnect class requires the IDatabase interface, because it implements it. If we are dealing with a big codebase, it can be very problematic to manually require all the files needed, and it can lead to problems if we forget to require one of those files. A mechanism often used is something called autoloading.
Autoloading of classes
Autoloading of classes is a mechanism to automatically include or require the files containing classes that are referenced in the code. There are different options to attain it. We’ll be writing our own autoloading.
Remove the require_once line on the Post.php file, and then add these lines right after the php tag.
namespace models;

use core\Model as Model;
The first line defines the Post class as belonging to the models namespace. Then we have the use sentence. Why? The Model class belongs to the core namespace. So, we are defining an alias to use as a shortcut. It is important to note that we are NOT including or requiring the file, that will be the purpose of the autoloader. We are simply establishing the instead of the fully qualified name core\Model, we’ll refer to the class simple as Model. The use sentence is also useful when we need classes with the same Name, but belonging to different namespaces. For example we could use something like this:
use SMTP\Mailer as SMTPMailer;
use Mailgun\Mailer as MailgunMailer;
Let's take a test. Modify the index.php file in the views folder as follows:
<?php
use models\Post;
?>
<html lang="en">
<head>
  <meta charset="UTF-8">
  <meta http-equiv="X-UA-Compatible" content="IE=edge">
  <meta name="viewport" content="width=device-width,
    initial-scale=1.0">
  <title>Simple Blog</title>
</head>
<body>
  <div>
    <h1>Simple Blog</h1>

    <?php
      $post1 = new Post("Why PHP?",
          "PHP powers most of the sites in the web.");
      echo $post1->title;
    ?>
  </div>
</body>
</html>
We get an error in the browser, and it is expected because we are not including or requiring the files.
We have a bootstrap.php file that doesn't do much. In fact, it only has one line. Modify it as follows:
<?php
function autoload($class)
{
  $directories = [
    'library',
    'application',
    'application\models'
  ];

  foreach ($directories as $directory) {
    $file = ROOT . DS . $directory . DS
      . str_replace('\\', '/', $class) . '.php';

    if (file_exists($file)) require_once $file;
  }
}

spl_autoload_register('autoload');

require_once ROOT . DS . 'config' . DS . 'config.php';
spl_autoload_register allows you to register autoloaders. It receives the name of a function as a parameter.
Our autoload function defines the directories in which the files containing the classes are located. When a class is referenced in the code, it searches in all the directories listed and requires the corresponding file if it exists.
As you can see, we follow the convention that a class named Post is defined in a file named Post.php.
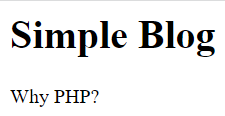
With those changes, we finally have the output shown in Figure 25:
This is not the only method to achieve autoloading. Most frameworks use Composer, and we’ll see examples later on. But for now, we have everything we need in order to begin building our mvc framework.