Chapter 01: Why creating an MVC Framework
Introducion
On our way to becoming successful developers, we will come across different tools to get the job done. What we learn today will not necessarily be relevant in a couple of years (maybe less). Such is the nature of the beast.
In this changing world, our greatest ability, the one that we must cultivate with greater zeal, is to learn – and UNLearn when necessary -.
Of course, even in this world of rapid change, there are certain things that are more constant.
Let me exemplify the above points.
Take for example the case of frameworks.
A framework is intended to provide the developer with a structure that allows them to write clean code that is easy to scale and maintain. Furthermore, it provides functionality in the form of classes, components, etc; to speed up the work.
Are frameworks absolutely necessary? Of course not. In fact, the creator of PHP himself considers that they are unnecessary and even counterproductive.
Obviously, I disagree, as do many other developers.
I am convinced of the need to use frameworks for different reasons:
If you work on your own, dealing directly with clients for whom applications are developed, the obvious way to maximize profit is to do the greatest amount of work in the least amount of time possible. And in that sense the frameworks as well as the RAD tools are invaluable to generate more income.
If you work as a freelancer, doing outsourced work, you will most likely find that the client already has a product made with some framework; and even if it is a new product, the client will probably have preferences or fixed ideas about the framework to use.
If you work for a company, or aspire to work in one, it is almost unthinkable not knowing how to use one or more frameworks.
You can see that I have used purely economic reasons. This is not because there are not technical ones – there are many – but to be honest, our professional activity must be profitable or we will soon find ourselves doing something else.
However, a “danger”, or in any case a concern, when learning a framework, especially for someone with little experience with the language, is to see any problem only depending on the framework used or preferred.
Example: we have been programming in PHP for a couple of months (or less) and we jump head over heels to learn Yii or Laravel or Cake…. Is there something wrong with this? Not at all. But in this case it is more likely that every time we come across a problem, or a new project, we immediately start thinking about things like “what module can I use for this? Which widget will be the most suitable? Again, is there something wrong with this? Not necessarily, but it seems to me that it can make us lose flexibility, and the lack of flexibility IS something dangerous. A lot.
One way to avoid this is to become as competent as possible in the language. This does not mean that we should memorize the syntax and the name of each function – although knowing as much as possible about it does not hurt – but something more important. THE PRINCIPLES and THE PATTERNS.
By principles, I mean the principles that govern object-oriented programming. Those that make our modeling of the problem domain, in terms of the language, more adequate.
By patterns, I mean design patterns that have proven useful in building higher quality products. One of these principles is the Model View Controller (MVC).
The foregoing, seeks to emphasize the fact that, regardless of whether we choose a framework from the various existing ones, the benefit we can get from them (the possibility of extending them, adapting them for our own purposes, or even using only some of its components in case they offer that possibility) will increase exponentially as our knowledge of the language increases.
And this brings us to our next point.
Reasons to create your own MVC framework
Let me insist on some reasons why this is a good idea:
We are in a highly competitive environment such as web development. The pace at which new technologies emerge can be overwhelming, and we cannot afford to be left behind.
It is unlikely – I would say impossible – that we will master all the frameworks with which web applications are developed.
An interesting alternative is to stay on top of new trends, and always skilfully manage a set of tools that allow us to carry out our work efficiently.
Today, I would say that, to be a full stack web developer, we must know:
- PHP Frameworks: Laravel, Yii, Zend, Cake, Symfony (There are others, but with these we cover a large part of the demand).
- Version Control: Git with Github or Bitbucket are the standard today.
- JavaScript frameworks: Angular, React.
- HTML5, CSS3, Less
- Databases: MySQL, PostgreSQL, and NoSQL engines like MongoDB
Quite a long list, of course, and even then it’s not exhaustive. Now, with respect to PHP frameworks, beyond the preference that one may have for one or the other, the function of all of them is to facilitate the development process. We want to develop more and better, and in this sense they provide us with extraordinary help.
But, and here is the origin of the need, my concern is that we could end up being absorbed by a framework; that we get to look at EACH project from the perspective of the framework and not from the client’s needs.
In this sense, if when we start to gather requirements for a project, we start thinking things like “ok, which widget will be appropriate for this?” or “hmm, the xyz framework doesn’t allow us to do that”, we’re in trouble.
We must remember that a framework, however good it may be, is built on a language. In this case, PHP. In addition, it uses design patterns that go beyond this language, such is the case of the MVC pattern (Model View Controller).
For this reason, and in order to take advantage of the power that frameworks give us, but understanding the principles on which they are based, we are going to build our own.
NOTE: The framework we are going to build will start very simple and then progress until it is ready for production. It is an exercise in design and programming, but will see it in action building a real project with it. All the code will be on Github, and if anyone wants to get their hands on it and take it further, they are of course more than welcome to do so.
Who is this book for and how to read it?
As its name suggests, this book is primarily intended for those who want to understand the MVC pattern, and advanced concepts that every professional developer should know. If that is your case, you can skip chapters 02 and 03 entirely.
However, if you are starting from scratch, chapter 02 gives an introduction to the language, which is enough to build the basis.
Chapter 03 deals with object oriented php, presenting concepts and examples that will help you greatly to understand how the paradigm is used to model the real world and build applications.
Installations needed
If you already have a development environment installed and configured, no matter what it is, then you can skip the corresponding chapters and go directly to the ones where the language is started. Nevertheless, I will show you what my environment looks like.
In order to work through the book, we will need:
- A web server capable of serving php files, such as Apache or IIS.
- A database server, we will be using MySQL for all our examples.
- A text editor or IDE to write the code of our applications.
XAMPP
A good option to configure our development environment is to install an application called xampp.
For those who don’t know, xampp allows us to configure our local machine with Apache, PHP and MySQL; quickly and easily.
In addition, it is available for all major platforms, so we can use it whether our environment is Windows, Linux or Mac.
The installation process is pretty straight forward. At the end you will have the option to start the control panel (Figure 1) right away:
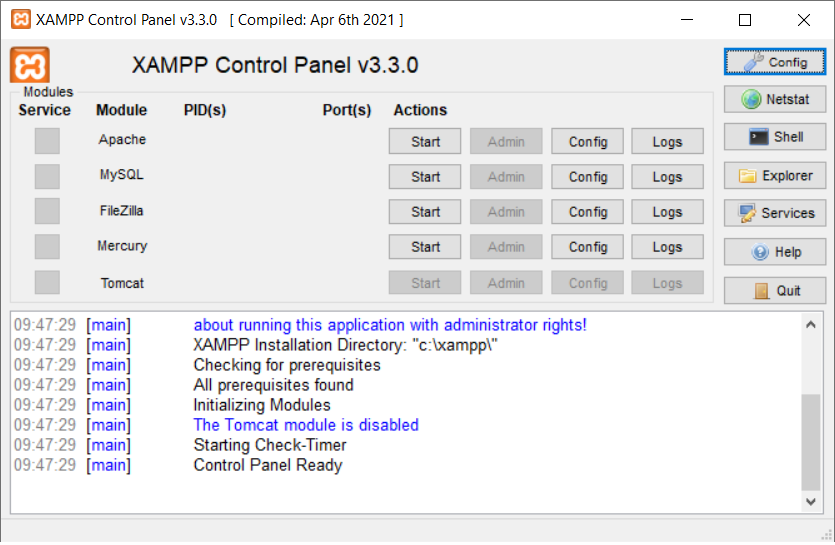
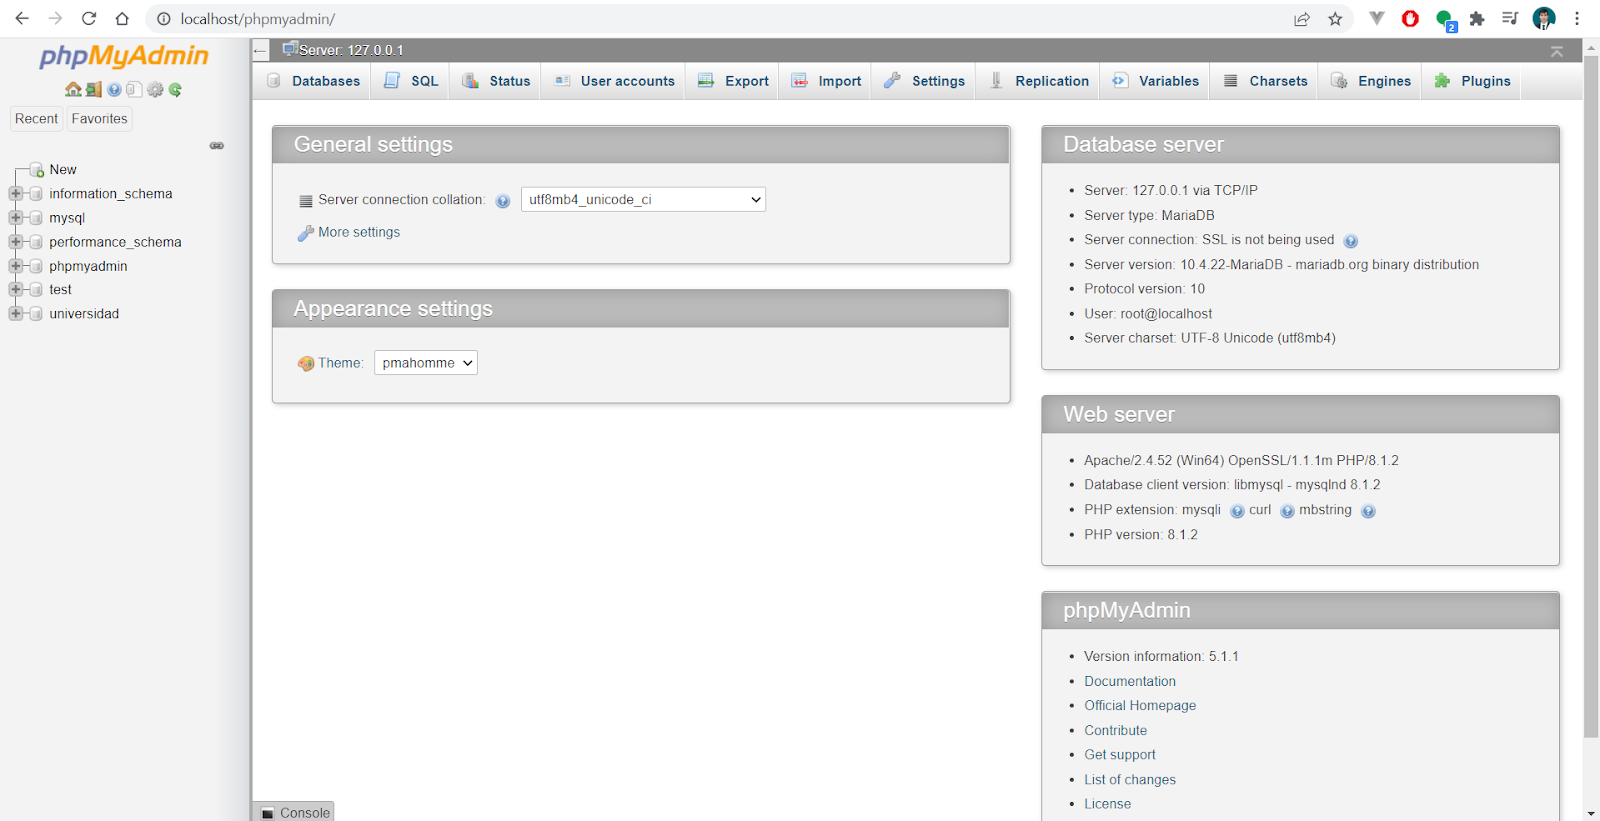
Click on Apache and MySQL will start the web and database servers. Then you can type localhost/phpmyadmin on your browser and you should see the following screen (Figure 2):
IDE
If you already have an IDE or text editor of your choice, you can probably work with it without any problem. However, the examples in this book are made using the IDE Visual Studio Code. It is a free and open source application, and it really is excellent.
Errors
Each line of code included in the book has been carefully reviewed. However, errors can occur and in that case I would greatly appreciate being contacted and informed of any problem in order to be able to correct it immediately.
Everyone will benefit from it.
On the other hand, where the code of the example exceeds a few lines of code, in addition to presenting it in the book, I will be providing a corresponding Gist, so that you can refer to that link and copy the code more comfortably if you wish. For those who do not know what a Gist is, it is a way to share files, parts of files and even complete applications. You can find all the relevant information here. Writing the code on your own, following the examples presented, would be an excellent way to gain confidence and get used to the syntax, but you will always have the complete code of the applications to be able to use it.
Contact information
For any questions regarding this book, as well as for pointing out errors or making suggestions, please send a message to vihugarcia@gmail.com.
I will do my best to answer within 48 hours of receipt.
Summary
This chapter had a lot of discussion and not enough action, but we’ll get there. I hope the points exposed served their purpose of presenting the big picture.
In the next chapter we’ll begin with the foundations of the language, covering everything you’ll need to follow along the book.
See you soon!
Chapter 02: Introduction to PHP
Introduction
In this chapter we’ll cover the installations needed to configure our development enviroment, and start learning the language.
I recommend you to try to type the code instead of copying it. It may seem like a waste of time, but it will help you to memorize the syntax and feel comfortable with PHP.
Development environment
In order to work through the book, we will need:
- A web server capable of serving php files, such as Apache or IIS.
- A database server, we will be using MySQL for all our examples.
- A text editor or IDE to write the code of our applications.
A good option to configure our development environment is to install an application called xampp.
For those who don’t know, xampp allows us to configure our local machine with Apache, PHP and MySQL; quickly and easily.
In addition, it is available for the main platforms, so we can use it whether our environment is Windows, Linux or Mac.
Installing xampp is very straightforward. After finishing the install process, you should be able to start the control panel (Figure 3).
Just press Start next to Apache and MySQL. They are our web server and database server respectively. Now you can open your web browser and type: http://localhost/phpmyadmin. You should see the screen shown in Figure 4.
Note: If you are unable to start Apache and/or MySQL, one possible reason is that the default ports are in use by another application.
In the case of Apache, you can click on Config (Figure 5).
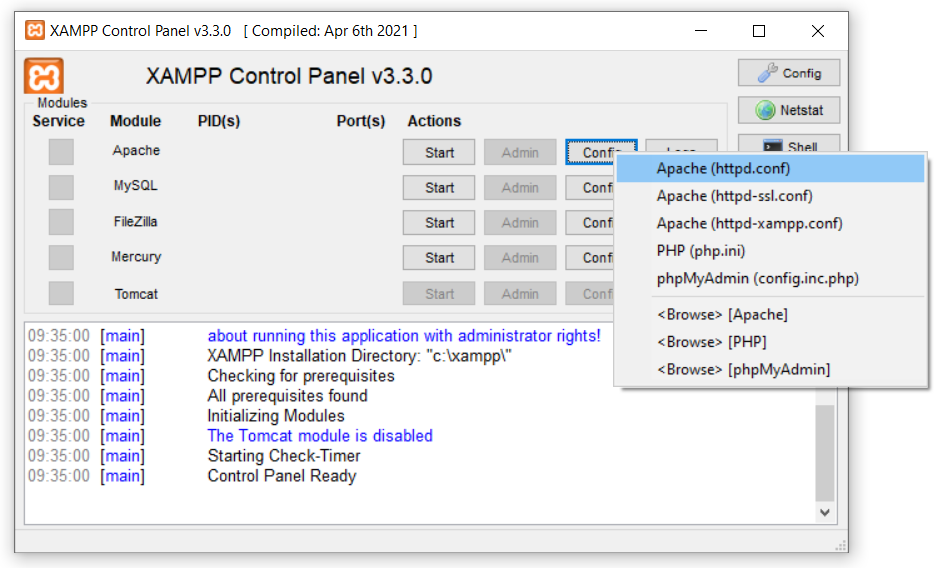
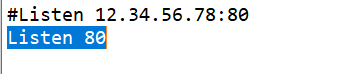
And then httpd.conf. A text file will open, where you can change the port the application is listening to, for example, from 80 to 8080 (Figure 6).
phpMyAdmin
phpMyAdmin is a web application packed into xampp, that allows us to create and manipulate databases in our development environment. It’s very useful, and enough to get started, but with time it can become limited. I strongly recommend using another tool. For example, DBeaver Community Edition is a very powerful tool. You can try it and see if it fits you.
Where to put the exercises
All the code that we want to be interpreted by Apache will go inside the htdocs folder, inside xampp. This represents our document root.
Let’s start by creating a folder named “php-bases” inside htdocs. We’ll be placing all of our scripts there.
If you are on windows, the path should look something like this: C:\xampp\htdocs\php-bases
On the browser, you can access the site by typing http://localhost/php-bases.
You can shorten this by creating a virtualhost for this if you like. Although it’s not mandatory, I’ll show you how you can do it under windows. Remember, these steps consider that you’re using xampp.
You need to go to the folder: C:\xampp\apache\conf\extra
This could be different if you have installed xampp on another path. Inside the extra folder, you will find a file named httpd-vhosts.conf. Open it.
At the bottom of the file, add these lines:
1 <VirtualHost *:80>
2     DocumentRoot "C:/xampp/htdocs/php-bases"
3     ServerName php-bases.test
4 </VirtualHost>
Next, you need to edit your hosts file. It’s located on C:\Windows\System32\drivers\etc
You need to open it with administrator rights. At the end of the file, add the following line: 127.0.0.1 php-bases.test
These will allow you to access the site by typing php-bases.test on the browser. You will need to restart Apache if it’s running.
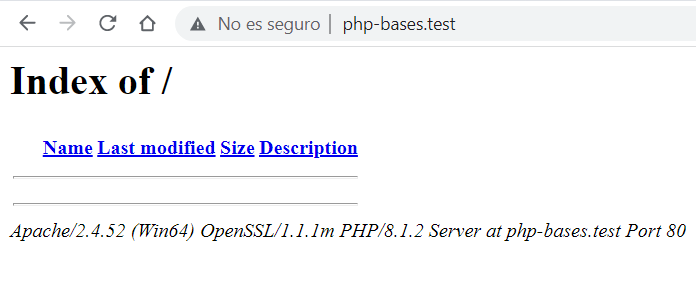
Now, you can open the folder with your IDE or editor. I’m using Visual Studio Code.
In order to generate dynamic content (ie on demand), the PHP code must be executed on the server; being able to be included or “embedded” within the HTML code; or hosted on the server as a separate file.
In either case, executing the PHP code will produce HTML output, which will be sent from the server to the client. Only the HTML output will be visible to the client, not the PHP code that produced it.
When the code is included within an html page, there must be a way to delimit it. We do it with the following tags:
1 <?php
2 // PHP code goes here
3 ?>
The closing tag is not mandatory, and in fact not using it can prevent some header issues when using and including multiple files.
Syntax
Let’s start by creating a folder named basics. Inside that folder, let’s create a file called syntax.php with the following content:
 1 <html lang="en">
 2 <head>
 3     <meta charset="UTF-8">
 4     <meta http-equiv="X-UA-Compatible" content="IE=edge">
 5     <meta name="viewport" content="width=device-width,
 6         initial-scale=1.0">
 7     <title>Syntax</title>
 8 </head>
 9 <body>
10
11 </body>
12 </html>
As you can see, this is pure html code. No opening or closing php tags. Let’s add the following line between the body tags:
1 <?php
2     echo "<h1>Hello World!</h1>";
3 ?>
This will give you the following output (Figure 8):
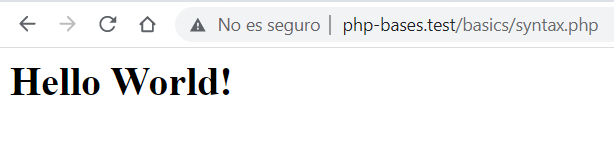
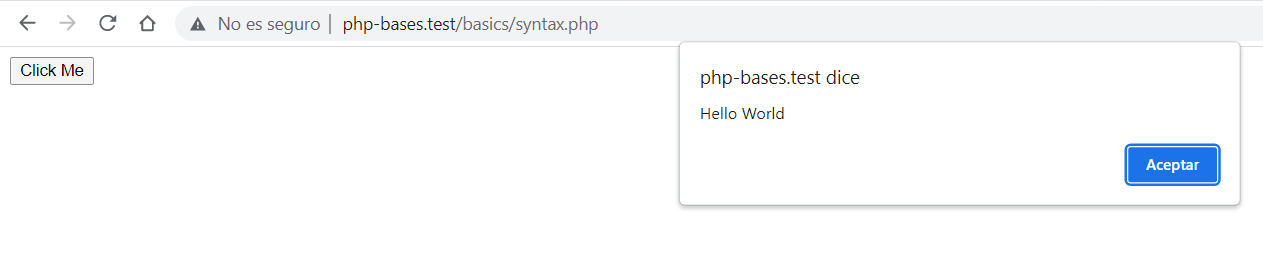
echo is a function that produces an output. It can take many parameters, although generally you will not use it like that. As you can see, you can produce html tags. In fact, you can write an entire html page using echo, but that’s not the normal way of working with the function. As an example, replace the line with the following:
1 echo "<button onclick='alert(`Hello World`)'>
2     Click Me</button>";
Note that inside the alert, I’m surrounding the message with backticks. I could have used simple or double quotes, but in that case they should be escaped with a slash . If you refresh the browser, you should see that the button works (Figure 9).
Comments
There are basically two types of comments you can use: single line, or multiple line:
1 // This is a single line comment
2
3 /*
4 This is a comment,
5 spanning multiple lines
6 */
Everything between /* and */ will be ignored.
Variables
A variable is a symbolic representation of a memory location to which any value or data can be assigned; We can think of a variable as a container for a piece of data or a set of data. During script execution the variable can change both its type and its value. In PHP, the $ character is prefixed to variable names. A valid name must begin with a letter or underscore, followed by any number of letters, numbers, or underscores. Variable names are case sensitive, so $var and $Var will be interpreted as two different variables.
As in any programming language, it is convenient to choose meaningful variable names, which increases the readability of the code.
Create another file called variables.php with the following content:
1 <?php
2 $first_name = "Jon";
3 $last_name = "Snow";
4
5 echo "You are $first_name $last_name";
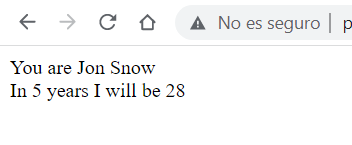
As you can see, the variables are replaced with the corresponding values. This happens with any variable between double quotes. It’s called expansion of variables. Of course, we can store different types of values in variables, and perform operations with them. Let’s add the following lines to the file.
1 $age = 23;
2 $gap = 5;
3 $future_age = $age + $gap;
4 echo "<br>";
5 echo "In $gap years I will be $future_age";
You’ll see the output shown in Figure 10:
PHP is a loosely typed language.
That means we can do this:
1 $gap = “Now is a text”;
And we’ll get no errors. It also means that in the case of functions, we could potentially pass a value of an incorrect type. We’ll see how to avoid these problems later.
Types
The data types that a variable can store are the following:
- Integer Positive and negative integers
- Float Decimal or floating point numbers
- String Text strings
- Boolean True or False values
- Array Special type of collection of values
- Object Special type of complex data
The size of integers and floats is platform dependent. This means that the number of bits used to store an integer or a float will depend on the machine where the script is executed.
Converting types
PHP is a language that performs type conversion based on the operands and the operator. To see the type of a variable we can use the gettype($variable) function.
If you still want to force the conversion of a variable to a certain type, you can use the settype($variable, ‘variable type’) function.
1 <?php
2 $var = 10;
3 echo "\$var has the value $var and is a " . gettype($var);
4 ?>
The output produced is as follows:
$var has the value 10 and is an integer
Note the backslash in front of the variable, this is to prevent its value from being displayed as is the case with variables inside double quotation marks.
Constants
These are data whose values remain constant throughout the execution of the script and that you may want to use a large number of times. They are declared as follows:
1 define("constant name", value);
The name of a constant follows the same rules as that of a variable, and like variables, it is case sensitive. It does not have a dollar sign in front of it.
Operators
An operator receives one or more expressions, and returns a value from them. The precedence of the operators indicates which ones will be applied first, that is, how the expressions will be grouped. For example 2 + 3 * 5 = 17, because the multiplication operator has higher precedence than the addition operator. The following table shows the operators ordered from highest to lowest precedence. Those on the same line have equal precedence.
| Operator | Type | Associativity |
|---|---|---|
| () | Parentheses | No |
| ++ — | Increment / Decrement | Right |
| ! | Logical | Right |
| * / % | Arithmetic | Left |
| + – . | Arithmetic and string | Left |
| << >> | Bitwise | Left |
| < <= > >= <> | Compare | No |
| == != === !== | Compare | No |
| & | Bitwise | Left |
| ^ | Bitwise | Left |
| && | Logical | Left |
| ? : | Ternary | Left |
| = += -= *= /= .= %= &= != ^= <<= >>= | Assignment | Right |
| and | logical | Left |
| xor | logical | Left |
| or | logical | Left |
Associativity means that the expression is evaluated from left to right, right associativity means the opposite.
Control Structures
structures allow us to vary the “flow” of script execution, which would otherwise be sequential; giving it a dynamic that otherwise would not have. In addition, they offer the possibility of repeating a set of actions as many times as desired or necessary.
if
if is a control structure used to make decisions depending on whether a condition (or several) is met or not. Its basic structure is as follows:
1 if (condition/s) {
2 // actions to perform if condition/s is/are met;
3 }
4 else{
5 // actions to perform if condition/s is/are not met;
6 }
Example
Create a filled called if.php with the following content:
1 <?php
2 if (strstr($_SERVER['HTTP_USER_AGENT'], 'Chrome')) {
3   echo "You are using Chrome";
4 } else {
5   echo "You are using " . $_SERVER['HTTP_USER_AGENT'];
6 }
7 ?>
The script checks whether the user is using Chrome as a browser or not, and displays a message in each case. Again the $_SERVER superglobal array is used, and within it the ‘HTTP_USER_AGENT’ variable that contains information about the browser of the person accessing the page. Note the use of the function strstr(‘source_string’, ‘string_to_search’), which searches for one character string in another, and returns ‘true’ or ‘false’ according to the search result.
switch
Used to compare an expression with different values. It is similar to multiple if statements one after the other. Its syntax is as follows: switch(expression){ case value1: statement to execute when the expression has value value1; break; case value2: statement to execute when the expression has value value2; break; default: statement to execute when none of the above conditions are met; }
Note that it is necessary to include the break statement after each comparison, otherwise the execution will continue with successive comparisons. It is unnecessary after the default statement.
Example
Save the following as switch.php
 1 <?php
 2 $age = rand(15,18);
 3 switch ($age) {
 4 case 15:
 5 echo "You are 15 years old, you are not of legal age";
 6 break;
 7 case 16:
 8 echo "You are 16 years old, you are not of legal age,
 9     but there is less to go";
10 break;
11 case 17:
12 echo "You are 17 years old, you are not of legal age,
13     but almost";
14 break;
15 case 18:
16 echo "You are 18 years old, you are finally of
17     legal age!";
18 break;
19 }
20 ?>
The function rand(int min, int max) returns an integer between the indicated limits, including these.
For loop
The for loop is used to repeat the same operation a given number of times. Its syntax is as follows: for(initialization; condition; update){ statement to execute while the condition is true; } Let’s analyze its 3 parts:
Initialization: It is executed only when the loop is started for the first time. In this part, the variable that will count the number of times the loop is repeated is usually placed.
Condition: It is the condition that will be evaluated each time the loop starts. This condition is what determines the length of the loop.
Update: It is used to indicate the changes that we want to execute in the variables each time the loop is executed.
An example of its use would be the following:
1 <?php
2 for($i=1;$i<=10;$i++){
3 echo "The current number is " . $i . "<br />";
4 }
5 ?>
In this way I would write all the numbers between 1 and 10.
While loop This loop is used when we want to repeat the execution of some statements an indefinite number of times. Its syntax is as follows: while(condition){ // statements to execute }
To better understand the use of while we will use the following example:
1 <?php
2 $i = 1;
3 while ($i <= 10) {
4 echo "The current number is " . $i . "<br />";
5 $i++;
6 }
7 ?>
Does the same thing as the for loop in the previous example.
Do…while loop
This loop is used when we don’t know the number of times a loop is going to be executed but what we do know is that at least once the action will be executed.
Its syntax is as follows:
do { // loop statement } while(condition)
break and continue
break
Used to escape the current for, while or switch loop. Accepts an optional parameter that determines how many control structures to escape.
continue
Serves to return to the beginning of the iteration from any part of the loop.
Functions
A function is basically a block of code grouped under a name, which can be called as many times as desired, and which usually returns a value as the result of its call. This allows you to reuse code, in an efficient way. Functions can receive values – called parameters – when they are called, and that will intervene in the value that the function returns.
The syntax of a function is as follows:
function name(parameters) { function instructions }
The call to the function has the following form: name(parameters)
Let’s see some examples. Create a folder named functions, at the same level that the basics folder, and inside it add a file may.php
We will create a function that receives two numbers and returns the larger one.
 1 <?php
 2 function greater($val1, $val2)
 3 {
 4 if ($val1 > $val2) {
 5 return $val1;
 6 } else {
 7 return $val2;
 8 }
 9 }
10 echo "The greater of 1 and 2 is: " . greater(2,1);
11 ?>
A relevant fact that should be noted is that the variables that we declare within the function will only exist or have that value within the function.
Another thing to take into account, is that right now, if we call the functions with the params: echo greater(2,‘1’);
The script will run without errors, despite one of the parameters being a string.
Most of the time, it’s a good idea to declare the type of parameters that the function expects. Rewrite the function as follows.
1 function greater(int $val1, int $val2)
2 {
3     if ($val1 > $val2) {
4         return $val1;
5     } else {
6         return $val2;
7     }
8 }
This is known as type hinting. We still don’t see any error, but the function can be better documented.
If you want to restrict the values, then we can add this line after the opening php tag:
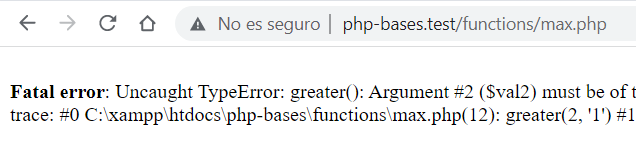
declare(strict_types = 1);
Now we’ll get an error as shown in Figure 11:
In fact, most of the IDEs should be able to pick this error (Figure 12):
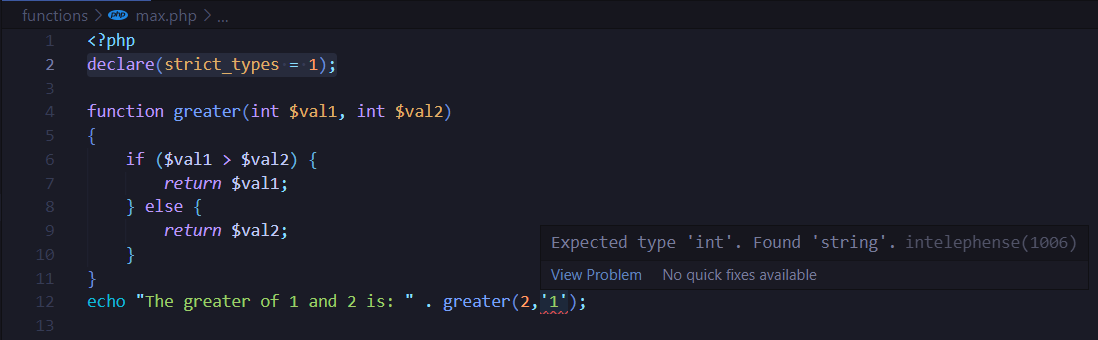
Using strict_types has advantages and disadvantages that we’ll discuss later. For now, we won’t be using strict_types, but we’ll use type hinting.
Besides type hinting, we can declare functions with default values. Create a file called area.php with the following content:
1 <?php
2 function get_square_area(int $side_length = 2)
3 {
4     return pow($side_length, 2);
5 }
6 echo get_square_area(5);
7 echo "<br/>";
8 echo get_square_area();
The first call should print 25, and the second 4.
pow is a built-in function. php has over 1000 functions, and that gives it tremendous power. Of course, it’s impossible to know all these functions by heart, but the number of built-in functions normally used is smaller.
Arrays
In the execution of a script in PHP, on multiple occasions there are variables that have related information. For this, PHP has an element called array.
An array is a set of variables grouped under a single name. Each variable within the array is called an element. Variables of different types can exist within the same array.
It is necessary to differentiate between the two types of existing arrays:
Indexed: The one whose access to the elements is carried out by the position they occupy within the structure (they always start from position 0). Example: $clientes[0]
Associative: It is the one in which the elements are made up of key-value pairs and access is made by providing a specific key. Example: $customers[‘age’]
So, we can now say that superglobals are associative arrays.
There are two ways to create arrays in PHP:
Implicitly, it consists of assigning values to the array indicating the position or key of the element.
Example: $names[0]=‘Javier’;
If you do not indicate a position, the array will take the value following the last value entered.
Example: $names[]=‘Lucas’ /* would take a value of 1 since the last input was 0. */
If $names does not exist, it will be created at the time of the first assignment.
Through array() in which the elements are passed as parameters. In the case of an indexed array, they take the position they occupy in the creation of the array, while those of the associative array are assigned their value by means of “=>”.
Example: $client=array(‘Name’=>‘Juan’,‘Last name’=>‘Perez’);
It should be noted that PHP is not only limited to the existence of arrays but that there are arrays of arrays, or what is the same, multidimensional arrays.
Example: $friends[2][‘Pedro’];
Traversing an array
We have several tools to be able to access the elements of an array
At each moment a reference of the element of the array to which we have access is maintained, therefore, to traverse an array it will suffice to modify said reference. In the case of an indexed array, the traversal will be carried out through a loop and for this we must know the number of total elements that the array has. To do this, we rely on the function count(variable) where “variable” represents the variable from which we want to obtain the number of elements. If “variable” is an array, it returns the number of elements it has, it returns 1 if it only has one element (even if it is not an array) and 0 if it has no value.
Browsing on arrays
When it comes to indexed arrays, navigation is simple since it is only enough to access the element that we want to show, but since it is an associative array, the same treatment cannot be applied. For this, there is a set of prefabricated functions that allow us to carry out a multitude of actions:
Syntax Action
reset(array); The internal pointer returns to the first position
end(array); The internal pointer goes to the last position
next(array); The pointer goes to the next element
prev(array); Access the previous element
current(array); Returns the content of the current element
Insertion of elements
For the insertion of elements inside an array there are a series of functions that allow us to add elements. Among them we highlight:
array_push(matrix,variable1,variableN);
Add elements to the end of the array, and its length is increased by as many elements as have been added. Returns the number of elements in the array.
array_unshift(array,variable1,variableN);
It introduces elements at the beginning of the matrix, displacing the other as many positions as there are elements. Returns the number of elements in the array. array_pad(array,new_size,pad_value);
Fills the array using a supplied value, according to the specified size.
Elimination of elements
array_shift(array);
Removes the first element of the array
array_pop(array);
Removes the last element of the array
array_splice(input,ini_pos,[size],[substitutes]);
It is used to replace or delete the content of an array portion, for this we must specify the position from which we want to start the deletion or replacement, the size or number of elements that will be affected and the substitutes (in case we want to replace it with some item).
array_keys(array,[lookup value]); It is used when we want to eliminate an element whose position we do not know.
array_values(array);
Returns an indexed array with all the values stored in the array passed as a parameter.
Mass manipulation of arrays
array_walk(array, function_name, parameter_list);
It is used to apply the same function to all elements of an array.
Obtaining sub-arrays
array_slice(array,position,size);
Allows to extract a sequence of elements from an array. The parameters to be passed are the matrix from which we want to extract these elements, the position from which the extraction starts and the size of the extraction (positions that we cover from the initial one).
Array Sorting
| Criterion | Function |
|---|---|
| Ascending Sort(Indexed Array) | sort(array) |
| Descending Sort(Indexed Array) | rsort(array) |
| Ascending Sort By Value(Associative Array) | asort(array) |
| Descending Sort By Value(Associative Array) | arsort(array ) |
| Ascending order by key(associative array) | ksort(array) |
| Descending order by key(associative array) | krsort(array) |
Other functions
In this section a series of functions are discussed (not all of them because it would be impossible) that can be useful at a certain moment .
compact() Returns an associative array from an indeterminate number of parameters
extract() Creates variables from associative array
array_unique() Returns array without repeated data as some are removed
array_reverse() Returns array with same elements but in reverse order
shuffle( ) Modifies the order of elements randomly
array_count_values() Returns an associative array containing repetition frequencies of the values of the array
in_array() Allows checking if a value is in the array
array_merge() Combines elements of two arrays into 1.
Forms
Forms are not part of PHP, but of the HTML language. However, since in most cases our scripts will process data coming from forms, we will dedicate a few lines to the HTML code linked to them.
Every form begins with the tag. With ACTION we indicate the script that is going to process the information that we collect in the form, while METHOD tells us if the user of the form is going to send data through POST (post) or GET (get).
The difference between these two methods lies in the way of sending the data to the page, while the GET method sends the data using the URL, the POST method sends it through the STDIO standard input (POST is therefore safer than GET). Another difference is the size limit. In the case of $_GET is browser dependent, with some of them allowing up until 2000.
The tag indicates the end of the form.
From the tag come the data input fields that can be:
Text box:
1 <input type="text" name="name" size="20" value="">
Text box with bars scroll:
1 <textarea rows="5" name="description" cols="20">
2     Is red
3 </textarea>
Checkbox:
1 <input type="checkbox" name="change" value="ON">
button:
1 <input type="radio" value="blue" checked name="color">
Dropdown menu:
1 <select size="1" name="day">
2 <option selected value="monday">monday </option>
3 <option>Tuesday</option>
4 <option value="Wednesday">Wednesday</option>
5 </select>
Command button:
1 <input type="submit" value="submit" name="submit">
Hidden field:
1 <input type="hidden" name="age" value="30">
This last type of field is especially useful when we want to pass hidden data in a form.
As you may have noticed, all field types have a modifier called name, which is none other than the name of the variable with which the data will be collected in the script indicated by the ACTION modifier of the FORM tag. With value a default value is established.
Next we will see an example.
Create a folder named forms at the same level as the basics and functions folders. Then add a file named forms01.php with this content:
 1 <?php
 2     $error = [];
 3     $error["name"] = "";
 4     $name = "";
 5     if ($_SERVER['REQUEST_METHOD'] == "POST") {
 6         if (isset($_POST["name"])
 7             && trim($_POST["name"]) != "") {
 8             echo $_POST["name"];
 9             $name = $_POST["name"];
10         } else {
11             $error["name"]= "Name is required";
12         }
13     }
14 ?>
15 <html lang="en">
16 <head>
17     <meta charset="UTF-8">
18     <meta http-equiv="X-UA-Compatible" content="IE=edge">
19     <meta name="viewport" content="width=device-width,
20         initial-scale=1.0">
21     <title>Simple Form</title>
22 </head>
23 <body>
24     <form action="<?= $_SERVER['PHP_SELF'] ?>"
25         method="POST">
26         <label for="name">Name</label>
27         <input type="text" name="name"
28             placeholder="Name" value="<?= $name ?>">
29         <span><?= $error["name"] ?></span>
30         <input type="submit" value="Send">
31     </form>
32 </body>
33 </html>
Pay attention to the following line:
$_SERVER is a predefined superglobal variable, containing information about the server where the script is running. To use <?= is equivalent to <?php echo, just a little bit shorter. $_SERVER[‘PHP_SELF’] refers to the current script. So, we are sending the data to the same file.
The condition:
if ($_SERVER[‘REQUEST_METHOD’] == “POST”) { … }
Guarantees that the code executes only when there is data sent.
Next, we have:
if (isset($_POST[“name”]) && trim($_POST[“name”]) != ““) { … }
isset checks if a variable is set, in this case, checks if the superglobal $_POST (which is an array), has a key named “name”. This is because we have an input text whose name is, precisely, “name”.
trim will remove any leading or trailing space.
So, we check if the variable is present and is not empty, and in that case, we print it.
We are ready for a more complex example.
Create a file called forms02.php with the following content:
 1 <?php
 2     $error = [];
 3     $error["name"] = "";
 4     $error["email"] = "";
 5     $error["message"] = "";
 6     $name = $email = $message = "";
 7
 8     if ($_SERVER['REQUEST_METHOD'] == "POST") {
 9         if (isset($_POST["name"])
10             && trim($_POST["name"]) != "") {
11             $name = filter_data($_POST["name"]);
12         } else {
13             $error["name"] = "Name is required";
14         }
15
16         if ( isset($_POST["email"])
17             && trim($_POST["email"]) != "" ) {
18             if (!filter_var($_POST["email"],
19                 FILTER_VALIDATE_EMAIL)) {
20                 $error["email"] = "Email is not valid";
21             } else {
22                 $email = trim($_POST["email"]);
23             }
24         } else {
25             $error["email"] = "Email is required";
26         }
27
28         if ( isset($_POST["message"])
29             && trim($_POST["message"]) != "" ) {
30             $message = filter_data($_POST["message"]);
31         } else {
32             $error["message"] = "Message is required";
33         }
34     }
35
36     function filter_data($data)
37     {
38         $data = trim($data);
39         $data = stripslashes($data);
40         $data = htmlspecialchars($data);
41
42         return $data;
43     }
44 ?>
45 <html lang="en">
46 <head>
47     <meta charset="UTF-8">
48     <meta http-equiv="X-UA-Compatible" content="IE=edge">
49     <meta name="viewport" content="width=device-width,
50         initial-scale=1.0">
51     <title>Simple Form</title>
52 </head>
53 <body>
54     <form action="<?= $_SERVER['PHP_SELF'] ?>"
55         method="POST">
56         <div>
57             <label for="name">Nombre</label>
58             <input type="text" name="name"
59                 placeholder="Name" value="<?= $name ?>">
60             <span><?= $error["name"] ?></span>
61         </div>
62
63
64         <div>
65             <label for="email">Email</label>
66             <input type="email" name="email"
67                 value="<?= $email ?>">
68             <span><?= $error["email"] ?></span>
69         </div>
70         <div>
71             <label for="message">Mensaje</label>
72             <textarea name="message" id="" cols="30"
73                 rows="10"><?= $message ?></textarea>
74             <span><?= $error["message"] ?></span>
75         </div>
76         <input type="submit" value="Send">
77     </form>
78 </body>
79 </html>
Databases
Most applications that we’ll be working on will interact with some type of persistent storage. One of the most common forms of storing data is a database. There are different types of databases. For all the examples we’ll use MariaDB. MariaDB is a project from the same creator of MySQL. MySQL use to come in the xampp package, but since it was acquired by Oracle the Apache org has replaced it with MariaDB. Fortunately, it is fully compatible.
Let’s open phpMyAdmin typing http://localhost/phpmyadmin on the browser.
Clicking the tab Databases we will see the following screen (Figure 13):
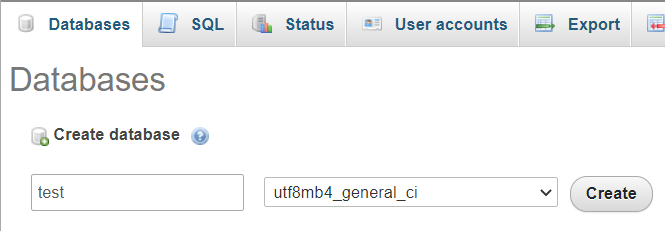
Type “test” as the name of the database and click the Create button.
The next step we’ll be to create a table. We can do it from the following screen (Figure 14):
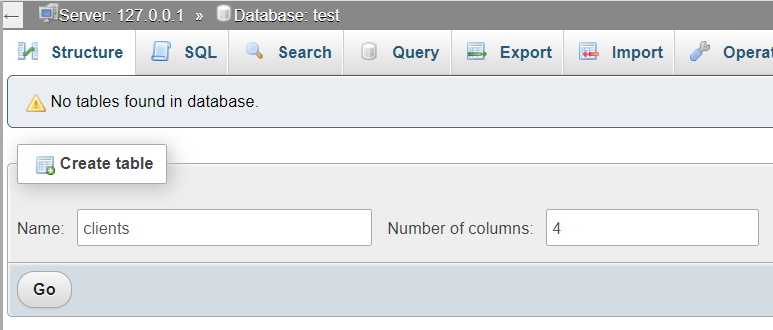
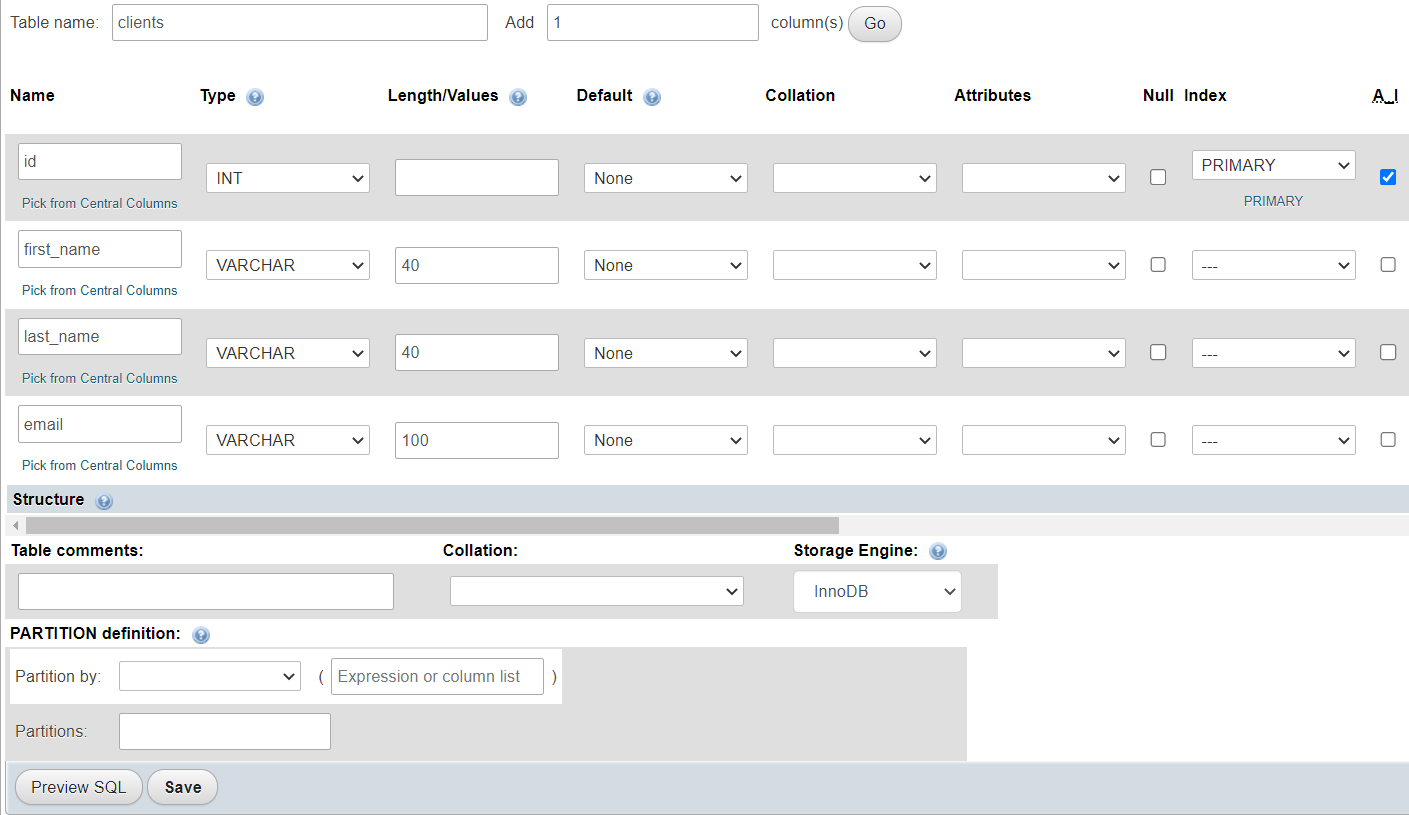
Type “clients” as the table name, leave the number of columns as 4, and press Go. Complete the form as follows (Figure 15):
Then press Save.
We are ready to work.
PHP has different libraries to work with databases. We will be using PDO. PDO is an extension to interact with relational databases. We can establish a connection with a database server, create tables, read and write values in tables, and many others tasks.
Create a folder named databases at the same level as the others.
The add a file called name config.php with the following content:
1 <?php
2 $servername = "localhost";
3 $dbname = "test";
4 $username = "root";
5 $password = "";
These variables contain the data necessary to connect with the server and manipulate the database.
Now add a file called connection.php with the following content:
 1 <?php
 2 function get_connection(
 3     $servername, $dbname, $username, $password
 4 )
 5 {
 6     try {
 7         $conn = new PDO(
 8             "mysql:host=$servername;dbname=$dbname",
 9             $username,
10             $password
11         );
12         $conn->setAttribute(
13             PDO::ATTR_ERRMODE, PDO::ERRMODE_EXCEPTION
14         );
15
16         return $conn;
17     } catch (PDOException $e) {
18         trigger_error(
19             "Connection error: " . $e->getMessage(),
20             E_USER_ERROR
21         );
22     }
23 }
This function uses a try catch block. If the connection can not be set, then the catch block we’ll catch the exception. We display a custom error in that case.
We create an object (we have a complete chapter on oop) of class php. We set the attribute to handle errors, and return the object.
Now we’ll set up a file to handle common functions like insert, update, delete and list data.
Add a file called db.php:
 1 <?php
 2 function insert($conn, array $data, string $table)
 3 {
 4     $sqlQuery = "INSERT INTO $table SET ";
 5
 6     foreach ($data as $k => $v) {
 7         $sqlQuery .= "$k = '$v',";
 8     }
 9
10     $sqlQuery = rtrim($sqlQuery, ",");
11
12     $stmt = $conn->prepare($sqlQuery);
13
14     if ($stmt->execute()) {
15         return true;
16     }
17
18     return false;
19 }
Let’s see what this function does. There are two ways we can present an insert statement.
One is:
INSERT INTO table_name (column1, column2, column3,…) VALUES (value1, value2, value3,…)
The other one is:
INSERT INTO table_name SET column1 = value1, column2 = value2, …
We use this second form in the function. In the first sentence we initialize the sentence. Then, we use a foreach loop to extract the key and values of the associative array that we’ll pass to the function to perform the insert. That means an array like this:
[“first_name” => “Peter”, “last_name” => “Parker”, “email” => “test@test.com”]
Note that in the foreach loop:
1 foreach ($data as $k => $v) {
2         $sqlQuery .= "$k = '$v',";
3     }
We wrap the values with single quotes. That is necessary for the insert sentence to work. Also, it should be noted that this loop leaves the query with a trailing comma. Now, the rtrim function is normally used to remove unwanted blanks from the right left of a string. But, if we pass it a second parameter, the function will search and remove that character from the right.
Finally, we prepare and execute the sentence. To prepare the sentence, allows us to prevent sql injections attacks, and also, prepared sentences will run faster the second time they are cold, thanks to the cache.
Now, is time to write the function to update data:
 1 function update(
 2     $conn,
 3     array $data, string $table, $key = null, $value = null
 4 )
 5 {
 6     $sqlQuery = "UPDATE $table SET ";
 7
 8     foreach ($data as $k => $v) {
 9         $sqlQuery .= "$k = '$v',";
10     }
11
12     $sqlQuery = rtrim($sqlQuery, ",");
13
14     $sqlQuery .= " WHERE $key = :value";
15
16     $stmt = $conn->prepare($sqlQuery);
17
18     $stmt->bindParam(":value", $value);
19
20     if ($stmt->execute()) {
21         return true;
22     }
23
24     return false;
25 }
As you can see, it looks very similar to the previous function. When something like this happens, it is a sign that we need to refactor the code. But first let’s see the difference.
This sentence:
1 $sqlQuery .= " WHERE $key = :value";
Is necessary to indicate what record should be updated in the database. You may have noted the use of :value.
It’s not a variable (there is no $ sign). This means that “value” will be assigned a value after it has been sanitized.
It’s what we accomplish with:
1 $stmt->bindParam(":value", $value);
Now, as we mentioned before, we can refactor the code.
Add the following function:
 1 function save(
 2   $conn, array $data, string $table, $key = null,
 3     $value = null
 4 )
 5 {
 6     $sqlQuery = "$table SET ";
 7
 8     foreach ($data as $k => $v) {
 9         $sqlQuery .= "$k = '$v',";
10     }
11
12     $sqlQuery = rtrim($sqlQuery, ",");
13
14     if ($key) {
15         $stmt = $conn->prepare("UPDATE " . $sqlQuery
16             . " WHERE $key = :value");
17         $stmt->bindParam(":value", $value);
18     } else {
19         $stmt = $conn->prepare("INSERT INTO "
20             . $sqlQuery);
21     }
22
23     if ($stmt->execute()) {
24         return true;
25     }
26
27     return false;
28 }
We can use this function as a replacement for the other two. However, instead of deleting them, we can rewrite them like this:
 1 function insert($conn, array $data, string $table)
 2 {
 3     return save($conn, $data, $table);
 4 }
 5
 6 function update(
 7     $conn,
 8     array $data, string $table, $key = null, $value = null
 9 )
10 {
11     return save($conn, $data, $table, $key, $value);
12 }
Now we can put our little library to test. Add a file called test.php with the following content:
 1 <?php
 2 require_once "config.php";
 3 require_once "connection.php";
 4 require_once "db.php";
 5
 6 $conn = get_connection(
 7     $servername, $dbname, $username, $password
 8 );
 9
10 if (insert($conn,
11     [
12         "first_name" => "Peter",
13         "last_name" => "Parker",
14         "email" => "test@test.com"
15     ], "clients")) {
16     echo "Data inserted";
17 }
If we run the script in the browser, we should see the message “Data inserted” displayed.
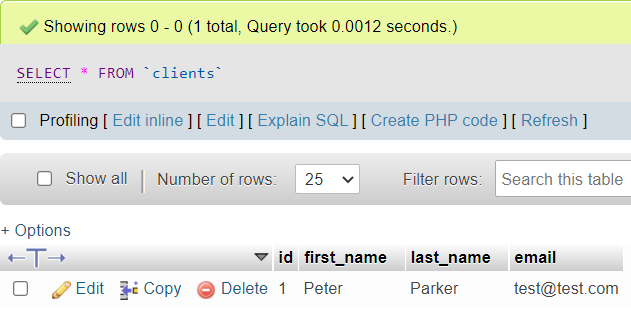
We can see that the data has been inserted in the “clients” table (Figure 16):
Our next step is to be able to read the data. Add the following function to db.php:
 1 function getAll($conn, $table, $data = null)
 2 {
 3     $sqlQuery = "SELECT ";
 4
 5     if ($data && is_array($data)) {
 6         $sqlQuery .= implode(",", $data);
 7     } else {
 8         $sqlQuery .= "*";
 9     }
10
11     $sqlQuery .= " FROM $table";
12
13     $stmt = $conn->prepare($sqlQuery);
14     $stmt->execute();
15
16     $stmt->setFetchMode(PDO::FETCH_ASSOC);
17
18     return $stmt->fetchAll();
19 }
We receive the connection, the table from which to fetch the data, and optionally an array with the fields that we want to retrieve. It’s not common and is not even recommended to retrieve all the fields from a table, for performance and security, but we can do it if we want.
Now is time to put our function to test. Add a file called read.php with this content:
 1 <?php
 2 require_once "config.php";
 3 require_once "connection.php";
 4 require_once "db.php";
 5
 6 $conn = get_connection(
 7     $servername, $dbname, $username, $password
 8 );
 9
10 $data = getAll(
11     $conn, "clients", ["first_name", "last_name"]
12 );
13
14 print_r($data);
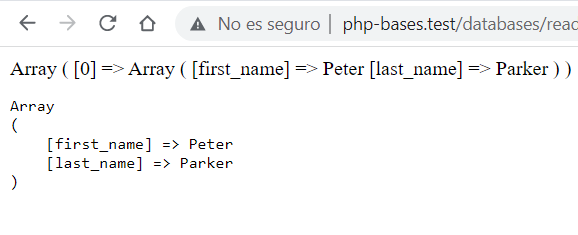
If we run the script, we should get this output (Figure 17):

We are merely printing the two dimensional array with the results, but just as easily we could show an html table, encode the data as json, and so one. This is not the responsibility of the function. We could have another file with utilities, and different formatting functions in it.
Now, in most cases we’ll want to retrieve one record in particular. Let’s write the appropriate function.
 1 function getOne($conn, $table, $key, $value, $data = null)
 2 {
 3     $sqlQuery = "SELECT ";
 4
 5     if ($data && is_array($data)) {
 6         $sqlQuery .= implode(",", $data);
 7     } else {
 8         $sqlQuery .= "*";
 9     }
10
11     $sqlQuery .= " FROM $table WHERE $key = :value";
12
13     $stmt = $conn->prepare($sqlQuery);
14     $stmt->bindParam(":value", $value);
15
16     $stmt->execute();
17
18     $stmt->setFetchMode(PDO::FETCH_ASSOC);
19
20     return $stmt->fetch();
21 }
It’s very similar to the previous function, but we are returning just one record. The supposition here is that “key” represents a field with a unique value for the table. Now add these lines to the read.php file:
1 $client = getOne(
2     $conn, "clients", "id", 1, ["first_name", "last_name"]
3 );
4
5 echo "<pre>";
6 print_r($client);
7 echo "</pre>";
The output should be like this (Figure 18):
It may not seem like much, but we have accomplished a great deal. We can read, insert and update data. The last piece is a function to delete data:
 1 function delete($conn, $table, $key, $value)
 2 {
 3     $sqlQuery = "DELETE FROM $table WHERE $key = :value";
 4
 5     $stmt = $conn->prepare($sqlQuery);
 6     $stmt->bindParam(":value", $value);
 7
 8     if ($stmt->execute()) {
 9         return true;
10     }
11
12     return false;
13 }
Now you can play around with these functions. Try to insert, update, read and delete data. There is no other way to improve than to practice.
Summary
In this chapter we’ve covered the installations needed to configure our development enviroment, and started learning the language.
The next chapter will deal with object oriented programming (OOP). It is a tremendously popular paradigm, and rightfully so, and is a requisite if you want a job as a developer. We’ll go step by step until you feel comfortable with it. See you soon.
Chapter 03: Object oriented programming
Classes and Objects
Object oriented programming is a paradigm that has been tried and proved for years. If we want to make a living as professional php developers then there is zero chance that you won’t be using it.
So, what is it exactly?
In the procedural paradigm, we write functions to accomplish our goals. Functions receive parameters and execute (ideally) one specific task. Functions perform operations on data.
In order to use a particular function, we need to include the file containing that function. That means that we can encounter clashes if we include two files containing functions with the same name. This is because functions reside in the global scope.
Object-oriented programming groups functions and data in a single entity, that represents an aspect of the problem. In this form, we can organize our code more efficiently, and with less repetition.
The entities are called objects, and are abstractions of the real world. We build those objects (instantiate them) from a blueprint. This blueprint is called a class.
The code inside a class is hidden from the global scope; that is, the code is encapsulated in the class scope. We access this code instantiating the object.
We’ll see some examples.
Create a folder called “oop” at the same level of the databases folder.
Let’s say we are working on a simple blogging system. We can identify that our blog we’ll have at the very least users, posts and comments.
Create a folder called “blog” inside the oop folder. Add a file called User.php
We can write the class user like this:
 1 <?php
 2 class User {
 3     public $first_name;
 4     public $last_name;
 5     public $email;
 6
 7     public function __construct(
 8         $first_name, $last_name, $email
 9     )
10     {
11         $this->first_name = $first_name;
12         $this->last_name = $last_name;
13         $this->email = $email;
14     }
15 }
$first_name, $last_name and $email are attributes of the class User, known as properties. They are declared public. “public” is an access modifier. Access modifiers are used to determine if we can access the property or function from outside the class. Normally we won’t be having many public properties, but we leave it like this for now.
Then we have a function called __construct. Functions inside classes are called methods. The constructor method is a special method that is executed automatically when an object is instantiated.
In the constructor, you can see the keyword $this. Let’s talk about it.
$this
$this represents the current object of the class. The $this keyword allows access to properties and objects of the current object of the class using the operator ->
So, in the example, to reference the “first_name” property we use $this->first_name.
Now we’ll add a new class representing the posts.
 1 <?php
 2 class Post {
 3     public $title;
 4     public $text;
 5
 6     public function __construct($title, $text)
 7     {
 8         $this->title = $title;
 9         $this->text = $text;
10     }
11 }
And the comments:
1 <?php
2 class Comment {
3     public $message;
4
5     public function __construct($message)
6     {
7         $this->message = $message;
8     }
9 }
Let’s put these classes to test adding a file called blog.php:
 1 <?php
 2 require_once "Post.php";
 3 ?>
 4 <html lang="en">
 5 <head>
 6     <meta charset="UTF-8">
 7     <meta http-equiv="X-UA-Compatible" content="IE=edge">
 8     <meta name="viewport" content="width=device-width,
 9         initial-scale=1.0">
10     <title>Simple Blog</title>
11 </head>
12 <body>
13     <div>
14         <h1>Simple Blog</h1>
15
16         <?php
17             $post1 = new Post("Why PHP?",
18             "PHP powers most of the sites in the web.");
19             $post2 = new Post("What is OOP?",
20             "OOP is a paradigm that encapsulates
21                 data and operations.");
22
23             $posts = [$post1, $post2];
24
25             foreach ($posts as $post) {
26                 echo "<h2>$post->title</h2>";
27
28                 echo "<p>$post->text</p>";
29             }
30         ?>
31     </div>
32 </body>
33 </html>
You can see that we use a foreach loop to go through the different posts of the array. We need to display the title and the text, so we reference this as $post->title and $post->text.
Internally, the class sees these sentences as $this->title and $this->text. The interpreter knows who the current object is, so we display the appropriate property values for each object.
We get the following output (Figure 19):
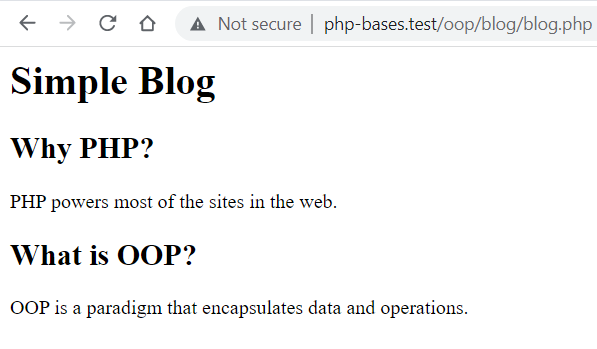
Not very impressive, I know, but we are integrating concepts to build increasingly larger applications.
At the moment, we can change properties values from outside the object. For example we could write something like this:
1 $post = new Post("Title", "Text");
2
3 echo $post->title , "<br/>";
4
5 $post->title = "New title";
6
7 echo $post->title;
We don’t normally want this, because that means we are exposing the system to uncontrolled changes outside the class. We should have very good reasons to leave the properties as public. And that brings us to the next subject.
Access modifiers
Access modifiers determine from where we can access the properties or methods of a class. We have 3 access modifiers:
public: We already saw these in action. We can access public properties and methods from outside the class.
protected: A property or method declared as protected can be accessed from inside the class and derived classes. We’ll see examples when we talk about inheritance.
private: This is the most restrictive of all. Properties and methods declared as private can be accessed only from within the class.
Going back to our Post class, let’s change the “title” and “text” properties from public to private:
 1 <?php
 2 class Post {
 3     private $title;
 4     private $text;
 5
 6     public function __construct($title, $text)
 7     {
 8         $this->title = $title;
 9         $this->text = $text;
10     }
11 }
Now if we run blog.php we get an error (Figure 20):
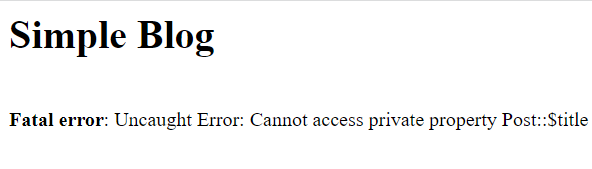
This is because private properties can not be accessed from outside the class. So, how can we access this property?
Getters and setters
We can use setters and getters to change and obtain the value of a private property. Add the following two methods to the Post class:
1 public function setTitle($title)
2 {
3     $this->title = $title;
4 }
5
6 public function getTitle()
7 {
8     return $this->title;
9 }
With these two methods, we have access to the “title” property. Now add other two methods to deal with the text property:
1 public function setText($text)
2     {
3         $this->text = $text;
4     }
5
6     public function getText()
7     {
8         return $this->text;
9     }
Now, we need to make a change to our blog.php script. Change these lines:
1 echo "<h2>".$post->getTitle()."</h2>";
2
3 echo "<p>".$post->getText()."</p>";
Now the error should go away.
You may be wondering why to use setters and getters if that makes our code longer. Well, one of the purposes of the oop paradigm is to provide encapsulation, and public properties go against it. Ahoner reason is that we can enforce checks on validations on the setters, maintaining data consistency. As an example, change the setTitle method as follows:
 1 public function setTitle($title)
 2     {
 3         if (strlen($title) > 45) {
 4             $title = wordwrap($title, 45);
 5             $title = substr(
 6                 $title, 0, strpos($title, "\n")
 7             );
 8         }
 9
10         $this->title = $title;
11     }
Now, in the blog.php script add these lines after the foreach loop:
1 $post2->setTitle("This is a very long title and should
2     be cut. This part won't be displayed");
3 echo $post2->getTitle();
If you run the script, you should see the title being cut.
If you are curious, the wordwrap wraps a string to a given number of characters using a string break character, this character defaults to newline “\n”.
Then with substring we take the firstline.
Magic methods
Magic methods are special methods in a class that override the normal behavior. The names of these methods start with a double underscore. We already saw one of them in action, the __construct method, used for initialization.
The constructor has its counterpart, the destructor. You can use the destructor to do some clean up, for example, closing a file:
1 public function __destruct()
2 {
3     fclose($this->handle);
4 }
Another magic method is __get, which is invoked when writing a value to a non-existing or inaccessible property.
We can use this method, for example, to shorten our class definition if we don’t need any checking to read a private property. Remove the setters from the Post class, and add this method:
1 public function __get($name)
2     {
3         if (method_exists($this, "get".ucfirst($name))) {
4             $method = "get".ucfirst($name);
5             return $this->$method();
6         }
7
8        return $this->$name;
9     }
The magic method we’ll search for a getter. For example, if it receives the parameter “title” we’ll search for a method called getTitle. If the method exists then it returns it. If there is not method, then it returns the property indicated by the parameter “name”.
Note that in the final line we write $this->$name and not $this->name. This is because $name will hold the name of whatever method or property we are requesting. But if we write $this->name then we are looking for a property called “name”.
Just to be sure, this is the complete code of the Post class:
 1 <?php
 2 class Post {
 3     private $title;
 4     private $text;
 5
 6     public function __construct($title, $text)
 7     {
 8         $this->title = $title;
 9         $this->text = $text;
10     }
11
12     public function setTitle($title)
13     {
14         if (strlen($title) > 45) {
15             $title = wordwrap($title, 45);
16             $title = substr(
17                 $title, 0, strpos($title, "\n")
18             );
19         }
20
21         $this->title = $title;
22     }
23
24     public function setText($text)
25     {
26         $this->text = $text;
27     }
28
29     public function __get($name)
30     {
31         if (method_exists($this, "get".ucfirst($name))) {
32             $method = "get".ucfirst($name);
33             return $this->$method();
34         }
35
36        return $this->$name;
37     }
38 }
Building a fileuploader
We are now ready to build something a little more complicated. In many applications, there is the need for an upload file functionality. We could follow a procedural approach, but this is the kind of functionality that is perfect to be encapsulated. Think of a set of reusable classes that you can bring to a new project, that you can use without worrying about function names clashing.
Add a folder called uploader inside the oop folder. Then add a file called FileUploader.php. We start with this content:
 1 <?php
 2 class FileUploader {
 3   private $fileName;
 4   private $targetDir;
 5   private $targetFile;
 6   private $errors;
 7
 8   public function __construct(
 9     $fileName, $targetDir = ''
10   )
11   {
12     $this->fileName = $fileName;
13     $this->targetDir = $targetDir;
14
15     $this->targetFile = $this->targetDir .
16       DIRECTORY_SEPARATOR .
17       basename($_FILES[$this->fileName]["name"]);
18   }
19 }
We have the class definition, with four private properties. One to hold the filename, that is, the value of the “name” attribute of an input of type file in a form; and the folder to which the image should be uploaded. The targetFile represents the full path to the uploaded file. Finally, a property to hold and display any possible errors. The constructor deals with the initialization of these properties. Note the use of the globarl constant DIRECTORY_SEPARATOR. This constant represents whatever character the operating system of the server uses as the separator for directories in a path, that is “/” or “\”.
After the constructor, add the following method:
 1 private function checkIsImage()
 2 {
 3     if (!getimagesize(
 4             $_FILES[$this->fileName]["tmp_name"]
 5         )) {
 6         $this->errors.= "File is not an image.";         \
 7
 8
 9         return false;
10     }
11
12     return true;
13 }
This method will check if the file is indeed an image, using the function getimagesize. This function will return false on any file that is not an image. We could have used a single line:
1 return getimagesize($_FILES[$this->fileName]["tmp_name"]);
But we want to save an error message. Then let’s add a function to allow only some types of images:
 1 private function checkImageType()
 2 {
 3     $imageType = strtolower(
 4         pathinfo(
 5             $this->targetFile, PATHINFO_EXTENSION
 6         )
 7     );
 8
 9     if (!in_array($imageType, ["jpg", "jpeg", "png"])) {
10         $this->errors = "Image type not allowed";
11
12         return false;
13     }
14
15     return true;
16 }
For this example, we will only allow jpg, jpeg or png images. This could be a place to future improvement, for example this could be the default values, and allow for the user to define the desired types in the constructor.
On to the next method.
 1 private function fileNotExists()
 2 {
 3     if (file_exists($this->targetFile)) {
 4         $this->errors.=" File already exists";
 5
 6         return false;
 7     }
 8
 9     return true;
10 }
We use this method to check if the file already exists. Again, we could set the value of a property to indicate if we want to override the file, but this is enough for now.
Until now, with the exception of the constructor, all methods are declared as private. Our last method is a public one, and is in fact the responsible for the upload of the file:
 1 public function uploadFile()
 2 {
 3     if (
 4         $this->checkIsImage()
 5         && $this->checkImageType()
 6         && $this->fileNotExists()
 7     ) {
 8         if (move_uploaded_file(
 9             $_FILES[$this->fileName]["tmp_name"],
10             $this->targetFile)
11             ) {
12             return true;
13         } else {
14             throw new Exception(
15                 "File could not be uploaded",
16                 E_USER_ERROR
17             );
18         }
19     } else {
20         throw new Exception($this->errors,
21             E_USER_ERROR);
22     }
23 }
That’s it, it’s a very simple class, but a very useful one. Now we’ll put it to the test.
Inside the “uploader” folder, add a file called form.php
 1 <?php
 2 if ($_SERVER["REQUEST_METHOD"] == "POST") {
 3     require_once "FileUploader.php";
 4
 5     $uploader = new FileUploader(
 6         "file",
 7         $_SERVER['DOCUMENT_ROOT'] . DIRECTORY_SEPARATOR
 8             . "uploads"
 9     );
10
11     try {
12         $uploader->uploadFile();
13         echo "File uploaded succesfully";
14     } catch (Exception $e) {
15         echo $e->getMessage();
16     }
17 }
18 ?>
19 <html lang="en">
20 <head>
21     <meta charset="UTF-8">
22     <meta http-equiv="X-UA-Compatible" content="IE=edge">
23     <meta name="viewport" content="width=device-width,
24         initial-scale=1.0">
25     <title>File Upload</title>
26 </head>
27 <body>
28
29     <form action="<?= $_SERVER["PHP_SELF"] ?>"
30         method="POST" enctype="multipart/form-data">
31         <label for="file">Upload your image</label>
32         <input type="file" name="file">
33
34         <input type="submit" value="Send">
35     </form>
36
37 </body>
38 </html>
Now add a folder called “uploads” at the root of the site, at the same level of the oop folder (Figure 21).
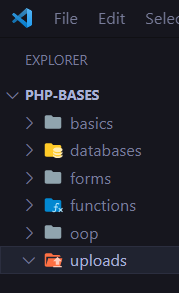
Just to be sure, here are the gists to the FileUploader and the Form
Go ahead and try the form. You should see the file uploaded to the “uploads” folder.
I hope you can see how a class like this can be useful, favoring code reuse and maintainability.
Inheritance
Inheritance is one of the most useful characteristics of a language. It can be defined as the process of deriving classes from other classes, creating a hierarchy. We indicate that one class is derived from another using the keyword extends.
Going back to our blog example, it is reasonable to conclude that our classes will have to interact with some kind of permanent storage. So, it will be a good practice to create a base class to handle all the basic crud (create, read, update, delete) operations. Add a class called Model.php in the blog folder:
 1 <?php
 2 class Model {
 3     public function all($arrFields = null)
 4     {
 5         print_r($arrFields);
 6     }
 7
 8     public function find($id, $arrFields = null)
 9     {
10         echo "Searching model with id $id";
11     }
12
13     public function save($data, $id = null)
14     {
15         echo "Saving data";
16     }
17
18     public function del($key, $value)
19     {
20         echo "Deleting key: $key with value: $value";
21     }
22 }
If we make our Post and Comments classes extend from this base class, then they will inherit these methods. Let’s change our Post class:
 1 <?php
 2 require_once "Model.php";
 3
 4 class Post extends Model {
 5     private $title;
 6     private $text;
 7
 8     public function __construct($title, $text)
 9     {
10         $this->title = $title;
11         $this->text = $text;
12     }
13
14     public function setTitle($title)
15     {
16         if (strlen($title) > 45) {
17             $title = wordwrap($title, 45);
18             $title = substr(
19                 $title, 0, strpos($title, "\n")
20             );
21         }
22
23         $this->title = $title;
24     }
25
26     public function setText($text)
27     {
28         $this->text = $text;
29     }
30
31     public function __get($name)
32     {
33         if ( method_exists(
34                 $this, "get".ucfirst($name))
35             ) {
36             $method = "get".ucfirst($name);
37             return $this->$method();
38         }
39
40         return $this->$name;
41     }
42 }
We can make some tests to see everything in action. Add a file called test.php at the same level as the blog.php script:
 1 <?php
 2 require_once "Post.php";
 3 ?>
 4 <html lang="en">
 5 <head>
 6     <meta charset="UTF-8">
 7     <meta http-equiv="X-UA-Compatible" content="IE=edge">
 8     <meta name="viewport" content="width=device-width,
 9         initial-scale=1.0">
10     <title>Simple Blog</title>
11 </head>
12 <body>
13     <div>
14         <h1>Simple Blog</h1>
15
16         <?php
17             $post = new Post("Why PHP?",
18             "PHP powers most of the sites in the web.");
19
20             echo $post->all(["title", "text"]);
21         ?>
22     </div>
23 </body>
24 </html>
Now we can see that, because the Post class extends from the Model class, we can use the all method (Figure 22).
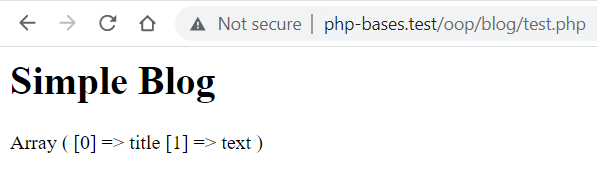
Interfaces
Interfaces allow you to specify what methods a class should implement. You can think about interfaces as contracts. If a class implements an interface, or a group of interfaces, then it is mandatory for that class to implement all the methods that are declared on those interfaces. Now, why is this useful?
Think about a big codebase. Normally, there will be a group of people working on it. One of the aspects that need to be carefully planned is the architectural one. Whether the title is “software architect” or something else, there should be someone in charge to define the bigger picture. Interfaces can be used to outline what the principal classes of the application should look like. Interfaces enforce a clear design, leaving the implementation to other members of the team and at the same time maintaining consistency. This is sometimes called “programming to the interface”.
We’ll build a db class, the object oriented equivalent to the functions that we used in the passed chapter to interact with a database. This class will adhere to an interface, so we’ll start with it. In the oop folder, add a directory called db. Then add a file called IDatabase.php
 1 <?php
 2 interface IDatabase {
 3     public function getConnection();
 4
 5     public function getAll(
 6         string $table, array $arrFields
 7     );
 8
 9     public function getOne(
10         string $table, array $arrFields, $key, $value
11     );
12
13     public function insertOrUpdate(
14         Array $data, string $table, $key, $value
15     );
16
17     public function insert(
18         array $data, string $table
19     );
20
21     public function update(
22         array $data, string $table, $key, $value
23     );
24 }
As you can see, we use the keyword interface. Also, the methods are only declared, not implemented. We don’t even have the curly braces for them. This interface is a contract. Every class implementing it must implement the corresponding methods or an error will be thrown.
Now add a file called PDOConnect.php
  1 <?php
  2 require_once "IDatabase.php";
  3
  4 class PDOConnect implements IDatabase {
  5   private $conn;
  6
  7   public function __construct(Array $config)
  8   {
  9     try {
 10       $this->conn = new \PDO(
 11         "mysql:host=".$config["host"].";dbname="
 12         .$config["dbname"],
 13         $config["username"],
 14         $config["password"]
 15       );
 16       $this->conn->setAttribute(
 17         \PDO::ATTR_ERRMODE, \PDO::ERRMODE_EXCEPTION
 18       );
 19     } catch (\PDOException $e) {
 20       trigger_error($e->getMessage(), E_USER_ERROR);
 21     }
 22   }
 23
 24   public function getConnection()
 25   {
 26     return $this->conn;
 27   }
 28
 29   public function getAll(
 30     string $table, array $arrFields = []
 31   )
 32   {
 33     $sql = "SELECT ";
 34
 35     if (!empty($arrFields)) {
 36       $sql .= implode(",", $arrFields);
 37     } else {
 38       $sql .= " * ";
 39     }
 40
 41     $sql .= " FROM $table";
 42
 43     $stmt = $this->getConnection()->prepare($sql);
 44
 45     if (!$stmt->execute()) return false;
 46
 47     $stmt->setFetchMode(\PDO::FETCH_ASSOC);
 48
 49     return $stmt->fetchAll();
 50   }
 51
 52   public function getOne(
 53     string $table, array $arrFields = [], $key, $value
 54   )
 55   {
 56     $sql = "SELECT ";
 57
 58     if (!empty($arrFields)) {
 59       $sql .= implode(",", $arrFields);
 60     } else {
 61       $sql .= "*";
 62     }
 63
 64     $sql .= " FROM $table WHERE $key = :value";
 65
 66     $stmt = $this->getConnection()->prepare($sql);
 67     $stmt->bindParam(":value", $value);
 68
 69     if (!$stmt->execute()) return false;
 70
 71     $stmt->setFetchMode(\PDO::FETCH_ASSOC);
 72
 73     return $stmt->fetch();
 74   }
 75
 76   public function save(
 77     array $data,
 78     string $table, $key = null, $value = null
 79   )
 80   {
 81     $sql = "$table SET";
 82
 83     foreach ($data as $k => $v) {
 84       $sql .= "$k = '$v'";
 85     }
 86
 87     $sql = trim($sql, ",");
 88
 89     if (!$value) {
 90       $sql = "INSERT INTO " . $sql;
 91     } else {
 92       $sql = "UPDATE " . $sql
 93                 . " WHERE $key = :value";
 94     }
 95
 96     $stmt = $this->getConnection()->prepare($sql);
 97
 98     if ($value) $stmt->bindParam(":value", $value);
 99
100     if ($stmt->execute()) return true;
101
102     return false;
103   }
104
105   public function insert(array $data, string $table)
106   {
107     $this->save($data, $table);
108   }
109
110   public function update(
111     array $data, string $table, $key, $value
112   )
113   {
114     $this->save($data, $table, $key, $value);
115   }
116 }
The code should look very familiar. In the constructor we initialize the $conn property as a new PDO object, which represents the connection to the database. When we need that connection, we call the method getConnection (a simple getter) to retrieve it.
Then we have methods that are very similar to the functions that we presented in the previous chapter to manage database operations.
Namespaces
We have made a lot of progress. We have an understanding of what classes are, and how they are declared and used. The examples presented try to reflect real world problems, and with that goal in mind, we have to look further and realize that projects tend to grow in complexity. As such, we need to organize our code better. This is of paramount importance in a project with a whole team working on it.
Just think about this situation. You have classes dealing with html tables, such as Table, Row and Col. At the same time, you have another set of classes dealing with Excel files with similar names: Table, Row and Col.
This is known as name colitions. We use identifiers to deal with this problem. A namespace groups a set of related classes. It’s very similar to how directories work. Different directories group files. The name of the files need to be different inside a directory, but different directories can have files with the same name. We’ll be expanding in our blog example to see these concepts.
First create a new folder named blog inside the htdocs folder.
Inside that folder, we’ll be adding four directories to organize the code: application, config, library and public.
Add a file named config.php with the following code:
1 <?php
2 define('DEVELOPMENT_ENVIROMENT', true);
3
4 const CONFIG = [
5     'DB_SERVER' => 'localhost',
6     'DB_USER' => 'root',
7     'DB_PASSWORD' => '',
8     'DB_DATABASE' => 'simpleblog'
9 ];
This file has the connection parameters to a database that doesn’t exist yet, but we’ll create it later.
Inside the library folder, add a file named bootstrap.php with the following content:
1 <?php
2 require_once ROOT . DS . 'config' . DS . 'config.php';
It doesn’t do much yet, but it will later.
The the public folder will have an index.php file with the following content:
1 <?php
2 define('DS', DIRECTORY_SEPARATOR);
3 define('ROOT', dirname(dirname(__FILE__)));
4
5 require_once(ROOT . DS . 'library'
6     . DS . 'bootstrap.php');
7
8 require_once(ROOT . DS . 'application' . DS . 'views'
9     . DS . 'index.php');
We define two constants and require the bootstrap.php file that we already saw, and another file named index.php, which is in the application -> views folder.
Put the followings content in that file:
 1 <html lang="en">
 2 <head>
 3     <meta charset="UTF-8">
 4     <meta http-equiv="X-UA-Compatible" content="IE=edge">
 5     <meta name="viewport" content="width=device-width,
 6         initial-scale=1.0">
 7     <title>Simple Blog</title>
 8 </head>
 9 <body>
10     <div>
11         <h1>Simple Blog</h1>
12
13
14     </div>
15 </body>
16 </html>
Let’s see what we have until now. We’ll be adding a virtual host in our httpd-vhosts.conf, which is located in C:\xampp\apache\conf\extra. This is not mandatory, but is convenient.
The lines to add are:
1 <VirtualHost *:80>
2     DocumentRoot "C:/xampp/htdocs/blog/public"
3     ServerName blog.test
4 </VirtualHost>
As before, we also need a line in our hosts file:
1 127.0.0.1 blog.test
If we go to the browser and type blog.test we should see the following (Figure 23):
Now, add a folder named core inside the library folder. To be sure, the folder structure should look like the following (Figure 24):
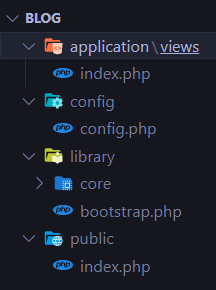
Now, copy the file Model.php from the Inheritance section inside the core folder. The file as of now has the following content:
 1 <?php
 2 class Model {
 3     public function all($arrFields = null)
 4     {
 5         print_r($arrFields);
 6     }
 7
 8     public function find($id, $arrFields = null)
 9     {
10         echo "Searching model with id $id";
11     }
12
13     public function save($data, $id = null)
14     {
15         echo "Saving data";
16     }
17
18     public function del($key, $value)
19     {
20         echo "Deleting key: $key with value: $value";
21     }
22 }
Now, we need to add just one line before the definition of the class:
1 namespace core;
We are using a namespace to group a set of classes. In this case, all the classes that are part of the library, will have the namespace core to differentiate them from the application classes. We will never modifying the classes in the core space. Instead, we should extend from the core classes.
This allows reuse of the structure. The classes that are particular to the application we are building we’ll be in the application folder.
In the application folder, add another named models. We can reuse the Comment, Post and User classes from the previous sections (the ones in php-bases->oop->blog). Just copy these models and paste them in the models directory.
The Post.php file right now has the following contents:
 1 <?php
 2 require_once "Model.php";
 3
 4 class Post extends Model {
 5     private $title;
 6     private $text;
 7
 8     public function __construct($title, $text)
 9     {
10         $this->title = $title;
11         $this->text = $text;
12     }
13
14     public function setTitle($title)
15     {
16         if (strlen($title) > 45) {
17             $title = wordwrap($title, 45);
18             $title = substr(
19                 $title, 0, strpos($title, "\n")
20             );
21         }
22
23         $this->title = $title;
24     }
25
26     public function setText($text)
27     {
28         $this->text = $text;
29     }
30
31     public function __get($name)
32     {
33         if (method_exists($this, "get".ucfirst($name))) {
34             $method = "get".ucfirst($name);
35             return $this->$method();
36         }
37
38         return $this->$name;
39     }
40 }
Now, we have a require_once line, since the class Post extends the model class. We need to change the path, since the two classes are no longer in the same folder.
But using require_once statements to include the necessary files. For example, the file with the PDOConnect class requires the IDatabase interface, because it implements it. If we are dealing with a big codebase, it can be very problematic to manually require all the files needed, and it can lead to problems if we forget to require one of those files. A mechanism often used is something called autoloading.
Autoloading of classes
Autoloading of classes is a mechanism to automatically include or require the files containing classes that are referenced in the code. There are different options to attain it. We’ll be writing our own autoloading.
Remove the require_once line on the Post.php file, and then add these lines right after the php tag.
1 namespace models;
2
3 use core\Model as Model;
The first line defines the Post class as belonging to the models namespace. Then we have the use sentence. Why? The Model class belongs to the core namespace. So, we are defining an alias to use as a shortcut. It is important to note that we are NOT including or requiring the file, that will be the purpose of the autoloader. We are simply establishing the instead of the fully qualified name core\Model, we’ll refer to the class simple as Model. The use sentence is also useful when we need classes with the same Name, but belonging to different namespaces. For example we could use something like this:
1 use SMTP\Mailer as SMTPMailer;
2 use Mailgun\Mailer as MailgunMailer;
Let’s take a test. Modify the index.php file in the views folder as follows:
 1 <?php
 2 use models\Post;
 3 ?>
 4 <html lang="en">
 5 <head>
 6   <meta charset="UTF-8">
 7   <meta http-equiv="X-UA-Compatible" content="IE=edge">
 8   <meta name="viewport" content="width=device-width,
 9     initial-scale=1.0">
10   <title>Simple Blog</title>
11 </head>
12 <body>
13   <div>
14     <h1>Simple Blog</h1>
15
16     <?php
17       $post1 = new Post("Why PHP?",
18           "PHP powers most of the sites in the web.");
19       echo $post1->title;
20     ?>
21   </div>
22 </body>
23 </html>
We get an error in the browser, and it is expected because we are not including or requiring the files.
We have a bootstrap.php file that doesn’t do much. In fact, it only has one line. Modify it as follows:
 1 <?php
 2 function autoload($class)
 3 {
 4   $directories = [
 5     'library',
 6     'application',
 7     'application\models'
 8   ];
 9
10   foreach ($directories as $directory) {
11     $file = ROOT . DS . $directory . DS
12       . str_replace('\\', '/', $class) . '.php';
13
14     if (file_exists($file)) require_once $file;
15   }
16 }
17
18 spl_autoload_register('autoload');
19
20 require_once ROOT . DS . 'config' . DS . 'config.php';
spl_autoload_register allows you to register autoloaders. It receives the name of a function as a parameter.
Our autoload function defines the directories in which the files containing the classes are located. When a class is referenced in the code, it searches in all the directories listed and requires the corresponding file if it exists.
As you can see, we follow the convention that a class named Post is defined in a file named Post.php.
With those changes, we finally have the output shown in Figure 25:
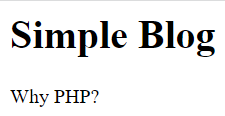
This is not the only method to achieve autoloading. Most frameworks use Composer, and we’ll see examples later on. But for now, we have everything we need in order to begin building our mvc framework.
Chapter 04: Basic structure
Navigating the Internet, a simple search like “create MVC framework” yields thousands of results, not all of the same quality.
A very interesting article can be found here. However, these articles were written in 2009, and thus lack important features such as the use of namespaces, use of composer for autoloading, dependency injection, and so on.
In addition, it contains other problems typical of the years that have passed. Therefore, in many important respects, we will make fundamental changes.
First of all, we need to create a directory for our web server. We can call it anything. Throughout this entry we will consider that directory to have been called simplemvc.
Within it, we must create the following directory structure (Figure 26):
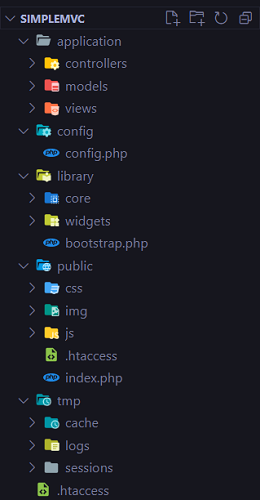
Let’s briefly analyze each directory:
application: contains the code of the application that we are developing. Here we can see directories called controllers, models and views. Each controller, model, and view in this directory is specific to the particular project, and will extend a framework class that provides basic functionality. config: contains files with configuration data, such as environment constants, or connection to the database. library: contains the framework’s own files. Within this directory we see two others: core and widgets. Within the first we will place the fundamental classes of the framework, and within the second some utility classes, such as widgets for creating tables, and others. public: This directory is meant to be the application’s entry point directory. It is the one that is accessible to the public. tmp: Contains temporary files such as cache files, errors, and session information.
Starting to spin the wheel
Let’s create a file called .htaccess (this is a special file used for configuration directives) and place it in the root of our project. That is, we will have a file called .htaccess at the same height as the directories mentioned above.
This file will be in charge of configuring our server to direct all requests to the public. The contents of the file are as follows:
1 <IfModule mod_rewrite.c>
2        RewriteEngine on
3        RewriteRule ^$ public/ [L]
4        RewriteRule (.*) public/$1 [L]
5 </IfModule>
NOTE: This is considered to be dealing with an Apache server. In case of using another environment, such as an IIS server, or Nginx, the necessary configuration must be carried out for each of them.
Inside the public directory, let’s add the following content to the .htaccess file:
1 <IfModule mod_rewrite.c>
2     RewriteEngine on
3
4     RewriteCond %{REQUEST_FILENAME} !-f
5     RewriteCond %{REQUEST_FILENAME} !-d
6
7     RewriteRule ^(.*)$ index.php?url=$1 [PT,L]
8 </IfModule>
With it we are instructing our server to direct all requests (with the exception of files and directories) to a single entry point, the index.php file.
This file will receive as a url parameter, a route in the form controller/action. For example, if we write localhost/simplemvc/items/index, index.php will receive the value in the url variable ‘items/index’.
This file is very simple and has the following content:
 1 <?php
 2
 3 define('DS', DIRECTORY_SEPARATOR);
 4 define('ROOT', dirname(dirname(__FILE__)));
 5
 6 if (!isset($_GET['url'])) $_GET['url'] = 'site/index';
 7
 8 $url = $_GET['url'];
 9
10 require_once(ROOT. DS . 'library' . DS .'bootstrap.php');
The first two lines define two constants:
DS: This constant will refer to the directory separator, which can vary from one operating system to another. For example, it will take the value “\” or “/”. ROOT: It will refer to the root of the site. To do this, it uses the dirname function, which returns the parent directory of the route passed as a parameter. FILE is a PHP magic constant that represents the full path of the current file. Therefore, by using dirname(dirname(FILE)) we are moving up two levels from the location of the index.php file, effectively referencing the root of the application.
In the next line, we are creating a default route in case none is requested. All routes in our application will have the form (assuming we are in our local environment).
localhost/simplemvc/controller/action
If the controller/action is not indicated, the ‘site/index’ will be called by default, that is, the site controller and within it the index action.
In the next line we save the url (controller/action) received.
Finally, we include the bootstrap.php file located in the library directory.
Let’s add the following code to bootstrap.php:
 1 <?php
 2 function autoload($class)
 3 {
 4     $directories = [
 5         'library',
 6         'application'
 7     ];
 8
 9     foreach ($directories as $directory)
10     {
11         $file = ROOT . DS. $directory . DS.
12             str_replace('\\', '/', $class) . '.php';
13         if (file_exists($file)) {
14             require_once($file);
15         }
16     }
17 }
18
19 spl_autoload_register('autoload');
20
21 require_once(ROOT . DS . 'config' . DS . 'config.php');
22
23 $app = new core\Application();
24
25 $app->setReporting();
26 $app->removeMagicQuotes();
27 $app->run($url);
This file is a bit longer, and more complex. It starts by defining a function called autoload.
This function will be in charge of automatically loading the necessary classes to start our application.
What does that mean?
Well, suppose we have an application where we define classes A, B and C. Each of them is defined in their respective files: A.php, B.php and C.php.
In each file of our application where we want to use these classes, we must include the necessary files, for example:
require_once(‘library/A.php’); require_once(‘library/B.php’);
As the number of classes increases, we can easily forget one of these statements.
One approach to avoid this problem is to take advantage of a php feature known as ‘autoloading’.
PHP defines a default function called __autoload, which we can override to perform class loading. That is, if we implement an __autoload function, PHP will try to use this function to load undeclared classes.
However, according to the PHP documentation, the __autoload function has limitations that make it deprecated and may be removed in the future. One of these limitations is that __autoload only allows you to implement a single autoloader.
Alternatively – and this is the option we have chosen – we can write our own function (named whatever we want) and register it as an autoloader using the spl_autoload_register function.
Our function is called autoload. (Note the difference with the function name __autoload).
Our autoload function receives a $class parameter, which contains the name of a class that we intend to use in the code. Inside this function, we define an array that references a set of directories where we’ll look for the necessary classes:
1 $directories = [
2     'library',
3     'application'
4 ];
Next, we loop through this array with a foreach.
In this foreach we have the following line:
1 $file = ROOT . DS. $directory . DS.
2     str_replace('\\', '/', $class) . '.php';
This line creates the path to the file where the referenced class is located.
For example, if we later write: $app = new Core\Application , the autoload function will receive as a parameter: ‘core\Application’.
From it, the variable $file will end up containing (in the case of my environment) the string: C:\xampp\htdocs\simplemvc\library\core/Application.php
Then, if the file exists, it will be included with require_once($file).
Now, for the autoload function to be called every time a class is referenced, it must be registered as an autoloader. We do this with the statement:
spl_autoload_register(‘autoload’);
Following that statement, we include the configuration file ‘config.php’.
This file, located in the config, contains the following:
 1 <?php
 2 define('DEVELOPMENT_ENVIRONMENT', true);
 3
 4 const CONFIG = [
 5     'DB_SERVER' => 'localhost',
 6     'DB_USER' => 'root',
 7     'DB_PASSWORD' => '',
 8     'DB_DATABASE' => 'simplemvc'
 9 ];
10
11 define('SITE_BASE', 'http://localhost/simplemvc/');
12
13 define('APP_SESSION_ID', 'xeFLcX4gfj1h7WM6Yfrl');
A constant is defined that indicates that we are in the development phase, and then a constant, an array, with the data necessary for the connection with the database.
After that, we have a constant that points to the web root of our application. This is necessary if we have our app in another folder different from our root.
Finally, we have a constant to identify our session. We will use this when we are dealing with authentication or authorization. For now, I will just simply use a random string of 20 characters. Later, we’ll employ a method to ensure every session is unique.
Back in the bootstrap.php file, the last few lines are:
1 $app = new core\Application();
2
3 $app->setReporting();
4 $app->removeMagicQuotes();
5 $app->run($url);
These are the ones in charge of instantiating an Application object, and calling the necessary methods to start our application.
At this point I think it’s necessary to explain what we are trying to achieve. I would not dare to advise someone to start using a professional framework such as Yii, Laravel, Zend and others, without having a solid foundation of the language.
Why? Because if you don’t have this foundation, the framework ends up becoming the language. We begin to think of EVERYTHING from the perspective of the particular framework that we use.
What does solid foundation mean?
Let’s see:
- Variables
- Constants
- Data types
- Control structures
- String manipulation functions (very important)
- Arrays (very important!)
- Form processing
- File upload and manipulation
- Sessions and cookies
- Databases
- Manipulation de xml
- Ajax
Sounds like a lot, but it’s not only necessary, it’s worth it. There are many resources online to achieve this learning. For example, the w3schools tutorial covers these and other points.
Once mastered, it is a good idea to return to these references and practice exercises from time to time to “keep in shape”.
After the basics, it is very important that we learn as much as possible about object-oriented programming. Classes, objects, namespaces, inheritance, interfaces, polymorphism, magic methods, traits, etc., must be part of our daily language.
Finally (yes, there is still more…but it is really the last thing) to take our skills to a new level, we must know and know how to apply DESIGN PATTERNS.
I highlight it, because design patterns allow building scalable and maintainable applications, two characteristics that facilitate the work of all project participants.
One of these design patterns is precisely the MVC pattern (Model, View, Controller) that we have talked about on several occasions.
As we already know, the MVC pattern seeks to separate the functionality of our application into three different components.
The model, in charge of implementing the business logic. It is in charge of reading and writing data to persistent storage.
The view, responsible for presenting the data to the user.
And the controller, in charge of delegating responsibilities to the model and the view in response to a user request.
Most frameworks use this pattern, but it’s important to know that they might not. Things could be done differently.
Another design pattern is called the Front Controller.
This design pattern consists of providing a single entry point to our application. That is, all the requests that arrive at the browser are directed to a single place from which they are derived to the appropriate component to handle them.
I think it is very important to point out that the MVC and the Front Controller are two different patterns that can be implemented independently.
It just so happens that they are frequently used together.
Again, most MVC frameworks, including Yii and Laravel, also use the Front Controller.
To clarify some doubts, let’s see the following graph (Figure 27):
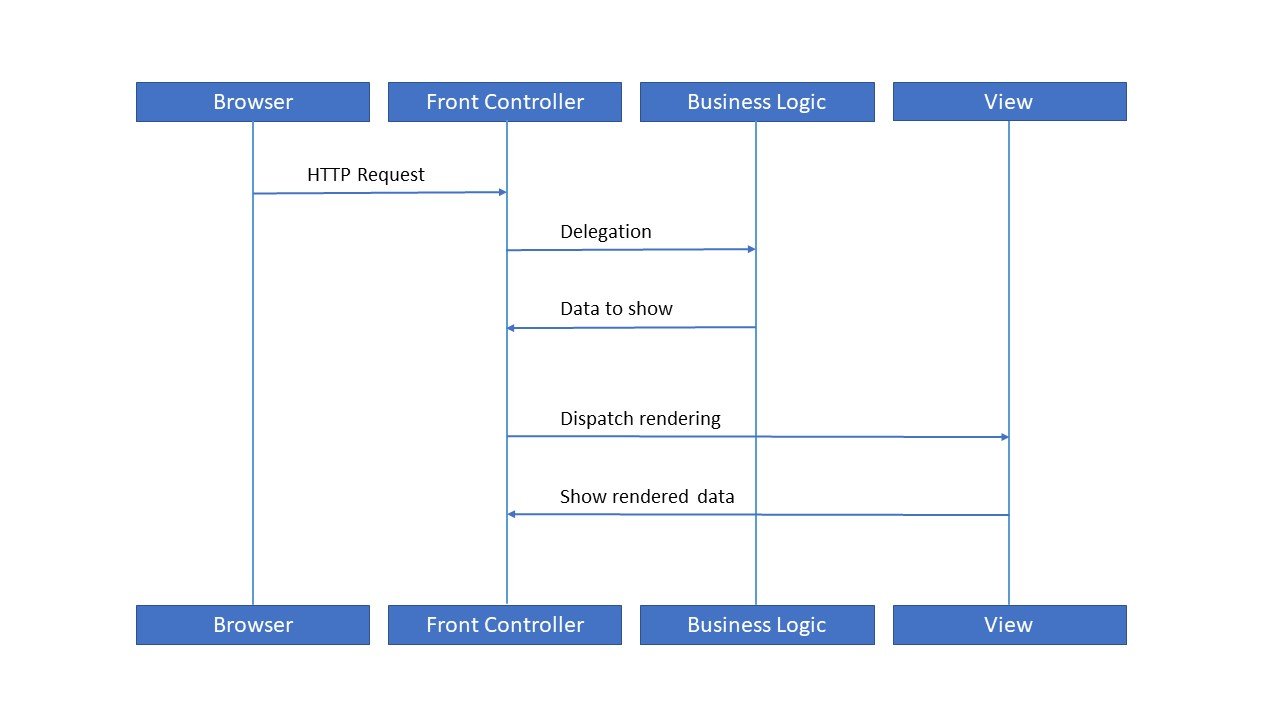
Here we see a diagram that represents the cycle of a request in a framework that uses the Front Controller and MVC patterns. The business logic is represented by the Model.
However, if we were to refer to the Front Controller alone, we could render it like this (Figure 28):
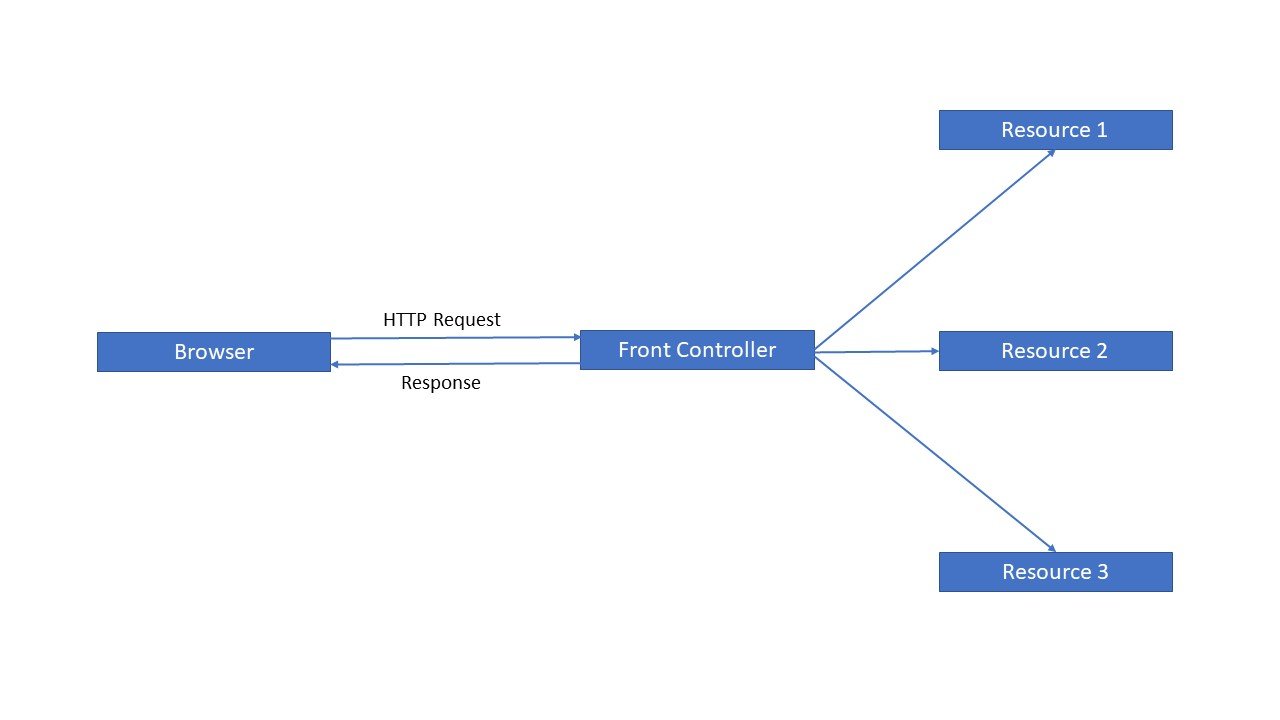
Sorry for the long exposition, I hope I haven’t lost you guys yet. What I wanted to make clear is that design patterns are fundamental tools, and knowing them allows us to be better at our work.
I also wanted to emphasize that my concern lies in the fact that if one simply dedicates oneself to using a framework without taking the time to understand the language, one can be left with the impression that things work by some kind of “magic”.
Of course, frameworks precisely hide much of the complexity of their inner workings, accelerating development, but this concealment can lead to stagnation, a kind of “paralysis” when we see the need to extend or modify something. It would be extremely useful to have a clear idea of how a framework works, bringing out some of that “magic”.
Now, we’ll turn to discussing the Application object, the heart of our application.
Structure
Let’s remember the structure of our application, of which we previously explained the function of each directory (Figure 29).
The library, as we can see, has two directories called core and widgets. Inside the core directory are all the classes that make up the core of our framework. That is, those classes that are not specific to our application but will be present in each project that we carry out (Figure 30):
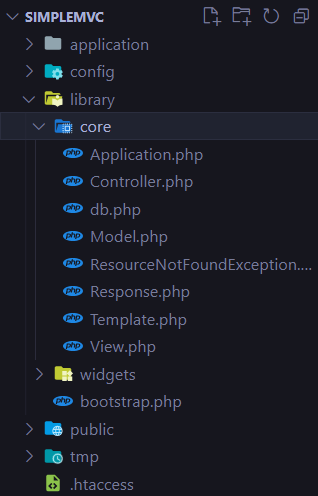
Go ahead and create the files, we can leave them empty for now.
Let’s remember the contents of the bootstrap.php file:
 1 function autoload($class)
 2 {
 3     $directories = [
 4         'library',
 5         'application'
 6     ];
 7
 8     foreach ($directories as $directory)
 9     {
10         $file = ROOT . DS. $directory . DS.
11             str_replace('\\', '/', $class) . '.php';
12         if (file_exists($file)) {
13             require_once($file);
14         }
15     }
16 }
17
18 spl_autoload_register('autoload');
19
20 require_once(ROOT . DS . 'config' . DS . 'config.php');
21
22 $app = newcore\Application();
23
24 $app->setReporting();
25 $app->removeMagicQuotes();
26 $app->run($url);
This file is in charge of instantiating the Application object, which in turn will be in charge of instantiating the appropriate controller and calling the correct method of said controller, according to the request received.
Let’s look at the content of Application.php. It’s not too long and we’ll go through it piece by piece:
 1 <?php
 2 namespace core;
 3
 4 class Application {
 5
 6   public function setReporting()
 7   {
 8     if (DEVELOPMENT_ENVIRONMENT) {
 9       error_reporting(E_ALL);
10       ini_set('display_error', 'on');
11     } else {
12       error_reporting(E_ALL);
13       ini_set('display_error', 'off');
14       ini_set('error_log', ROOT . DS . 'tmp' .
15         DS . 'logs' . DS . 'error.log');
16     }
17   }
18
19   public function stripSlashesDeep($value)
20   {
21     (is_array($value)) ? array_map(
22         [$this, 'stripSlashesDeep'], $value
23     ) : stripslashes($value);
24     return $value;
25   }
26
27   public function removeMagicQuotes()
28   {
29     $_GET = $this->stripSlashesDeep($_GET);
30   }
31
32   public function run($url)
33   {
34     $url = explode('/', $url);
35
36     $controller = array_shift($url);
37     $controllerClass = 'controllers\\'
38       .ucwords($controller) . 'Controller';
39     $action = array_shift($url);
40     $queryString = $url;
41
42     if (class_exists($controllerClass)) {
43       $parents = class_parents($controllerClass);
44       if (in_array('core\\Controller', $parents)) {
45         if (method_exists($controllerClass, $action)) {
46           $dispatch = new $controllerClass(
47             $controller, $action
48           );
49           call_user_func_array(
50             [$dispatch, $action], $queryString
51           );
52         } else {
53           die("Bad action");
54         }
55       } else {
56         die("Bad Controller");
57       }
58     } else {
59       die("Bad Controller");
60     }
61   }
62
63 }
In the first line we identify the namespace to which our class belongs:
1 namespace core;
In a simplified way, we can think of a namespace as a way of grouping classes. Thus, our core namespace groups together the Application, Controller, db, Model, and Template classes.
Two classes with the same name cannot exist in the same namespace, but they can exist in different namespaces.
After identifying the namespace to which the class corresponds, we have its definition:
1 class Application {
Then we find the first method of our class:
 1 public function setReporting()
 2 {
 3     if (DEVELOPMENT_ENVIRONMENT) {
 4         error_reporting(E_ALL );
 5         ini_set('display_error', 'on');
 6     } else {
 7         error_reporting(E_ALL);
 8         ini_set('display_error', 'off');
 9         ini_set('error_log', ROOT . DS . 'tmp' .
10             DS . 'logs' . DS . 'error.log');
11     }
12 }
The purpose of this method is establishing the way in which the errors of our application will be registered, according to the value of the DEVELOPMENT_ENVIRONMENT variable, which, as we remember, is defined in the config.php file.
If the value of this constant is true, then we do two things: We
set the error reporting level to E_ALL. That is, all types of errors will be reported.
By setting display_errors to on, we are indicating that we want all errors to be displayed as part of the screen output. This is very useful in the development phase when we are debugging bugs.
Conversely, if DEVELOPMENT_ENVIRONMENT is false, then display_errors will be set to off, hiding error messages from the user. However, it is important to be able to parse such errors, so we add a new line:
1 ini_set('error_log', ROOT . DS . 'tmp' . DS .
2     'logs' . DS . 'error.log');
With it, we are indicating in which file the errors that occur at runtime will be dumped, for later analysis.
Next we have a very short method:
1 public function stripSlashesDeep($value)
2 {
3     (is_array($value))
4         ? array_map([$this, 'stripSlashesDeep'], $value)
5         : stripslashes($value);
6     return $value;
7 }
This method receives a parameter, which can be an array or a single element. In the case that it is a vector, we make use of the array_map function. This function receives two parameters: a function to be applied, and an element on which to apply it.
Note that the function to be applied is stripSlashesDeep itself. That is, we have a recursive call. Also notice that the first parameter passed to array_map has the form:
1 [$this, 'stripSlashesDeep']
This is because we are calling a function that is a method of a class, so we must use “$this”. $this is a pointer that represents, at run time, the calling object. Next, we have the name of the function.
As the second parameter of array_map, we have the value (which we already established to be an array) $value.
In short, array_map receives two parameters: a function and an array. And I return an array as a result, where the function indicated in the first parameter has been applied to each of the elements.
On the other hand, if $value is not an array but a single value, the stripslashes function is applied to that value. This function removes character escape slashes in strings:
For example, if we have the string O'Brian, after stripslashes we will have the string O’Brian.
The following method:
1 public function removeMagicQuotes()
2 {
3     $_GET = $this->stripSlashesDeep($_GET);
4 }
Simply call stripSlashesDeep method for requests received via $_GET. We won’t be doing it for $_POST because this could give us an empty $_POST array, or $_COOKIE because later we will use cookies to implement the Remember me functionality.
Finally we have the run method:
 1 public function run($url)
 2 {
 3     $url = explode('/', $url);
 4
 5     $controller = array_shift($url);
 6     $controllerClass = 'controllers\\'
 7         .ucwords($controller) . 'Controller';
 8     $action = array_shift($url);
 9     $queryString = $url;
10
11     if (class_exists($controllerClass)) {
12       $parents = class_parents($controllerClass);
13       if (in_array('core\\Controller', $parents)) {
14         if (method_exists($controllerClass, $action)) {
15           $dispatch = new $controllerClass(
16                 $controller, $action);
17             call_user_func_array(
18                 [$dispatch, $action], $queryString);
19           } else {
20             die("Bad action");
21           }
22         } else {
23             die("Bad Controller");
24       }
25     } else {
26         die("Bad Controller");
27     }
28 }
Let’s analyze it carefully:
This method receives as a parameter the url that the user has requested, for example, given our application called simplemvc, when entering in the browser:
localhost/simplemvc/items/index, the received parameter ($url), it will have the value “items/index”.
Then we have the following statements:
1 $url = explode('/', $url);
2
3 $controller = array_shift($url);
4 $controllerClass = 'controllers\\'
5     .ucwords($controller) . 'Controller';
6 $action = array_shift($url);
7 $queryString = $url;
Using the explode function, we convert the received string into a vector. Following the example, if $url has the value “items/index”, then we will have the following vector:
$url[0] = “items” $url[1] = “index”
Then we have $controller = array_shift($url) ;
The array_shift function returns the first element of an array, and removes it from the array. Following the example, in $controller we will have saved “items”.
Then we have:
1 $controllerClass = 'controllers\\'
2     .ucwords($controller) . 'Controller';
What we do here is get the name of the class that represents the desired controller. We know that requests arrive in the form “controller/action”. From the indicated controller, we must obtain the name of the class that corresponds to the controller.
Following the example, $controllerClass will contain the value “controllers\ItemsController”, which corresponds to the name of the class including its namespace (controllers).
Note the use of the ucwords function, which converts the first character of each word in a string to uppercase. In this case “items” becomes “Items”.
Let’s continue:
1 $action = array_shift($url);
2 $queryString = $url;
Now we get the name of the action, in our example, “index”. Recall that array_shift takes and extracts the first element of an array.
At the beginning we had the array: [“items”, “index”]. After the first call to array_shift we will have: [“index”]. After the second call we will have an empty array.
Finally, $queryString will contain…an empty string? Yes, in this case. But suppose that instead of “items/index” we would have received “items/edit/1” as a request. In this case, we would have:
$controller = “items” $controllerClass = “controllers\ItemsController” $action = “edit” $queryString = 1
Let’s continue:
1 if (class_exists($controllerClass)) {
2     ...
3 } else {
4     die(" BadController");
5 }
In the outermost if we check if the requested class (the controller) exists. Otherwise we finish the execution of the script showing a message.
In case the class exists, we have the following line:
1 $parents = class_parents($controllerClass);
The class_parents function returns an array containing the names of all classes that are ancestors of the class passed as a parameter.
What does this mean?
Suppose we have a class “A”. Then we have a class “B” that inherits from “A”. Finally we have a class “C” that inherits from “B”.
class_parents(“C”) will return the following array: [“A”, “B”].
Next we evaluate another condition:
1 if (in_array('core\\Controller', $parents)) {
2     ...
3 } else {
4     die("Bad Controller");
5 }
What we are looking for is to see if in the $parents array, which contains the ancestor classes of $controllerClass, the class “core\Controller” is present.
This means that each controller in our application must extend from the base class “Controller”. We have already seen this many times in Yii, where we have for example a controller class “Client” defined in this way:
class ClientController extends Controller
If the class does not extend “Controller”, then we interrupt the execution of the script with an error message.
If it’s a class extending from “Controller”, we have the last if:
1 if (method_exists($controllerClass, $action)) {
2     $dispatch = new $controllerClass(
3         $controller, $action);
4     call_user_func_array(
5         [$dispatch, $action], $queryString);
6 } else {
7     die("Bad action");
8 }
What we do here is use the method_exists function. Such a function determines whether a given method is present in a given class.
We make sure that the requested action is a method of the desired controller. If this is not the case, we terminate the execution with an error.
If it is present, then we instantiate a new object of the desired controller class. In this case ItemsController.
The call_user_func_array function receives two parameters. The first is an array, where the first element corresponds to the instantiated controller object, and the second to the method that should be called for that controller. The second parameter corresponds to the value that said method will receive as a parameter.
This may sound confusing, but what it means is the following:
From the “items/index” request, the “index” method of “ItemsController” will be called. In that case the index method will receive an empty parameter.
If the request had been “items/edit/1”, then the edit method of ItemsController would have been called, and the method in question would receive the value 1 as a parameter.
Of course, using die to show a message and end the execution is far from an elegant solution, in fact, is not a solution at all, but we’ll take care of that later.
We are closer to the first functional version of our framework. In the next chapter, we’ll be working on the database connection class.
Chapter 05: Database connection
Introduction
Almost every application that we develop we’ll consume data from a source, normally a database. For this book, we will be using MariaDB as our database engine although ideally, our application should be database agnostic. We can accomplish this by introducing abstraction layers. We’ll build a database class that uses PDO internally. PDO provides one abstraction layer, and our class will simplify working with that extension.
Database class
 1 <?php
 2 define('DEVELOPMENT_ENVIROMENT', true);
 3 const CONFIG = [
 4     'DB_SERVER' => 'localhost',
 5     'DB_USER' => 'root',
 6     'DB_PASSWORD' => '',
 7     'DB_DATABASE' => 'simplemvc'
 8 ];
 9 define('SITE_BASE', 'http://localhost/simplemvc/');
10 define('APP_SESSION_ID', 'xeFLcX4gfj1h7WM6Yfrl');
We still don’t have the database simplemvc. That’s ok, we don’t need it just yet.
Now, in the core folder, put the following content in the db.php file:
 1 <?php
 2 namespace core;
 3
 4 class db {
 5   private $_connection;
 6
 7   public function __construct(array $CONFIG)
 8   {
 9     try {
10       $this->_connection = new \PDO(
11         "mysql:host=".$CONFIG["DB_SERVER"].";dbname="
12           .$CONFIG["DB_DATABASE"],
13         $CONFIG["DB_USER"],
14         $CONFIG["DB_PASSWORD"]);
15       $this->_connection->setAttribute(
16         \PDO::ATTR_ERRMODE, \PDO::ERRMODE_EXCEPTION);
17     } catch (\PDOException $e) {
18       trigger_error("Failed connecting to database: "
19         . $e->getMessage(), E_USER_ERROR);
20     }
21   }
22 }
We use our constructor to get a new PDO instance. We take a parameter named CONFIG, which is an array. Note that we are using type hinting to let php know what kind of parameter we should expect. Also, take note of the inverted slash \ at the beginning of the PDO class name. We need this because we are working in the core namespace, so every reference to a class we’ll be interpreted as a reference to a class in that namespace. The slash indicates that we are referencing a class in the global namespace.
There is not much in this function. We,ve wrapped everything in a try catch block, and we trigger an error if the connection fails. trigger_error creates a user-level error message. At this point, you could also write an entry in a log file. But it’s enough for now.
Let’s add another method.
1     /**
2      * Get pdo connection
3      * @return \pdo pdo connection
4      */
5     public function getConnection()
6     {
7         return $this->_connection;
8     }
In this function we simply return the connection.
Now, we will build a method to return a resultset, containing all the records from a table.
 1 /**
 2 * Get all records of the specified table
 3 * @param string table
 4 * @param array $arrFields
 5 * @return array the resulset
 6 */
 7 public function getAll(string $table, array $arrFields)
 8 {
 9     if (!empty($arrFields)) {
10         $fields = implode(',', $arrFields);
11         $sqlQuery = "SELECT $fields FROM $table";
12     } else {
13         $sqlQuery = "SELECT * FROM $table";
14     }
15     $conn = $this->getConnection();
16     $stmt = $conn->prepare($sqlQuery);
17     $stmt->execute();
18     $stmt->setFetchMode(\PDO::FETCH_ASSOC);
19     return $stmt->fetchAll();
20 }
We receive the table name, and optionally an array of field names. We build the query string to return all or some columns of the records, we retrieve the connection, prepare a sentence with the query string, execute it and return the result. Note that we are setting the fetch mode to FETCH_ASSOC, this means we can reference every column of the rows as properties, so we can have something like this:
1 foreach ($clients as $client) {
2 echo $client->name;
3 }
Now, on to the next method:
 1 public function getOne(
 2   string $table, array $arrFields, string $key, int $value
 3 )
 4 {
 5   if (!empty($arrFields)) {
 6     $fields = implode(',', $arrFields);
 7     $sqlQuery = "SELECT $fields FROM $table WHERE $key = \
 8 :value";
 9   } else {
10     $sqlQuery = "SELECT * FROM $table WHERE $key = :value\
11 ";
12   }
13
14   $conn = $this->getConnection();
15   $stmt = $conn->prepare($sqlQuery);
16   $stmt->bindParam(":value", $value, \PDO::PARAM_INT);
17   $stmt->execute();
18   $stmt->setFetchMode(\PDO::FETCH_ASSOC);
19   return $stmt->fetch();
20 }
Now, this method is pretty similar to the previous one (we could definitely use a refactor but we leave it for later), except that we return a single row, based on some field (normally the id).
The next one is a little bit more complex:
 1 public function save(
 2   array $data, string $table, $key = null, $value = null
 3 )
 4 {
 5   $sqlQuery = " $table SET ";
 6
 7   foreach ($data as $k => $v) {
 8     $sqlQuery .= "$k = '$v',";
 9   }
10
11   $sqlQuery = rtrim($sqlQuery, ",");
12
13   if ($key) {
14     $sqlQuery = "UPDATE " . $sqlQuery . " WHERE $key = :v\
15 alue";
16   } else {
17     $sqlQuery = "INSERT INTO " . $sqlQuery;
18   }
19
20   $conn = $this->getConnection();
21   $stmt = $conn->prepare($sqlQuery);
22
23   if ($key) {
24     $stmt->bindParam('value', $value);
25   }
26
27   $stmt->execute();
28
29   return true;
30 }
Let’s analyze this part:
1 foreach ($data as $k => $v) {
2     $sqlQuery .= "$k = '$v',";
3 }
We use the parameter $data, which is an associative array, to build the part of the query where we assign values to the fields. This relies on the fact that the array $data has keys that correspond to the field names. But, as we’ll see later, we rarely use the database class directly. Our models will deal with it.
In this other block:
1 if ($key) {
2   $sqlQuery = "UPDATE " . $sqlQuery . " WHERE $key = :val\
3 ue";
4 } else {
5   $sqlQuery = "INSERT INTO " . $sqlQuery;
6 }
We determine if we are dealing with an insert or an update, based on the presence or not of a key.
Now we’ll present two other short methods:
 1 public function update(
 2     array $data, string $table, $key, $value
 3 )
 4 {
 5     $this->save($data, $table, $key, $value);
 6 }
 7
 8 public function insert(array $data, string $table)
 9 {
10     $this->save($data, $table);
11 }
We are building upon the save method. This is always good, as we should reuse as much as possible.
The last one:
 1 public function delete(
 2   string $table, string $key, int $value
 3 )
 4 {
 5   $conn = $this->getConnection();
 6
 7   $stmt = $conn->prepare("DELETE FROM $table WHERE $key =\
 8  :value");
 9
10   $stmt->bindParam(":value", $value, \PDO::PARAM_INT);
11
12   if ($stmt->execute()) {
13     return true;
14   }
15
16   return false;
17 }
We delete a record based on the value of the key.
And that ’s it. We have everything we need for any kind of interaction with the database.
In the next chapter, we will focus on the Model, View and Controller classes. But, just to be sure everything is right, here is the corresponding gist of the db class.
See you in the next chapter.
Chapter 06: Model, View, Controller
As we said in the last chapter, we will start working on the Model, View and Controller classes. We have already discussed that the library folder contains the classes that build our framework.
Inside that folder, we have two other directories, core and widgets. The core folder, as its name suggests, contains the core classes. Our Model, View and Controller classes will provide the basic functionality, the common behavior that the derived classes - the models, views and controllers of every particular project - will follow.
But first, let’s do some cleanup on our Application class.
In our run function, we have this piece of code:
 1 if (class_exists($controllerClass)) {
 2   $parents = class_parents($controllerClass);
 3   if (in_array('core\\Controller', $parents)) {
 4     if (method_exists($controllerClass, $action)) {
 5       $dispatch = new $controllerClass(
 6         $controller, $action
 7       );
 8       call_user_func_array(
 9         [$dispatch, $action], $queryString
10       );
11     } else {
12       die("Bad action");
13     }
14   } else {
15     die("Bad Controller");
16   }
17 } else {
18   die("Bad Controller");
19 }
We really need to get rid of those die statements. If you don’t have it already, create a file named ResourceNotFoundException.php in the core folder with the following content:
 1 <?php
 2 namespace core;
 3
 4 class ResourceNotFoundException extends \Exception
 5 {
 6     public function __construct(
 7         $message, $code = 0, \Exception $previous = null
 8     )
 9     {
10         parent::__construct($message, $code, $previous);
11     }
12 }
It’s a very simple class, extending from the Exception class. Note the use of the slash \ at the beginning of the name of the class we are extending. This is necessary because we are in the namespace core, so every reference to a class will be interpreted as a class residing in that namespace.
We have our constructor, which simply invokes the parent constructor. At this point you might be wondering why have a constructor whose only purpose is to implement the parent’s constructor. But it’s a good practice, and we could easily add new functionality.
Let’s add another file named Response.php in the core folder with the following content:
 1 <?php
 2 namespace core;
 3
 4 class Response {
 5   public function setResponseHeader($code, $title)
 6   {
 7     header("HTTP/1.0 $code $title");
 8     echo "<h1>404 Not found</h1>";
 9     echo "The page that you have requested could
10       not be found.";
11     exit();
12   }
13 }
We have an only function, setResponseHeader. This function will set a header with the code indicated in the first parameter. At this point, we will only use this function to display 404 errors, but we could easily extend it to include all 4xx errors.
For a complete list of http status codes you can visit this link.
Now we can rewrite our run function as follows:
 1 public function run($url)
 2 {
 3   $url = explode('/', $url);
 4   $controller = array_shift($url);
 5   $controllerClass = 'controllers\\'
 6     . ucwords($controller) . 'Controller';
 7   $action = array_shift($url);
 8   $queryString = $url;
 9
10   try {
11     if (class_exists($controllerClass)) {
12       $parents = class_parents($controllerClass);        \
13
14
15       if (in_array('core\\Controller', $parents)) {
16         if (method_exists($controllerClass, $action)) {
17           $dispatch = new $controllerClass(
18             $controllerClass, $action
19           );
20           call_user_func_array(
21             [$dispatch, $action], $queryString
22           );
23         } else {
24           // Bad action
25           throw new ResourceNotFoundException(
26             'Not found', 404
27           );
28         }
29       } else {
30         // Bad controller
31         throw new ResourceNotFoundException(
32           'Not found', 404
33         );
34       }
35     } else {
36       // Bad controller
37       throw new ResourceNotFoundException(
38         'Not found', 404
39       );
40     }
41   } catch (ResourceNotFoundException $e) {
42     $response = new Response();
43     $response->setResponseHeader(404, 'Not found');
44   }
45 }
Instead of spitting a message we throw an exception of type ResourceNotFoundException. The exception is captured by our catch sentence, and then an adequate response is shown.
At this point, you might be tempted to execute the application. Go ahead, open the browser and type http://localhost/simplemvc/nocontroller/noaction. You should see something like this (Figure 31):
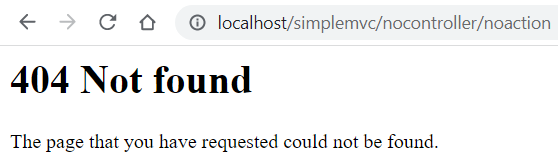
Before we continue, let’s make a small change. It is not mandatory, but convenient. Right now, our config.php file has the SITE_BASE constant defined as:
1 define('SITE_BASE', 'http://localhost/simplemvc/');
We’ll use a virtual host, something that we already saw in previous chapters. Change the line to:
1 define('SITE_BASE', 'http://simplemvc.test/');
Now open the httpd-vhosts.conf file and add these lines:
1 <VirtualHost *:80>
2     DocumentRoot "C:/xampp/htdocs/simplemvc/public"
3     ServerName simplemvc.test
4 </VirtualHost>
The final step is change the hosts file to include this line:
127.0.0.1 simplemvc.test
You can choose to skip these steps, it will only affect the address that you must type in the browser. With these changes we can simply use simplemvc.test, which is shorter.
Now we can concentrate on the main purpose of this chapter. Since chapter 05 dealt with the database class, it is a good idea to continue the Model class.
 1 <?php
 2 namespace core;
 3
 4 class Model {
 5   protected $table;
 6   protected $db;
 7   protected $key;
 8   private $data;
 9
10   public function __construct($table)
11   {
12     $this->table = $table;
13     $this->db = new db(CONFIG);
14   }
15
16   public function all($arrFields = [])
17   {
18     return $this->db->getAll($this->table, $arrFields);
19   }
20
21   private function find($id, $arrFields = [])
22   {
23     return
24       $this->db->getOne(
25         $this->table, $arrFields, 'id', $id
26       );
27   }
28
29   public function load($data)
30   {
31     foreach ($data as $key => $value) {
32       $this->data[$key] = $this->$key = $value;
33     }
34   }
35
36   public function loadModel($id)
37   {
38     $result = $this->find($id, []);
39
40     if ($result) {
41       $this->load($result);
42
43       return $this;
44     }
45     return false;
46   }
47
48   public function save($id = null)
49   {
50     if ($id) {
51      $result =
52       $this->db->update(
53         $this->data, $this->table, $this->key, $id
54       );
55     } else {
56      $result =
57       $this->db->insert($this->data, $this->table);
58     }
59
60     return $result;
61   }
62
63   public function del($key, $value)
64   {
65     return $this->db->delete($this->table, $key, $value);
66   }
67
68   public function __set($name, $value)
69   {
70     if (method_exists($this, 'set' . ucfirst($name))) {
71       $method = 'set' . ucfirst($name);
72       return $this->$method($value);
73     }
74
75     return $this->$name = $value;
76   }
77
78   public function __get($name)
79   {
80     if (method_exists($this, 'get' . ucfirst($name))) {
81       $method = 'get' . ucfirst($name);
82       return $this->$method();
83     }
84
85     return $this->$name;
86   }
87 }
This is the whole class, only 80 lines of code in my editor.
Let’s go through it.
1 protected $table;
2 protected $db;
3 protected $key;
4 private $data;
The $table property will simply hold the name of the database table the model will be attached to. In our framework, we’ll have a one to one correspondence between models and tables. This is a fairly simple but effective way to organize our projects. Of course, we will have to account for the relationships between tables, but for now we can work with what we have.
Then we have a property to hold an instance of our database class. $key will hold the name of the table field that identifies a record, normally id.
Finally, $data will be used to hold an associative array of properties values. We don’t need to reference $data from the project’s models, so we declare it as private.
On with the methods.
1 public function __construct($table)
2 {
3     $this->table = $table;
4     $this->db = new db(CONFIG);
5 }
The constructor is very simple. It takes the table name as a parameter, and creates an instance of the database class.
 1 public function all($arrFields = [])
 2 {
 3   return $this->db->getAll($this->table, $arrFields);
 4 }
 5
 6 private function find($id, $arrFields = [])
 7 {
 8   return $this->db->getOne(
 9     $this->table, $arrFields, 'id', $id
10   );
11 }
These two methods are very similar. Just one line of code each, getting all or one record from the table.
Now, before we get to the rest of the methods, it’s convenient to focus on the implementation of two magic methods, __set and __get:
 1 public function __set($name, $value)
 2 {
 3     if (method_exists($this, 'set' . ucfirst($name))) {
 4         $method = 'set' . ucfirst($name);
 5         return $this->$method($value);
 6     }
 7
 8     return $this->$name = $value;
 9 }
10
11 public function __get($name)
12 {
13     if (method_exists($this, 'get' . ucfirst($name))) {
14         $method = 'get' . ucfirst($name);
15         return $this->$method();
16     }
17
18     return $this->$name;
19 }
We already saw these methods in previous chapters. We used them in the Post class of the blog example. Now, we are extracting them to the Model class, from which every model in our application will inherit.
We have the base Model class in place, and it is time to move to the base Controller class.
Change the content of the Controller.php file like this:
 1 <?php
 2 namespace core;
 3
 4 class Controller
 5 {
 6     private $model;
 7
 8     public function __construct()
 9     {
10
11     }
12
13     public function index()
14     {
15
16     }
17 }
Very simple, the methods are not implemented, but it is a necessary skeleton to our application.
Now, the final piece is the View component. Change the content of the View.php file as follows:
 1 <?php
 2 namespace core;
 3
 4 class View {
 5   private $controller = '';
 6   private $action = '';
 7   private $variables = [];
 8
 9   public function __construct($controller)
10   {
11     $this->controller = $controller;
12   }
13
14   public function setAction($action)
15   {
16     $this->action = $action;
17   }
18
19   public function set($name, $value)
20   {
21     $this->variables[$name] = $value;
22   }
23
24   public function render($main = true, $scripts = '')
25   {
26     extract($this->variables);
27     include ROOT . DS . 'application'. DS . 'views'
28      . DS . $this->controller . DS . $this->action
29      . '.php';
30   }
31 }
Now, this class serves as the foundation for the views of our application.
If the user is visiting the url http://simplemvc.test/client/index, for example, we already know that a ClientController should be in place, with an index method. In some part of that method, there will present some lines like these:
1 $this->view->setAction('index');
2
3 $this->view->set('data', $data);
4
5 $this->view->render();
We set the action to index, and that means that the view will try to include a file called index.php located in a client folder. In fact it will look for c:/xampp/htdocs/simplemvc.test/application/views/index.php
Let’s go back to index.php located in the public directory. It has the following content:
 1 <?php
 2 define('DS', DIRECTORY_SEPARATOR);
 3 define('ROOT', dirname(dirname(__FILE__)));
 4
 5 if (!isset($_GET['url'])) $_GET['url'] = 'site/index';
 6
 7 $url = $_GET['url'];
 8
 9 require_once(ROOT . DS . 'library' . DS
10     . 'bootstrap.php');
So, if there is no query string with the controller and action, it will default to site/index. That is, it will look for a SiteController class, and a method called index. Following the convention, this method will render a view file called index.php
Summary
In this chapter we have laid the foundations of our framework. It may not seem like much yet, but it has given us a clean folder structure and a set of extensible classes to build increasingly complex applications.
In the next chapter, we’ll build one simple example application to show how to extend from the core classes presented here.
See you soon!
Chapter 07: First application
In this chapter, we’ll build a very simple application that performs CRUD operations upon a single table. The purpose of this is to have some example functional code that you can use to build the controllers specific to your application.
As you had noted, we don’t have a database yet, so the first step is to create our “simplemvc” database. You can see how that is done using phpMyAdmin in figure 32:
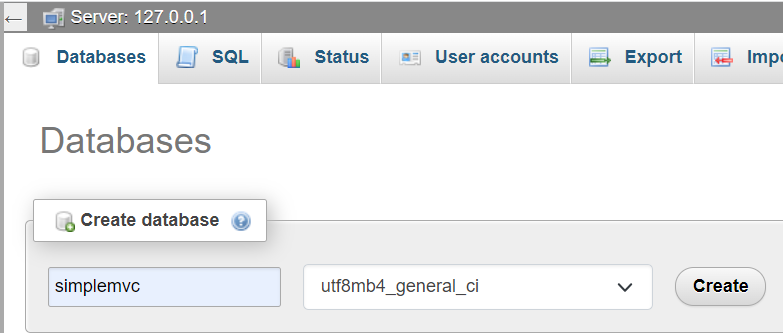
Simply click Create leaving the default character collation.
Next is creating the table, we’ll call it “clients”. Go to the SQL and use the following command:
 1 CREATE TABLE `clients` (
 2   `id` int(11) NOT NULL AUTO_INCREMENT,
 3   `firstname` varchar(30) NOT NULL,
 4   `lastname` varchar(30) NOT NULL,
 5   `email` varchar(50) DEFAULT NULL,
 6   `reg_date` timestamp NOT NULL
 7     DEFAULT CURRENT_TIMESTAMP ON UPDATE CURRENT_TIMESTAMP,
 8   `image_path` varchar(200) DEFAULT NULL,
 9   PRIMARY KEY (id)
10 );
You should see the newly created table. Now we are ready to create our model, controller and views.
The Client Model
Inside application -> models create a file named Client.php with the following content:
 1 <?php
 2 namespace models;
 3 use core\Model as Model;
 4
 5
 6 class Client extends Model {
 7     private $firstname;
 8     private $lastname;
 9     private $email;
10
11
12     public function __construct($table)
13     {
14         $this->table = $table;
15
16
17         parent::__construct($this->table, $this->db);
18         $this->key = 'id';
19     }
20
21
22     public function setFirstName($firstName)
23     {
24         $this->firstname = $firstName;
25     }
26
27
28     public function setLastName($lastName)
29     {
30         $this->lastname = $lastName;
31     }
32
33
34     public function setEmail($email)
35     {
36         $this->email = $email;
37     }
38
39
40     public function getFirstName()
41     {
42         return $this->firstname;
43     }
44
45
46     public function getLastName()
47     {
48         return $this->lastname;
49     }
50
51
52     public function getEmail()
53     {
54         return $this->email;
55     }
56 }
Nothing much. Our class extends from the core Model class. We define private properties corresponding to the table fields susceptible to change and the corresponding getters and setters. One thing to take note of is the constructor.
It takes the name of the table the model we’ll be attached to.
The we have this line:
1 parent::__construct($this->table, $this->db);
We don’t have a db property in the Client model, but it is defined in the base class. Then we have:
1 $this->key = 'id';
This is necessary to establish the name of the primary key of the table. We could define a default value in the base model class.
On to the Controller.
The ClientController
In application -> controllers create a file named ClientController.php with the following content:
 1 <?php
 2 namespace controllers;
 3
 4
 5 use core\Controller as Controller;
 6 use models\Client as Client;
 7 use core\View as View;
 8 use core\db as db;
 9
10
11 class ClientController extends Controller {
12     private $client;
13     private $view;
14     private $db;
15
16
17     public function __construct()
18     {
19         $this->client = new Client('clients');
20         $this->view = new View('clients');
21     }
22
23
24     public function index()
25     {
26         $this->view->setAction('index');
27         $this->view->render();
28     }
29 }
Let’s see what’s going on here.
Note this line in the constructor:
1 $this->client = new Client('clients');
We don’t see a __construct function in our Client model, but if you remember, the core Model class has the constructor defined as follows:
1 public function __construct($table)
2     {
3         $this->table = $table;
4         $this->db = new db(CONFIG);
5     }
So as you can see, it receives the table name as a parameter. Clients inherited this behavior from its parent class.
The next line of the constructor:
1 $this->view = new View('clients');
Instantiates a view object. The parameter will ultimately make reference to a folder inside the application -> views directory. So, we need to create that folder and name it clients.
Each method of our ClientController will render a view that will correspond to a file inside the clients folder. We can see this in our index method:
1 public function index()
2     {
3         $this->view->setAction('index');
4         $this->view->render();
5     }
As you can deduce, we need to create the index.php file inside the application -> views -> clients folder. For now, we’ll simply display a message. Inside index.php:
1 <h1>Clients</h1>
Just to be sure, our application folders should look like the ones shown in figure 33:
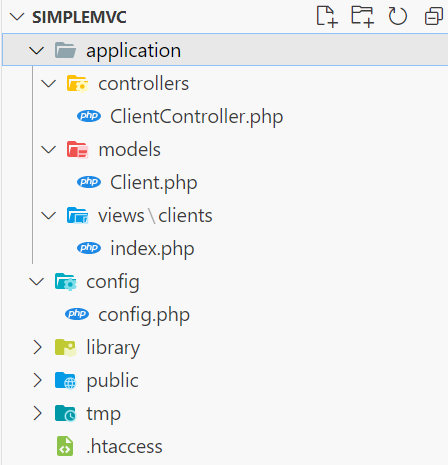
Now if you visit http://simplemvc.test/client/index in the browser, you’ll get the following output (Figure 34).

Now, the index method should be used to list the table records, but we don’t have any yet. Go ahead and add some clients, you don’t need to introduce a value for the reg_date field as it defaults to the current date.
Now we can modify the index method as follows:
1 public function index()
2     {
3         $clients = $this->client->all();
4         $this->view->setAction('index');
5         $this->view->set('clients', $clients);
6         $this->view->render();
7     }
And the index view:
 1 <h1>Clients</h1>
 2 <table>
 3     <thead>
 4         <tr>
 5             <th>First Name</th>
 6             <th>Last Name</th>
 7             <th>Email</th>
 8         </tr>
 9     </thead>
10     <tbody>
11         <?php
12         foreach ($clients as $client):
13         ?>
14             <tr>
15                 <td><?= $client["firstname"]; ?></td>
16                 <td><?= $client["lastname"]; ?></td>
17                 <td><?= $client["email"]; ?></td>
18             </tr>
19         <?php endforeach; ?>
20     </tbody>
21 </table>
Now we can see our clients in a table (Figure 35):
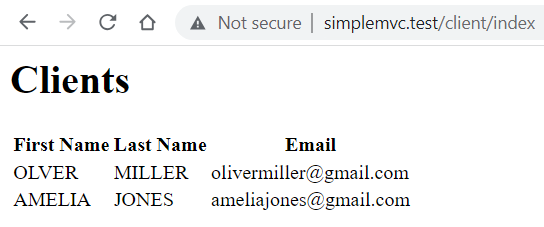
Of course, this approach is not practical for a significant number of records, but we’ll fix it later. We are now ready to display the details of a single client.
First, we need to change the properties definitions of our Client model:
1 public $id;
2     private $firstname;
3     private $lastname;
4     private $email;
5     public $reg_date;
6     public $image_path;
We need to declare some properties as public so we won’t get an error when we load the model. We can fix that later. Now add the following method to ClientController:
 1 public function view($id)
 2     {
 3         $client = $this->client->loadModel($id);
 4
 5
 6         if ($client) {
 7             $this->view->setAction('view');
 8             $this->view->set('client', $client);
 9             $this->view->render();
10         }
11     }
And we need to add the view. In application -> views -> clients add a file named view.php with the following content:
1 <h2><?= $client->firstname . ' '
2     . $client->lastname; ?></h2>
3 <?php
4 echo $client->email;
Now if we go to http://simplemvc.test/client/view/1 we should be able to see the details of the client with id 2. If we type an id that is not existent, then we’ll get a blank screen.
We need to link the index view, with the details view. Change the contents of the index view as follows:
 1 <h1>Clients</h1>
 2 <table>
 3   <thead>
 4       <tr>
 5           <th>First Name</th>
 6           <th>Last Name</th>
 7           <th>Email</th>
 8           <th>Actions</th>
 9       </tr>
10   </thead>
11   <tbody>
12       <?php
13       foreach ($clients as $client):
14       ?>
15         <tr>
16           <td><?= $client["firstname"]; ?></td>
17           <td><?= $client["lastname"]; ?></td>
18           <td><?= $client["email"]; ?></td>
19           <td>
20             <a href="<?= SITE_BASE.'client/view/'
21                 .$client['id'] ?>">View</a>
22           </td>
23         </tr>
24       <?php endforeach; ?>
25   </tbody>
26 </table>
It should give us the output shown in Figure 36:
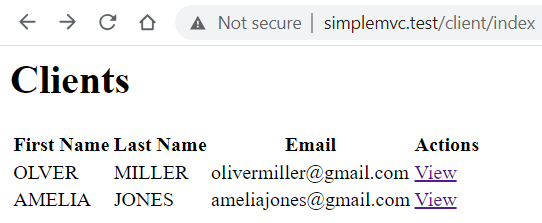
We can move now to adding a new record. Add the following method in ClientController:
 1 public function add()
 2 {
 3   if ($_SERVER["REQUEST_METHOD"] == 'POST') {
 4     $data = [
 5       'firstname' => $_POST["firstname"],
 6       'lastname' => $_POST["lastname"],
 7       'email' => $_POST["email"]
 8     ];
 9
10
11     $this->client->load($data);
12     $this->client->save();
13
14     header('Location: ' . SITE_BASE . 'client/index/');
15     exit;
16   }
17
18   $this->view->setAction('add');
19   $this->view->set('client', $this->client);
20   $this->view->render();
21 }
Next is time to add the view. Create a file named add.php with the following content:
 1 <form action="<?= SITE_BASE ?>client/add" method="POST">
 2   <div>
 3     <label for="firstname">First Name:</label>
 4     <input type="text" name="firstname"
 5         value="<?= $client->firstname ?>">
 6   </div>
 7   <div>
 8     <label for="lastname">Last Name:</label>
 9     <input type="text" name="lastname"
10         value="<?= $client->lastname ?>">
11   </div>
12   <div>
13     <label for="email">Email:</label>
14     <input type="text" name="email"
15         value="<?= $client->email ?>">
16   </div>
17   <button type="submit">Save</button>
18 </form>
Now go ahead and visit http://simplemvc.test/client/add
You should see the form shown in Figure 37:
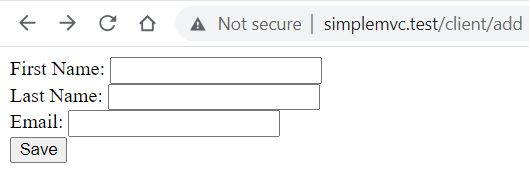
Go ahead and fill the form. The application will redirect you to the index with the new record added.
We can add a link to add a new client in the index view. Right under the h1 title:
1 <a href="<?= SITE_BASE ?>/client/add">New Client</a>
On to the edit method:
 1 public function edit($id)
 2 {
 3   if ($_SERVER["REQUEST_METHOD"] == 'POST') {
 4     $data = [
 5       'firstname' => $_POST["firstname"],
 6       'lastname' => $_POST["lastname"],
 7       'email' => $_POST["email"]
 8     ];
 9
10
11     $this->client->load($data);
12     $this->client->save();
13
14     header('Location: ' . SITE_BASE . 'client/index/');
15     exit;
16   }
17
18   $this->client->loadModel($id);
19   $this->view->setAction('edit');
20   $this->view->set('client', $this->client);
21   $this->view->render();
22 }
It’s almost identical. The edit view. Create a file named edit.php with the following content:
 1 <form action="<?= SITE_BASE ?>client/edit/<?= $id ?>"
 2   method="POST">
 3   <div>
 4     <label for="firstname">First Name:</label>
 5     <input type="text" name="firstname"
 6         value="<?= $client->firstname ?>">
 7   </div>
 8   <div>
 9     <label for="lastname">Last Name:</label>
10     <input type="text" name="lastname"
11         value="<?= $client->lastname ?>">
12   </div>
13   <div>
14     <label for="email">Email:</label>
15     <input type="text" name="email"
16         value="<?= $client->email ?>">
17   </div>
18   <button type="submit">Save</button>
19 </form>
Again, almost identical. The only difference is the action. It’s time to do some refactoring.
Let’s move the field definitions to a partial view. Create a file called _form.php:
 1 <div>
 2   <label for="firstname">First Name:</label>
 3   <input type="text" name="firstname"
 4     value="<?= $client->firstname ?>">
 5 </div>
 6 <div>
 7   <label for="lastname">Last Name:</label>
 8   <input type="text" name="lastname"
 9     value="<?= $client->lastname ?>">
10 </div>
11 <div>
12   <label for="email">Email:</label>
13   <input type="text" name="email"
14     value="<?= $client->email ?>">
15 </div>
16 <button type="submit">Save</button>
Now we can rewrite add.php:
1 <form action="<?= SITE_BASE ?>client/add" method="POST">
2   <?php include '_form.php'; ?>
3 </form>
And edit.php
1 <form action="<?= SITE_BASE ?>client/edit/<?= $id ?>"
2     method="POST">
3   <?php include '_form.php'; ?>
4 </form>
Finally, we need to add the edit links to every row. I’ll paste the entire index.php content:
 1 <h1>Clients</h1>
 2 <a href="<?= SITE_BASE ?>client/add">New Client</a>
 3 <table>
 4   <thead>
 5     <tr>
 6       <th>First Name</th>
 7       <th>Last Name</th>
 8       <th>Email</th>
 9       <th>Actions</th>
10     </tr>
11   </thead>
12   <tbody>
13     <?php
14     foreach ($clients as $client):
15     ?>
16       <tr>
17         <td><?= $client["firstname"]; ?></td>
18         <td><?= $client["lastname"]; ?></td>
19         <td><?= $client["email"]; ?></td>
20         <td>
21           <a href="<?= SITE_BASE.'client/view/'
22             .$client['id'] ?>">View</a>
23           <a href="<?= SITE_BASE.'client/edit/'
24             .$client['id'] ?>">Edit</a>
25         </td>
26       </tr>
27     <?php endforeach; ?>
28   </tbody>
29 </table>
It’s time to add the functionality to delete records. Since we want to prevent an accidental deletion, we’ll add this line in the actions columns:
1 <a href="#" onclick="confirm_delete(<?= $client['id'] ?>)\
2 ">Delete</a>
We are calling a JavaScript function that will display a confirmation message. Add this at the top of index.php:
 1 <script>
 2 function confirm_delete(id)
 3 {
 4   if (
 5     confirm("Are you sure you want to delete this record?\
 6 ")
 7   ) {
 8     location.href = "<?= SITE_BASE ?>client/delete/"+id;
 9   }
10 }
11 </script>
Now go back to the ClientController and add the following method:
1 public function delete($id)
2 {
3     $this->client->del("id", $id);
4     header('Location: ' . SITE_BASE . 'client/index/');
5     exit;
6 }
We use the Model’s delete method, and then redirect to the index page.
Adding a main layout
Take a look at the render method in the View class of the core folder:
1 public function render($main = true, $scripts = '')
2 {
3   extract($this->variables);
4   include ROOT . DS . 'application'. DS . 'views'
5     . DS . $this->controller . DS . $this->action
6     . '.php';
7 }
We are declaring a $main parameter that we’re not using yet. We’ll use it to conditionally show a main layout for our site. Rewrite the method as follows:
 1 public function render($main = true, $scripts = '')
 2 {
 3   extract($this->variables);
 4
 5
 6   if ($main == true) {
 7     ob_start();
 8     include ROOT . DS . 'application'. DS . 'views'
 9       . DS . $this->controller . DS . $this->action
10         . '.php';
11     $content = ob_get_clean();
12
13
14     include ROOT . DS . 'application'. DS . 'views'
15       . DS . 'layouts' . DS . 'main.php';
16   } else {
17     include ROOT . DS . 'application'. DS . 'views'
18       . DS . $this->controller . DS . $this->action
19         . '.php';
20   }
21 }
We see some things that need an explanation.
The function ob_start() opens a buffer and stores the output. So, in the next line when we include the view file, the contents of the file are not automatically displayed but stored in the buffer.
Then we do
1 $content = ob_get_clean()
Storing the buffer contents in the variable.
Then we include a main view, that is expected to be found in a layouts folder.
Create a folder called layouts in views, and then inside that folder add a file called main.php with the following contents:
 1 <html lang="en">
 2 <head>
 3   <meta charset="UTF-8">
 4   <meta name="viewport" content="width=device-width,
 5     initial-scale=1.0">
 6   <link rel="stylesheet"
 7     href="<?= SITE_BASE ?>css/main.css">
 8   <title>SimpleMVC</title>
 9 </head>
10 <body>
11   <?= $content ?>
12 </body>
13 </html>
We make reference to a css file, but we don’t have it yet. Go to the public folder, and then the css folder. Create a file called main.css with the following content:
 1 body {
 2     font-family: Arial, Helvetica, Serif;
 3     font-size: 14px;
 4 }
 5
 6 table {
 7     width: 50%;
 8     border-collapse: collapse;
 9     text-align: center;
10 }
11
12 a {
13     text-decoration: none;
14 }
15
16 table thead tr th {
17     background-color: #73d488;
18     border: 1px solid #ccc;
19     padding: 5px;
20 }
21
22 table tbody tr td {
23     border: 1px solid #ccc;
24 }
25
26 form  {
27     width: 50%;
28 }
29
30 input[type=text], select, textarea {
31     width: 100%;
32     padding: 12px;
33     border: 1px solid #ccc;
34     border-radius: 4px;
35     resize: vertical;
36 }
37
38 input[type=email] {
39     width: 100%;
40     padding: 12px;
41     border: 1px solid #ccc;
42     border-radius: 4px;
43     resize: vertical;
44 }
45
46 label {
47     padding: 12px 12px 12px 0;
48     display: inline-block;
49     font-weight: bold;
50 }
51
52 button[type=submit] {
53     width: 100%;
54     background-color: #04AA6D;
55     color: white;
56     padding: 12px 20px;
57     border: none;
58     border-radius: 4px;
59     cursor: pointer;
60     font-weight: bold;
61     font-size: 16px;
62 }
63
64 .boton {
65     padding: 10px 10px;
66     background-color: #73d488;
67     color: white;
68     text-decoration: none;
69     display: inline-block;
70     border-radius: 2px;
71 }
If we now refresh the page, we should see something like this (Figure 38):
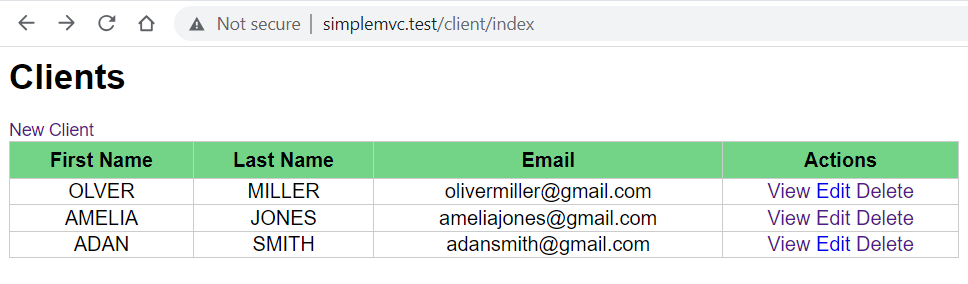
And the form (Figure 39):
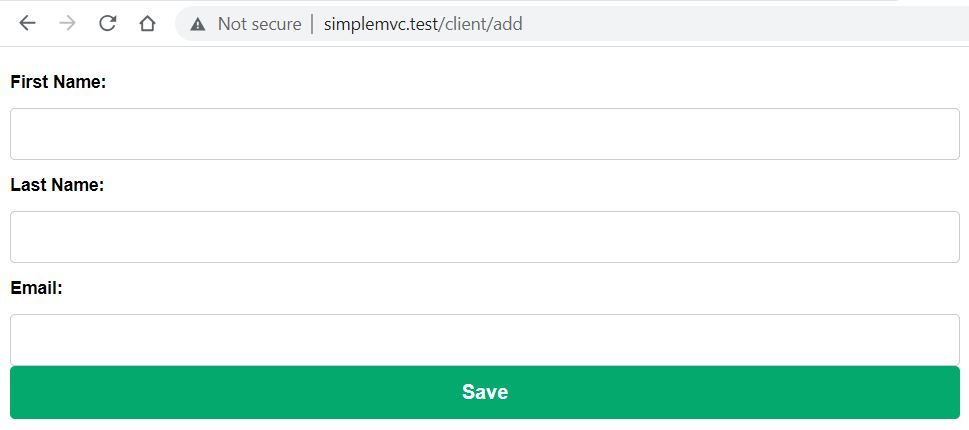
Far from perfect, but it’s certainly better.
DataTable widget
I want to finish this chapter introducing a widget. Let’s analyze this situation: suppose we have a table with hundreds or even thousands of clients. We will need to write the logic to paginate the results. And we need to code the search and order functionality every time we need something similar.
We can make use of some useful plugin called jquery datatable. The initialization is very simple, and with just a line of code we can have a table with pagination, search and order capabilities. But if you want to implement these functions on the server side, it’s a bit more complicated.
Let’s start rewriting a the main.php layout as follows:
 1 <html lang="en">
 2 <head>
 3   <meta charset="UTF-8">
 4   <meta name="viewport" content="width=device-width,
 5     initial-scale=1.0">
 6   <script
 7   src="https://code.jquery.com/jquery-3.7.0.min.js"
 8   integrity
 9   ="sha256-2Pmvv0kuTBOenSvLm6bvfBSSHrUJ+3A7x6P5Ebd07/g="
10   crossorigin="anonymous"></script>
11   <link rel="stylesheet"
12     href="<?= SITE_BASE ?>css/main.css">
13   <link rel="stylesheet"
14   href
15   ="//cdn.datatables.net/1.13.4/css/jquery.dataTables.min\
16 .css">
17   <script
18   src="https://cdn.jsdelivr.net/npm/sweetalert2@11">
19   </script>
20   <title>SimpleMVC</title>
21 </head>
22 <body>
23   <?= $content ?>
24   <script
25   src="//cdn.datatables.net/1.13.4/js/jquery.dataTables.m\
26 in.js">
27   </script>
28   <script type="text/javascript">
29     <?= $scripts; ?>
30   </script>
31 </body>
32 </html>
Now, the text word wrapping could cause problems, so I will provide a gist
We are including jquery and the jquery datatable stylesheets in the head. We also are adding SweetAlert, which is a beautiful replacement for the default JavaScript popup.
Let’s open the widgets folder, and create a file named DataTable.php with the following content:
 1 <?php
 2 namespace widgets;
 3
 4 class DataTable
 5 {
 6     private $cols = [];
 7     private $key = '';
 8     private $controller;
 9
10     public function __construct($cols, $key, $controller)
11     {
12         $this->cols = $cols;
13         $this->key = $key;
14         $this->controller = $controller;
15     }
16
17     public function render()
18     {
19         $cols = $this->cols;
20         $controller = $this->controller;
21         $key = $this->key;
22
23
24         ob_start();
25         include 'datatableview.php';
26         echo ob_get_clean();
27     }
28 }
This is the class definition of our widget. It takes the names of the fields of the table, the primary key of the table, and the name of the controller.
Then it includes the view. Add the datatableview.php with the following content:
 1 <div>
 2   <table id="data-table">
 3       <thead>
 4       <tr>
 5         <?php
 6         $i = 0;
 7         $col_data = "";
 8         foreach ($cols as $col) {
 9           if ($col != $key) {
10             echo "<th>"
11               . ucwords( str_replace("_", " ", $col) )
12               . "</th>";
13             $col_data .= '{"data": '.$i.'},';
14           }
15           $i++;
16         }
17         ?>
18         <th>View / Edit / Delete</th>
19       </tr>
20       </thead>
21   </table>
22 </div>
23 <script>
24 function del(id) {
25   Swal.fire({
26     title: 'Are you sure you want to delete this record?',
27     icon: 'warning',
28     showCancelButton: true,
29     confirmButtonColor: '#3085d6',
30     cancelButtonColor: '#d33',
31     confirmButtonText: 'Si',
32     cancelButtonText: 'No'
33   }).then((result) => {
34     if (result.isConfirmed) {
35       var param = {
36         "id" : id
37       };
38       $.ajax({
39         type: "POST",
40         url: '<?= SITE_BASE . $controller ?>/delete',
41         data: param,
42         success:  function (response) {
43           if (response == "success") {
44             table.ajax.reload();
45           }
46         }
47       });
48     }
49   });
50 }
51 </script>
It looks more complex than it really is. We have these lines:
1 $i = 0;
2 foreach ($cols as $col) {
3     if ($col != $key) {
4          echo "<th>"
5             . ucwords( str_replace("_", " ", $col) )
6             . "</th>";
7     }
8     $i++;
9 }
For each of the columns, we create a table column with the name of the fields capitalized.
Go back to the ClientController and the following line:
1 use widgets\DataTable as DataTable;
And then rewrite the index method as follows:
 1 public function index()
 2 {
 3   /*$clients = $this->client->all();
 4   $this->view->setAction('index');
 5   $this->view->set('clients', $clients);
 6   $this->view->render();*/
 7
 8   $dataTable = new DataTable(
 9   ['firstname', 'lastname', 'email', 'id'], 'id', 'client'
10   );
11
12   $this->view->setAction("index");
13   $this->view->set('grid', $dataTable);
14
15   $scripts = <<<scripts
16   $( document ).ready(function() {
17     table = $('#data-table').DataTable({
18       "ajax":{
19         url :"/client/data", // json datasource
20         type: "post"  // type of method, GET/POST/DELETE
21       },
22       columns: [
23         {"data": 0},{"data": 1},{"data": 2}, {
24           data: null,
25           orderable: false,
26           searchable: false,
27           className: "center",
28           render: function (data, type, full, meta) {
29             return '<a href="/client/view/'+data[3]
30                 +'" title="View">View</a>' + ' ' +
31               '<a href="/client/edit/'+data[3]
32                 +'" title="Edit">Edit</a>' + ' ' +
33               '<a href="javascript: void(0);"
34                 title="Delete" onclick="del('+data[3]+')">
35                 Delete
36               </a>';
37           }
38         }
39       ]
40     });
41   });
42   scripts;
43   return $this->view->render(true, $scripts);
44 }
Note that the previous content is commented out in case you want to reuse it in the future.
Let’s see what’s going on. First we initialize the widget:
1 $dataTable = new DataTable(
2   ['firstname', 'lastname', 'email', 'id'], 'id', 'client'
3 );
We will display the firstname, lastname and the email. The id is necessary to call to the view, update and delete methods.
Then we have:
1 $this->view->setAction("index");
2 $this->view->set('grid', $dataTable);
We set the corresponding action, and pass the datatable as a variable named grid.
Then we have:
 1 $scripts = <<<scripts
 2 $( document ).ready(function() {
 3   table = $('#data-table').DataTable({
 4     "ajax":{
 5       url :"/client/data", // json datasource
 6       type: "post"  // type of method, GET/POST/DELETE
 7     },
 8     columns: [
 9       {"data": 0},{"data": 1},{"data": 2}, {
10         data: null,
11         orderable: false,
12         searchable: false,
13         className: "center",
14         render: function (data, type, full, meta) {
15           return '<a href="/client/view/'+data[3]
16             +'" title="View">View</a>' + ' ' +
17             '<a href="/client/edit/'+data[3]
18             +'" title="Edit">Edit</a>' + ' ' +
19             '<a href="javascript: void(0);"
20               title="Delete" onclick="del('+data[3]+')">
21               Delete
22             </a>';
23         }
24       }
25     ]
26   });
27 });
28 scripts;
The characters <<< allows us to write a long text, which contains the javascript necessary to initialize the jquery datatable.
The lines:
1 "ajax":{
2     url :"/client/data", // json datasource
3     type: "post"  // type of method, GET/POST/DELETE
4 },
Define the url from which the data to populate the table will be obtained, and the method used to send the ajax petition.
Then we have the columns definition:
1 {"data": 0},{"data": 1},{"data": 2},
We defined the first 3 columns, that will simply display the data without transformations. The fourth column, however, needs to display the links to View, Delete and Delete.
 1 {
 2     data: null,
 3     orderable: false,
 4     searchable: false,
 5     className: "center",
 6     render: function (data, type, full, meta) {
 7         return '<a href="/client/view/'
 8           +data[3]+'" title="View">View</a>' + ' ' +
 9             '<a href="/client/edit/'
10           +data[3]+'" title="Edit">Edit</a>' + ' ' +
11             '<a href="javascript: void(0);"
12               title="Delete" onclick="del('+data[3]+')">
13               Delete
14             </a>';
15     }
16 }
This column won’t be orderable or searchable, and will render the links to the view and edit methods of the controller. The third link, however, calls the del method that is part of our widget.
Now our index view only needs to have one line of code:
1 <?php $grid->render(); ?>
You can comment out everything else if you don’t want to delete it.
It won’t work just yet. We need to add the data method to the ClientController:
 1 public function data()
 2 {
 3   $params = $_REQUEST;
 4
 5   $where = "";
 6
 7
 8   $columns = array(
 9     0 =>'firstname',
10     1 =>'lastname',
11     2 =>'email',
12     3 =>'id'
13   );
14
15
16   $data = [];
17
18
19   $queryTot = $queryRec = "SELECT firstname,
20     lastname, email, id FROM clients";
21
22
23   // check search value exist
24   if( !empty($params['search']['value']) ) {
25     $where .=" WHERE ";
26     $where .=" ( firstname LIKE '"
27       .$params['search']['value']."%' ";
28     $where .=" OR lastname LIKE '"
29       .$params['search']['value']."%' ";
30     $where .=" OR email LIKE '"
31       .$params['search']['value']."%' )";
32
33
34     $queryTot .= $where;
35     $queryRec .= $where;
36   }
37
38
39   if( !empty($params['order'][0]) ) {
40     $queryRec .= " ORDER BY "
41       . $columns[$params['order'][0]['column']]." "
42       .$params['order'][0]['dir']." LIMIT "
43       .$params['start']." ,".$params['length']." ";
44   }
45
46
47   $this->db = new db(CONFIG);
48
49
50   $clients = $this->db->query($queryRec);
51
52
53   foreach ($clients as $client) {
54     foreach ($client as $key => $value) {
55       $item[] = $value;
56     }
57     $data[] = $item;
58     $item = [];
59   }
60
61
62   $totalRecords = count($this->db->query($queryTot));
63
64
65   $draw = ( !empty($params['draw']) )
66     ? intval( $params['draw'] )
67     : false;
68
69
70   $json_data = array(
71     "draw"            => $draw,
72     "recordsTotal"    => intval( $totalRecords ),
73     "recordsFiltered" => intval($totalRecords),
74     "data"            => $data   // total data array
75   );
76
77
78   echo json_encode($json_data);  // send data as json
79   exit;
80 }
The line:
1 $params = $_REQUEST;
Allows us to capture the request sent by the jquery datatable plugin. This request may contain the column the user wants to order by, or the string search to filter records.
In:
1 $params['search']['value']
We have the value that the user has entered in the search box. We can add the corresponding conditions to the query based on that:
 1 if( !empty($params['search']['value']) ) {
 2   $where .=" WHERE ";
 3   $where .=" ( firstname LIKE '"
 4     .$params['search']['value']."%' ";
 5   $where .=" OR lastname LIKE '"
 6     .$params['search']['value']."%' ";
 7   $where .=" OR email LIKE '"
 8     .$params['search']['value']."%' )";
 9
10
11   $queryTot .= $where;
12   $queryRec .= $where;
13 }
Something similar happens to the order criteria:
1 if( !empty($params['order'][0]) ) {
2     $queryRec .= " ORDER BY "
3       . $columns[$params['order'][0]['column']]
4       ." ".$params['order'][0]['dir']." LIMIT "
5       .$params['start']." ,".$params['length']." ";
6 }
The last lines send the data as json:
1 echo json_encode($json_data);  // send data as json format
2 exit;
There is one more method we need to change:
 1 public function delete()
 2 {
 3     /*$this->client->del("id", $id);
 4     header('Location: ' . SITE_BASE . 'client/index/');
 5     exit;*/
 6
 7
 8     if (!isset($_REQUEST["id"])) {
 9         echo "error";
10     } else {
11         if ($this->client->del("id", $_REQUEST["id"])) {
12             echo "success";
13         } else {
14             echo "error";
15         }
16     }
17     exit;
18 }
Just to be sure, here is the complete gist of the ClientController.
You should get an output similar to the one shown in Figure 40.
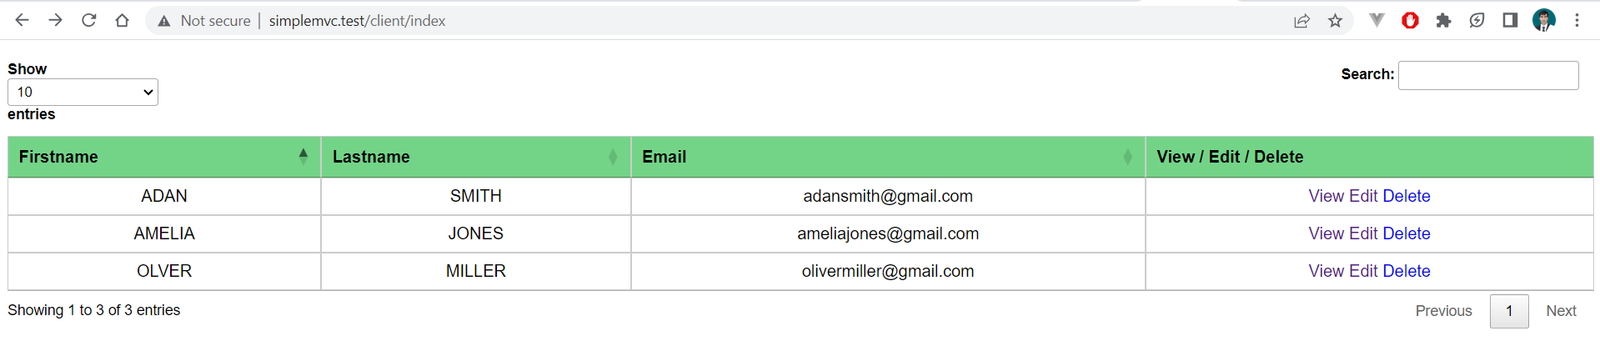
Go ahead, you can try to search and order. If you click the Delete link you should see the confirmation message (Figure 41):
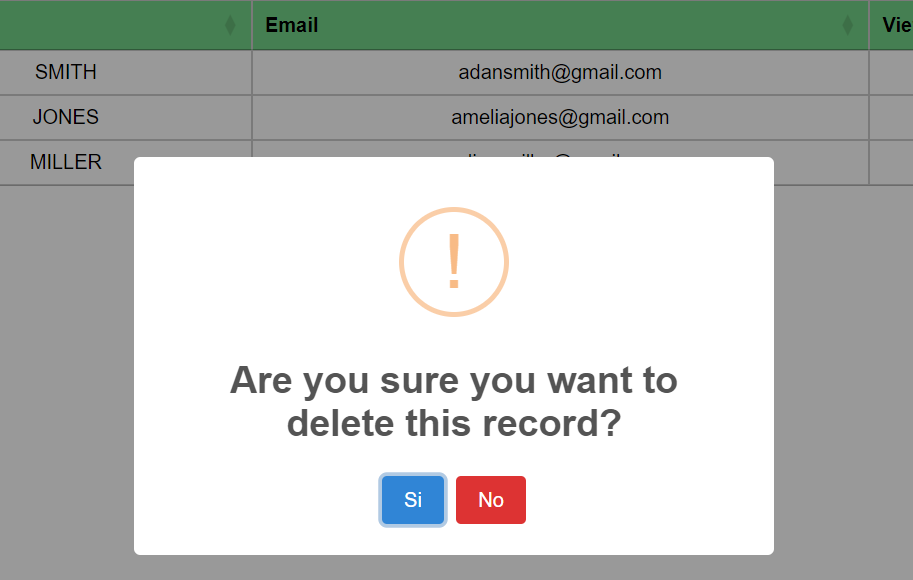
Summary
In this chapter we built a very simple but functional application. We learned how to perform CRUD operations upon a table, add a main layout with some style, and then move on to introduce the use of one very useful widget.
I hope you are beginning to have a taste of how this framework can help us to build applications. It’s not production ready yet, but we have come a long way.
See you in the next chapter!
Chapter 08: Authentication
Introduction
In this chapter we will focus our attention on a fundamental characteristic of an application: authentication. It is inconceivable to think about an application that doesn’t require registration and login functionalities, and as so, it’s probablya good idea for our framework to provide those features out of the box.
Users table
We’ll start by creating a users table. We don’t need many fields. Use this sql sentence to create the table:
1 CREATE TABLE `simplemvc`.`users` (
2 `id` INT(11) NOT NULL AUTO_INCREMENT ,
3 `username` VARCHAR(30) NOT NULL ,
4 `password` VARCHAR(255) NOT NULL ,
5 `email` VARCHAR(100) NOT NULL ,
6 `confirmed_at` DATETIME NULL ,
7 PRIMARY KEY (`id`)
8 ) ENGINE = InnoDB;
Generating a unique session id
At this moment, we have this line in our config.php:
1 define('APP_SESSION_ID', 'xeFLcX4gfj1h7WM6Yfrl');
We are using some random string to identify the session, but we need to ensure that every session is unique for every user. We’ll be using a helper class to accomplish this.
Create a folder called helpers inside the config directory. Then, inside helpers, add a file IP.php with the following content:
 1 <?php
 2 namespace helpers;
 3
 4 class IP {
 5   public static function getRealIP() {
 6       $ip = isset($_SERVER['HTTP_CLIENT_IP'])
 7           ? $_SERVER['HTTP_CLIENT_IP']
 8           : (isset($_SERVER['HTTP_X_FORWARDED_FOR'])
 9               ? $_SERVER['HTTP_X_FORWARDED_FOR']
10               : $_SERVER['REMOTE_ADDR']);
11
12       return $ip;
13   }
14 }
The class has only one static method.
Now we can rewrite the config.php as follows:
 1 <?php
 2 define('DEVELOPMENT_ENVIRONMENT', true);
 3
 4 const CONFIG = [
 5     'DB_SERVER' => 'localhost',
 6     'DB_USER' => 'root',
 7     'DB_PASSWORD' => '',
 8     'DB_DATABASE' => 'simplemvc'
 9 ];
10
11 define('SITE_BASE', 'http://simplemvc.test/');
12
13 use  helpers\IP as IP;
14
15 $sess_id = md5(IP::getRealIP());
16
17 define('APP_SESSION_ID', $sess_id);
User model
Now we need to create a User model. It’s very similar to what we did with the Cliente model. Create a file called User.php inside the models folder with the following content:
 1 <?php
 2 namespace models;
 3
 4 use core\Model as Model;
 5
 6 class User extends Model {
 7     private $username;
 8     private $email;
 9     private $password;
10
11     public function setUserName(String $username)
12     {
13         $this->username = $username;
14     }
15
16     public function getUserName()
17     {
18         return $this->username;
19     }
20
21     public function setEmail(String $email)
22     {
23         $this->email = $email;
24     }
25
26     public function getEmail()
27     {
28         return $this->email;
29     }
30
31     public function setPassword($password)
32     {
33         $this->password;
34     }
35
36     public function getPassword()
37     {
38         return $this->password;
39     }
40 }
Nothing new here. We can go on to the controller and views.
UserController: registering a new user
Create a new UserController with the following content:
 1 <?php
 2 namespace controllers;
 3
 4 use core\Controller as Controller;
 5 use models\User as User;
 6 use core\View as View;
 7
 8 class UserController extends Controller {
 9   private $user;
10   private $view;
11   private $db;
12
13   public function __construct()
14   {
15       $this->user = new User('users');
16       $this->view = new View('users');
17   }
18
19   public function register()
20   {
21       if ($_SERVER["REQUEST_METHOD"] == 'POST') {
22           $data = [
23               'username' => $_POST["username"],
24               'password' =>
25 password_hash($_POST["password"], PASSWORD_BCRYPT),
26               'email' => $_POST["email"]
27           ];
28
29           $this->user->load($data);
30           $this->user->save();
31
32           header('Location: ' . SITE_BASE
33             . 'site/index/');
34           exit;
35       }
36
37       $this->view->setAction('register');
38       $this->view->set('user', $this->user);
39       $this->view->render();
40   }
41 }
We’ll be calling the register method to add a new user. The only thing worth to note is this line:
1 'password' =>
2     password_hash($_POST["password"], PASSWORD_BCRYPT)
We are hashing the password before storing it. This function has two parameters: the string representing the password, and the second is the algorithm to be used. PASSWORD_BCRYPT generates a 60 character string.
Register view
Now we need to add a folder called users inside the views folder. Then add a file called register.php with the following content:
 1 <div style="display: flex; justify-content: center">
 2   <form action="<?= SITE_BASE ?>user/register"
 3     method="POST">
 4       <div>
 5           <label for="username">Username:</label>
 6           <input type="text" name="username"
 7             value="<?= $user->username ?>">
 8       </div>
 9       <div>
10           <label for="email">Email:</label>
11           <input type="text" name="email"
12             value="<?= $user->email ?>">
13       </div>
14       <div>
15           <label for="password">Password:</label>
16           <input type="password" name="password" value="">
17       </div>
18       <button type="submit">Register</button>
19   </form>
20 </div>
If you go to http://simplemvc.test/user/register we should see the following (Figure 42):
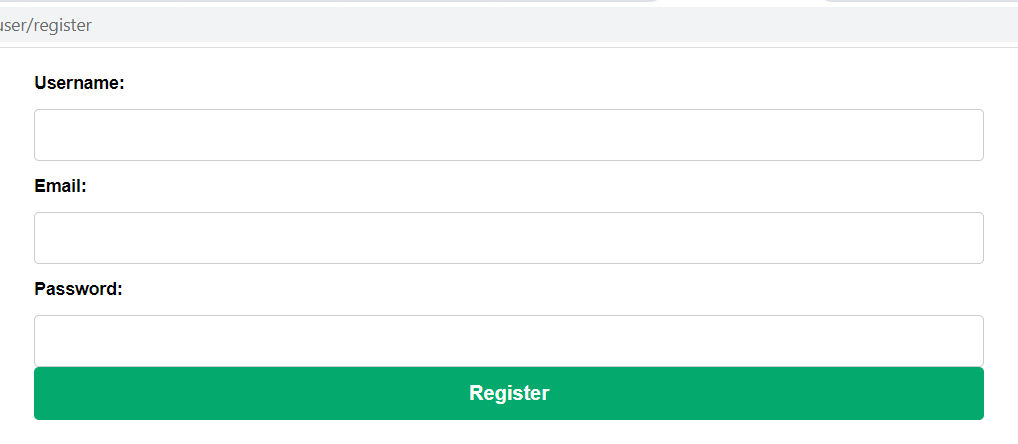
Go ahead and try to register. You should get a Not Found error (Figure 43):
This is natural, because we are redirecting to site/index, and we don’t have and SiteController or an index view.
Let’s create a SiteController.php with the following content:
 1 <?php
 2 namespace controllers;
 3
 4 use core\Controller as Controller;
 5 use core\View as View;
 6
 7 class SiteController extends Controller {
 8     private $view;
 9
10     public function __construct()
11     {
12         $this->view = new View('site');
13     }
14
15
16     public function index()
17     {
18         $this->view->setAction('index');
19         $this->view->render();
20     }
21 }
Then add the site folder inside the views directory. And then a file called index.php, with this single line:
1 <h1>Welcome</h1>
UserController: login in
We can focus on login in. First at the following line to the UserController:
1 use core\db as db;
Then add the following method to the UserController:
 1 public function login()
 2 {
 3   session_id(APP_SESSION_ID);
 4   session_start();
 5
 6   if (isset($_SESSION["username"])) {
 7       header('Location: '.SITE_BASE.'site/index');
 8       exit;
 9   }
10
11   if ($_SERVER["REQUEST_METHOD"] == 'POST'
12 && isset($_POST["username"]))     {
13       $this->db = new db(CONFIG);
14
15       $conn = $this->db->getConnection();
16
17       $stmt = $conn->prepare(
18       "SELECT password FROM users
19         WHERE TRIM(username) = :username"
20       );
21
22       $stmt->bindParam(":username", $_POST["username"]);
23
24       $stmt->execute();
25
26       $stmt->setFetchMode(\PDO::FETCH_ASSOC);
27
28       $result = $stmt->fetch();
29
30       if (empty($result)) {
31         $msg = "Wrong username or password";
32         $this->view->setAction('login');
33         $this->view->set('msg', $msg);
34         $this->view->render(false);
35       } else {
36         if (password_verify($_POST["password"],
37             $result["password"])) {
38           session_id(APP_SESSION_ID);
39           session_start();
40           $_SESSION["username"] = $_POST["username"];
41           $_SESSION["login_time_stamp"] = time();
42           header('Location: '.SITE_BASE.'site/index');
43           exit;
44         } else {
45           $msg = "Wrong username or password";
46           $this->view->setAction('login');
47           $this->view->set('msg', $msg);
48           $this->view->render(false);
49         }
50       }
51       exit;
52     } else {
53       $this->view->setAction('login');
54       $this->view->render();
55     }
56 }
It’s a little bit long, let’s analyze it bit by bit. The first two lines:
1 session_id(APP_SESSION_ID);
2 session_start();
We are setting the session id, so the next call to session_star we’ll start the corresponding session, giving us access to the session variables, which we’ll be stored in the $_SESSION superglobal.
Then we check if there is a session variable containing the username, which means the user is already logged in and we can redirect it to the site index:
1 if (isset($_SESSION["username"])) {
2      header('Location: '.SITE_BASE.'site/index');
3      exit;
4 }
After that we have a condition to check if data has been sent through a post request, and if there is a username present. If that happens, then we need to check if there is a username matching the data in the database:
 1 $this->db = new db(CONFIG);
 2
 3 $conn = $this->db->getConnection();
 4
 5 $stmt = $conn->prepare(
 6   "SELECT password FROM users
 7     WHERE TRIM(username) = :username"
 8 );
 9
10 $stmt->bindParam(":username", $_POST["username"]);
11
12 $stmt->execute();
13
14 $stmt->setFetchMode(\PDO::FETCH_ASSOC);
15
16 $result = $stmt->fetch();
It there is no result, then we stored an error message that we will display to the user:
1 if (empty($result)) {
2     $msg = "Wrong username or password";
3     $this->view->setAction('login');
4     $this->view->set('msg', $msg);
5     $this->view->render(false);
6 }
If the username entered by the visitor corresponds to a record in the users table, then we proceed to check the password:
1 if (password_verify($_POST["password"],
2     $result["password"])) {
3     session_id(APP_SESSION_ID);
4     session_start();
5     $_SESSION["username"] = $_POST["username"];
6     $_SESSION["login_time_stamp"] = time();
7     header('Location: '.SITE_BASE.'site/index');
8     exit;
9 }
Pay attention to the use of the password_verify function. It compares the hash obtained from the password entered by the visitor, with the hash stored in the database. If it’s a match, then we store two session variables, the username and the time of login. The last one can be used to show the time the user has been logged in, or to close the session after a certain amount of time. Then we can redirect the user to the index page.
The code of the login view is very simple. Create a file called login.php in the users folder with the following content:
 1 <div style="display: flex; justify-content: center">
 2   <form action="<?= SITE_BASE ?>user/login" method="POST">
 3       <div>
 4           <label for="username">Username:</label>
 5           <input type="text" name="username" value="">
 6       </div>
 7       <div>
 8           <label for="password">Password:</label>
 9           <input type="password" name="password" value="">
10       </div>
11       <button type="submit">Register</button>
12   </form>
13 </div>
Go ahead, enter your credentials and you will be redirected to the index page. If you try to go again to the login page, you won’t be able to see the login form, and will be redirected instead to the index. This is because of this verification:
1 session_id(APP_SESSION_ID);
2 session_start();
3
4 if (isset($_SESSION["username"])) {
5     header('Location: '.SITE_BASE.'site/index');
6     exit;
7 }
We need a way to close the session. Go back to the main.php file and just above this line:
1 <?= $content ?>
Add this form:
1 <form action="<?= SITE_BASE ?>user/logout" method="POST">
2     <button type="submit" class="danger">Log out</button>
3 </form>
And add this in main.css:
1 .danger {
2     background-color: red !important;
3     width: 20% !important;
4     float: right;
5 }
You should see something similar to the output of Figure 44:

If you press the button, you’ll be redirected to the index page, but there is problem as shown in Figure :
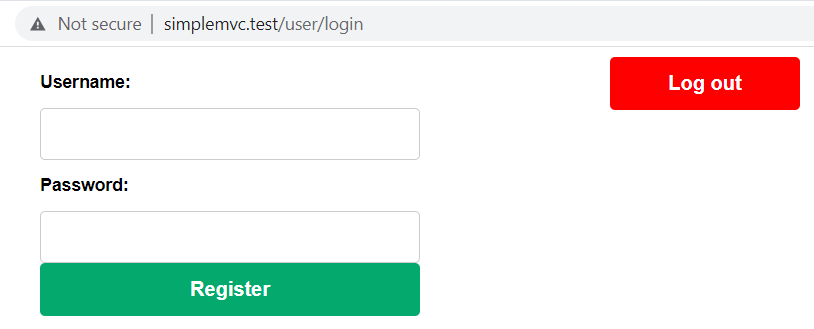
Let us change this. Replace the form as follows:
1 <?php if (isset($_SESSION["username"])): ?>
2  <form action="<?= SITE_BASE ?>user/logout" method="POST">
3     <button type="submit" class="danger">Log out</button>
4  </form>
5 <?php endif; ?>
We are surrounding the form with a condition, and in case the session variable is present, the button won’t be shown.
That ’s it. We have implemented authentication capabilities. We’ll finish this chapter with another utility class.
Let’s create a file called SessionChecker.php in the helpers folder with this content:
 1 <?php
 2 namespace helpers;
 3
 4 class SessionChecker {
 5   public static function check() {
 6       session_id(APP_SESSION_ID);
 7       session_start();
 8
 9       if (!isset($_SESSION["username"])) {
10           header('Location: '.SITE_BASE.'user/login');
11           exit;
12       }
13
14       if (time() - $_SESSION["login_time_stamp"] > 3600) {
15           session_unset();
16           session_destroy();
17           header('Location: '.SITE_BASE.'user/login');
18           exit;
19       }
20   }
21 }
This class we’ll allow us to avoid code repetition, since we should check for the state of the user in many methods in a controller. For example, in our SiteController, we can add the following line:
1 use helpers\SessionChecker;
And the rewrite our index method as follows:
1 public function index()
2 {
3     SessionChecker::check();
4
5     $this->view->setAction('index');
6     $this->view->render();
7 }
We are also destroying the session, and so login the user out, after an hour has passed. You can ignore that part by simply eliminating the condition, or change the time length.
Summary
In this chapter we gave our framework Register and Login capabilities. Having this functionality out of the box can save us a lot of time, since they’ll be needed in practically every application we build. Of course, we miss some features, like email verification, but we’ll get there, trust me.
I hope you are enjoying your journey so far. In the next chapters, we’ll do some refactoring and clean up, and deal with advanced concepts such as dependency injection.
See you soon!
Chapter 09: Advanced topics
Introduction
This chapter serves two purposes:
First, to improve our framework introducing characteristics that many modern frameworks possess, and second, to teach you how those features work and are implemented.
We will see what dependency injection is and how it can be used to improve the maintainability and testability of our code, then we’ll move to using PSR-4 autoloading.
Dependency injection
Let’s take a look at the constructor of our ClientController:
1 public function __construct()
2 {
3     $this->client = new Client('clients');
4     $this->view = new View('clients');
5 }
On the surface, there is nothing bad here. We use the constructor to initialize two private properties, one referring to a model, and the other one to a view.
But, if we analyze the situation carefully, we can conclude that ClientController is tightly coupled to the Client and View classes. This means than in order to test the ClientController class we must instantiate the Client and View classes. Also, the ClientController knows too much about the Client and View classes. For example, it knows that both of them receive a parameter consisting in a string.
It may not look like much, but if we were to change the constructor of Client to include another parameter, we should make a change in the call made in the constructor of ClientController, and in every other part a Client object is instantiated in the project.
In larger projects, these could be really problematic, making the code less flexible and by extension less maintainable.
This can be mitigated using dependency injection.
What is dependency injection?
Dependency Injection is a software design pattern that allows avoiding hard-coding dependencies and makes possible to change the dependencies both at runtime and compile time.
What does this mean in the context of our application?
It means to write the method in this way:
1 public function __construct(Client $client, View $view)
2 {
3     $this->client = $client;
4     $this->view = $view;
5 }
In this way, we could use a mock for the client and view objects with the purpose of testing, or we could change the implementation of those objects, modifying the constructor, without impacting the ClientController class. Go ahead and make the changes. The application wont’ work at this point if you visit client/index, but this is ok.
Now let’s see the constructor of the Client model:
1 public function __construct($table)
2 {
3     $this->table = $table;
4
5
6     parent::__construct($this->table, $this->db);
7     $this->key = 'id';
8 }
We could make a little tweak expliciting the type of the $table parameter:
1 public function __construct(string $table)
2 {
3     $this->table = $table;
4
5
6     parent::__construct($this->table, $this->db);
7     $this->key = 'id';
8 }
Now it’s the turn of the View constructor:
1 public function __construct($controller)
2 {
3     $this->controller = $controller;
4 }
Again, the class doesn’t depend on another class, it only receives a common parameter. Let’s specify the type:
1 public function __construct(string $controller)
2 {
3     $this->controller = $controller;
4 }
So, the chain of dependencies is this:
ClientController needs two objects, Client and View. Client needs a string defining the table, and View needs a string that defines the controller (and the folder inside views).
Now, how can we make things work again?
If we go to Application.php, we can make these changes:
 1 if (method_exists($controllerClass, $action)) {
 2   $model = new ('models\\'
 3     . ucwords($controller))($controller . 's');
 4   $view = new ('core\\View')($controller . 's');
 5   $dispatch = new $controllerClass(
 6     $model, $view, $controller, $action
 7   );
 8   call_user_func_array([$dispatch, $action],
 9     $queryString);
10 }
We are instantiating the necessary model and view, and we are injecting that dependencies in the controller. It should work now, but we are still using the new operator. It would be much better if you could find a view to instantiate the controller, and let the framework resolve the dependencies for us. That is the function of something called Container
A container is a tool to implement the dependency injection pattern. It allows us to register services with their respective dependencies.
The container can read the configuration from yaml files, text files, arrays, etc.
Our container class would be extremely simple. Let’s create a file called DependencyContainer.php in the core folder with the following content:
 1 <?php
 2 namespace core;
 3
 4 class DependencyResolver {
 5   private static $map = [];
 6
 7   public static function set($key, $value) {
 8       if (!array_key_exists($key, self::$map)) {
 9           self::$map[$key] = $value;
10       }
11   }
12
13   public static function resolveDependencies($class) {
14       $reflector = new \ReflectionClass($class);
15       $method = $reflector->getConstructor();
16       $parameters = $method->getParameters();
17       $dependencies = [];
18
19       foreach ($parameters as $parameter) {
20           $parameterType = $parameter->getType();
21
22           if ($parameterType === null
23             || $parameterType->isBuiltin()) {
24               $parameterName = $parameter->getName();
25               // Handling non classes parameters
26               if (array_key_exists($parameterName, self::\
27 $map)) {
28                   $dependencies[] = self::$map[
29                     $parameterName
30                   ];
31               }
32           } else {
33               $dependencyClassName = $parameterType
34                 ->getName();
35               $dependencies[] = self::resolveDependencies(
36                 $dependencyClassName
37               );
38           }
39       }
40
41       return $reflector->newInstanceArgs($dependencies);
42   }
43 }
Our class has static methods so we can call them without creating a new instance. It also has a static property:
1 private static $map = [];
It’s a simple array. Let’s see the first method:
1 public static function set($key, $value) {
2         if (!array_key_exists($key, self::$map)) {
3             self::$map[$key] = $value;
4         }
5     }
The method is very simple. It stores a value associated with a key in an array. This will serve to store parameters that are not classes. You will see this later in practice.
Then we have another method. Let’s start with the definition:
1 public static function resolveDependencies($class)
It takes the name of a class as a parameter, for example “ClientController”.
Then we have these lines:
1 $reflector = new \ReflectionClass($class);
2 $method = $reflector->getConstructor();
3 $parameters = $method->getParameters();
4 $dependencies = [];
We use the ReflectionClass. This built in php class allows us to gather information about a class: properties with their respective types, methods and their parameters, etc.
We get the constructor of the class, and then the parameters. Following the case of ClientController, if we print the parameters variable, it will give us the following information:
1 Array (
2 [0] => ReflectionParameter Object ( [name] => client )
3 [1] => ReflectionParameter Object ( [name] => view )
4  )
We have two parameters, they are objects, and the name of the parameters are client and view.
Then we iterate through these parameters. For every one of them, we get the type. It will take the first parameter, client, and see that its type is models\Client
We check if the type is null or if it’s an builtin type. This is not the case, so we have these two lines:
1 $dependencyClassName = $parameterType->getName();
2 $dependencies[] = self::resolveDependencies(
3     $dependencyClassName
4 );
We take the class name of the parameter, and we call the same method. We are using recursion, since it is the most elegant and simple solution.
In the next iteration of the function, we’ll get the Client model, and see that it has one parameter that it’s a string.
1 $parameterName = $parameter->getName();
2 // Handling non classes parameters
3 if (array_key_exists($parameterName, self::$map)) {
4     $dependencies[] = self::$map[$parameterName];
5 }
The parameter is not a class, so we check to see if the parameter (table) has a value in the map array. If it is, the dependency is stored in the dependencies array.
When all the dependencies are resolved, the dependencies array will have the following content:
 1 Array
 2 (
 3   [0] => models\Client Object
 4       (
 5           [table:protected] => clients
 6           [db:protected] => core\db Object
 7               (
 8                   [_connection:core\db:private]
 9                     => PDO Object
10                       (
11                       )
12
13               )
14
15           [key:protected] => id
16           [data:core\Model:private] =>
17           [id] =>
18           [firstname:models\Client:private] =>
19           [lastname:models\Client:private] =>
20           [email:models\Client:private] =>
21           [reg_date] =>
22           [image_path] =>
23       )
24
25   [1] => core\View Object
26       (
27           [controller:core\View:private] => clients
28           [action:core\View:private] =>
29           [variables:core\View:private] => Array
30               (
31               )
32
33       )
34
35 )
We can now create a new instance of the ClientController, passing in it the corresponding dependencies.
1 return $reflector->newInstanceArgs($dependencies);
We make use of the newInstanceArgs method of the ReflectionClass.
Now we need to make these changes to Application.php:
1 if (method_exists($controllerClass, $action)) {
2  DependencyResolver::set('table', $controller . 's');
3  DependencyResolver::set('controller', $controller . 's');
4
5  $dispatch = DependencyResolver::resolveDependencies(
6   $controllerClass
7  );
8  call_user_func_array([$dispatch, $action], $queryString);
9 }
Just to be sure, here is the gist with the full code of Application.php
PSR-4 Autoloading
So far we have relied on our own autoloading for framework and application specific classes. In bootstrap.php we have the function and the call:
 1 function autoload($class)
 2 {
 3   $directories = [
 4       'library',
 5       'application'
 6   ];
 7
 8   foreach ($directories as $directory)
 9   {
10       $file = ROOT . DS. $directory . DS
11         . str_replace('\\', '/', $class) . '.php';
12       if (file_exists($file)) {
13           require_once($file);
14       }
15   }
16 }
17
18 spl_autoload_register('autoload');
There is nothing wrong with that, and in fact it works pretty well, but in order to build a robust framework, and at the same time advance our knowledge, it’s recommended to adhere to standards whenever possible.
What is PSR-4?
PSR-4 is an accepted recommendation that outlines the standard for autoloading classes via filenames.
This means that as long as we follow a certain convention to name our file, we can use composer to generate an autoloader.
For this to work, you need to download and install composer.
Now, go ahead and create a file named composer.json at the root of the project with the following content:
1 {
2   "autoload": {
3     "psr-4": {
4       "SimpleMVC\\":"simplemvc/",
5       "App\\":"application/"
6     }
7   }
8 }
What we are doing here is mapping our classes. The namespace SimpleMVC we’ll be mapped to the simplemvc folder. We don’t have it, but we’ll renamed the library model later.
The namespace App we’ll be mapped to the application folder.
Now, open a terminal at the root of the project and type:
1 composer dump-autoload
You we’ll see a new folder called vendor, as shown in Figure 46:
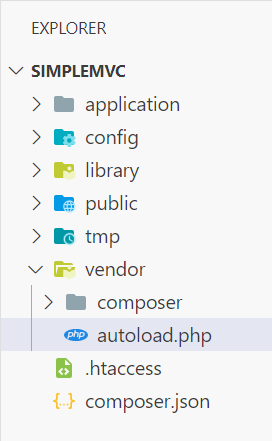
Inside that folder, there is an autoload.php, that has the following content:
 1 <?php
 2
 3
 4 // autoload.php @generated by Composer
 5
 6
 7 if (PHP_VERSION_ID < 50600) {
 8     if (!headers_sent()) {
 9         header('HTTP/1.1 500 Internal Server Error');
10     }
11     $err = 'Composer 2.3.0 dropped support
12     for autoloading on PHP <5.6
13     and you are running '.PHP_VERSION.',
14     please upgrade PHP or use Composer 2.2
15     LTS via "composer self-update --2.2"
16     . Aborting.'.PHP_EOL;
17     if (!ini_get('display_errors')) {
18         if (PHP_SAPI === 'cli' || PHP_SAPI === 'phpdbg') {
19             fwrite(STDERR, $err);
20         } elseif (!headers_sent()) {
21             echo $err;
22         }
23     }
24     trigger_error(
25         $err,
26         E_USER_ERROR
27     );
28 }
29
30
31 require_once __DIR__ . '/composer/autoload_real.php';
32
33
34 return
35   ComposerAutoloaderInit046ffdaaa41676ad930f030ef40bd67d
36     ::getLoader();
The contents may differ, as the versions of composer change, but the most important thing to note id that there is a require sentence.
The autoload_real.php file contains the necessary logic to autoload the classes. We don’t need to understand what’s going on there for now, you can take a look later.
Now, we need to rename the folder library to simplemvc.
Then, we need to change the namespace of all the classes of the framework.
All the classes inside simplemvc -> core need to change the namespace from:
1 namespace core;
To:
1 namespace SimpleMVC\core;
The two helpers will have the namespace:
1 namespace SimpleMVC\helpers;
And the DataTable widget:
1 namespace SimpleMVC\widgets;
That covers the framework classes. We need to do something similar in the application classes. Open the ClientController. The namespace and the use sentences need to be rewritten as follows:
1 namespace App\controllers;
2
3 use SimpleMVC\core\Controller as Controller;
4 use App\models\Client as Client;
5 use SimpleMVC\core\View as View;
6 use SimpleMVC\widgets\DataTable as DataTable;
7 use SimpleMVC\core\db as db;
Now the Client model:
1 namespace App\models;
2
3 use SimpleMVC\core\Model as Model;
We are almost done. It’s time to change the entry point of our app, index.php. I’ll give you the entire code:
 1 <?php
 2 require "../vendor/autoload.php";
 3 require "../config/config.php";
 4
 5 define('DS', DIRECTORY_SEPARATOR);
 6 define('ROOT', dirname(dirname(__FILE__)));
 7
 8 if (!isset($_GET['url'])) $_GET['url'] = 'site/index';
 9
10 $url = $_GET['url'];
11
12 require_once(ROOT . DS . 'simplemvc'
13   . DS . 'bootstrap.php');
The changes are the two require sentences at the top, and the folder in which our bootstrap is. It’s no longer library but simplemvc.
In config.php there is one line we need to change. From:
1 use helpers\IP as IP;
To:
1 use SimpleMVC\helpers\IP as IP;
Our bootstrap.php becomes shorter, since we don’t need our custom autoloader any more:
1 <?php
2 $app = new \SimpleMVC\core\Application();
3
4 $app->setReporting();
5 $app->removeMagicQuotes();
6 $app->run($url);
Finally in Application.php. The line:
1 $controllerClass = 'controllers\\'
2 . ucwords($controller) . 'Controller';
Becomes:
1 $controllerClass = 'App\\controllers\\'
2 . ucwords($controller) . 'Controller';
And this check:
1 if (in_array('core\\Controller', $parents)) {
Becomes:
1 if (in_array('SimpleMVC\\core\\Controller', $parents)) {
There were a lot of changes, but if everything is correct, we should be able to see the client/index page.
Let’s see some errors we could get. For example, if you type: http://simplemvc.test/user/login
You’ll get an error as shown in Figure 47:

That is expected, because we haven’t changed the namespace and the use sentences. We need to rewrite them like this:
1 namespace App\controllers;
2
3 use SimpleMVC\core\Controller as Controller;
4 use App\models\User as User;
5 use SimpleMVC\core\View as View;
6 use SimpleMVC\core\db as db;
We also need to make changes to the User model, the namespace and the only use sentence:
1 namespace App\models;
2
3 use SimpleMVC\core\Model as Model;
Finally, the changes to SiteController:
1 namespace App\controllers;
2
3 use SimpleMVC\core\Controller as Controller;
4 use SimpleMVC\core\View as View;
5 use SimpleMVC\helpers\SessionChecker;
Summary
This chapter served two purposes:
First, to improve our framework introducing characteristics that many modern frameworks possess, and second, show how those features work and are implemented.
We saw what dependency injection is and how it can be used to improve the maintainability and testability of our code, then we used PSR-4 autoloading thanks to composer.
Our framework has matured a lot. Of course there is a lot of room to improve, but we have a solid base to develop well structured applications.
In the next chapters, we’ll put our framework to use building a real world application.
See you soon!
Chapter 10: Clinic Management App Part I
Introduction
So far, we have developed our framework, with a solid structure and some advanced features like dependency injection; but we need to see how we can put this tool to work. In this chapter we’ll start building a real world application, a Clinic Management App. We’ll learn how to start a new app, integrating a template to improve the design considerable.
Project folder
Make a copy of the simplemvc folder and rename it as clinicmanagement. Then we need to configure the virtual host as we already have seen in previous chapters:
1 <VirtualHost *:80>
2 DocumentRoot "C:/xampp/htdocs/clinicmanagement/public"
3 ServerName clinicmanagement.test
4 </VirtualHost>
And we need to add the entry to the hosts file:
1 127.0.0.1 clinicmanagement.test
Remember to restart the Apache server if it’s already running.
Config
Open the clinicmanagement folder and make the following changes to the config.php file:
1 <?php
2 define('DEVELOPMENT_ENVIRONMENT', true);
3
4 const CONFIG = [
5 'DB_SERVER' => 'localhost',
6 'DB_USER' => 'root',
7 'DB_PASSWORD' => '',
8 'DB_DATABASE' => 'clinicmanagement'
9 ];
10
11 define('SITE_BASE', 'http://clinicmanagement.test/');
12
13 use SimpleMVC\helpers\IP as IP;
14
15 $sess_id = md5(IP::getRealIP());
16
17 define('APP_SESSION_ID', $sess_id);
Of course the clinicmanagement database doesn’t exist yet.
Let’s make a copy of the simplemvc database. We can do it from the phpMyAdmin app, selecting the database and going to the Operations tab, as shown in Figure 48:
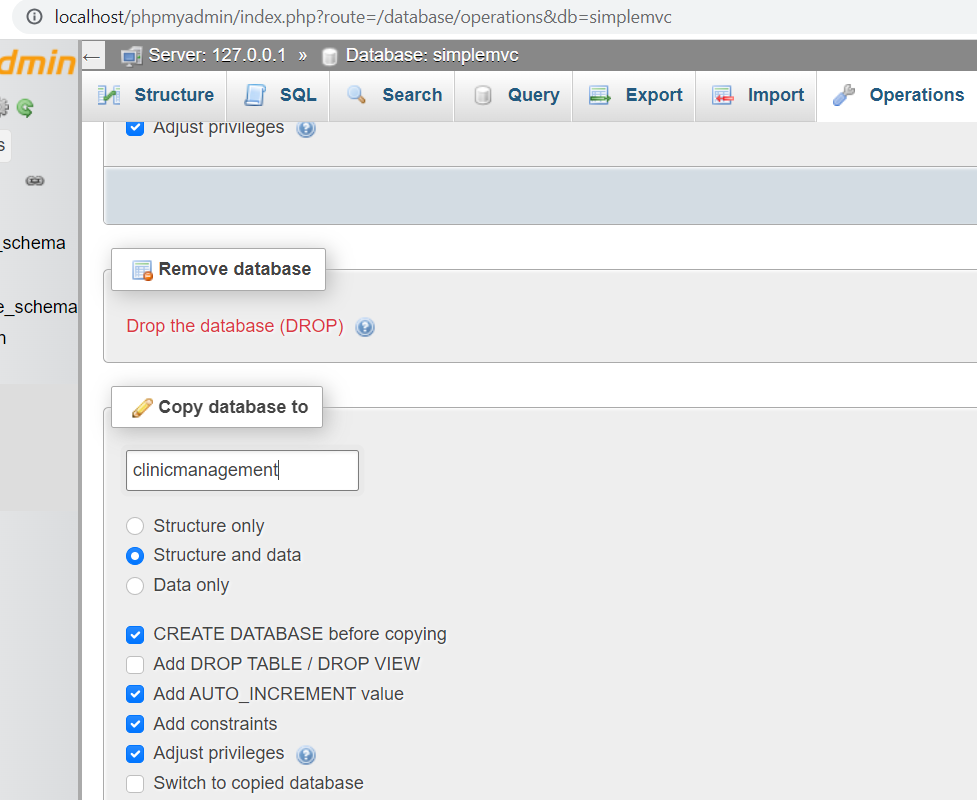
We can get rid of the clients table.
Now if you go to http://clinicmanagement.test/ we should see the login page. Go ahead and use your credentials.
Visual aspect
For this app we’ll use an admin template called AdminLTE. You can see it in action at: https://adminlte.io/themes/v3/
As you can see, it’s very appealing. It is based on Bootstrap and it has a lot of widgets that we can use. At the time of this writing, we can download the releases from this page
I’m grabbing the 3.2.0 release. After extracting the folder, you should see the structure shown in Figure 49:
Main layout
Inside the views -> layout folder create another file called menu.php. We’ll leave it empty for now. Now, open the AdminLTE folder and then the index.html file with your IDE or a text editor, grab the code and paste it in main.php replacing the current content. Of course it won’t work because we don’t have the js and css files.
Grab the dist and plugins folders and copy them inside the public folder of the new application.
It still won’t work, and you’ll see a lot of errors in the console (Figure 50).
The problem is, the server are trying to find the files at http://clinicmanagement.test/site/ that is, relative to the index page.
All we need to do is add
1 <base href="<?= SITE_BASE ?>">
Right before the title tag. Now the site will display correctly.
There is a lot of content we don’t need. We’ll get rid of everything inside:
1 <div class="content-wrapper">
In my case, that means delete from line 853 to 1453.
Place the content inside the div:
1 <?= $content ?>
We should see the Welcome message that we placed inside views -> site -> index.php.
Now replace everything between:
1 <!-- Sidebar Menu -->
And:
1 <!-- /.sidebar-menu -->
Place this line:
1 <?php include_once 'menu.php'; ?>
Between the comments. Now the app will look a lot cleaner (Figure 51):
At the end of the main page, we have these lines:
1 <!-- AdminLTE for demo purposes -->
2 <script src="dist/js/demo.js"></script>
3 <!-- AdminLTE dashboard demo (This is only for demo
4 purposes) -->
5 <script src="dist/js/pages/dashboard.js"></script>
Since they are only for the demo we can delete them.
Logout button
In the main.php layout we have this dropdown menu:
1 <!-- Notifications Dropdown Menu -->
2 <li class="nav-item dropdown">
3 <a class="nav-link" data-toggle="dropdown" href="#">
4 <i class="far fa-bell"></i>
5 <span class="badge badge-warning navbar-badge">
6 15
7 </span>
8 </a>
9 <div
10 class="dropdown-menu dropdown-menu-lg
11 dropdown-menu-right">
12 <span class="dropdown-item dropdown-header">
13 15 Notifications
14 </span>
15 <div class="dropdown-divider"></div>
16 <a href="#" class="dropdown-item">
17 <i class="fas fa-envelope mr-2"></i> 4 new messages
18 <span class="float-right text-muted text-sm">
19 3 mins
20 </span>
21 </a>
22 <div class="dropdown-divider"></div>
23 <a href="#" class="dropdown-item">
24 <i class="fas fa-users mr-2"></i> 8 friend requests
25 <span class="float-right text-muted text-sm">
26 12 hours
27 </span>
28 </a>
29 <div class="dropdown-divider"></div>
30 <a href="#" class="dropdown-item">
31 <i class="fas fa-file mr-2"></i> 3 new reports
32 <span class="float-right text-muted text-sm">
33 2 days
34 </span>
35 </a>
36 <div class="dropdown-divider"></div>
37 <a href="#" class="dropdown-item dropdown-footer">
38 See All Notifications
39 </a>
40 </div>
41 </li>
Let’s replace it with the following:
1 <!-- Notifications Dropdown Menu -->
2 <li class="nav-item dropdown">
3 <a class="nav-link" data-toggle="dropdown" href="#">
4 <i class="far fa-user"></i>
5 </a>
6 <div
7 class="dropdown-menu dropdown-menu-lg
8 dropdown-menu-right">
9 <span class="dropdown-item dropdown-header">
10 User: <?= $_SESSION["username"] ?>
11 </span>
12 <div class="dropdown-divider"></div>
13 <a href="#" class="dropdown-item dropdown-header">
14 <span>
15 <a class="link"
16 style="display: block; padding: 0.5rem 1rem;"
17 href="user/change">
18 <i class="far fa-user pr-2"></i>
19 <span>Change Password</span>
20 </a>
21 <form action="user/logout" method="post">
22 <input type="hidden" name="closesession"
23 value="1">
24 <i
25 class="fa-solid fa-arrow-right-from-bracket">
26 </i>
27 <button class="btn btn-danger btn-block"
28 type="submit">
29 </i>Logout</button>
30 </form>
31 </span>
32 </a>
33 <br>
34 </div>
35 </li>
We’ll see a dropdown menu with a link to change the password and a button to close the session, as shown in Figure 52:
Go ahead and press Logout. We’ll be redirected to the login page, but we have a problem, as seen in Figure 53:
The login page is rendering along with the main page, but this shouldn’t be the case. Fortunately we have taken that into account.
Let’s go back to the View class of the framework and the render method:
1 public function render($main = true, $scripts = '')
2 {
3 extract($this->variables);
4
5 if ($main == true) {
6 ob_start();
7 include ROOT . DS . 'application'. DS
8 . 'views'
9 . DS . $this->controller . DS
10 . $this->action . '.php';
11 $content = ob_get_clean();
12
13 include ROOT . DS . 'application'. DS
14 . 'views'
15 . DS . 'layouts' . DS . 'main.php';
16 } else {
17 include ROOT . DS . 'application'. DS
18 . 'views'
19 . DS . $this->controller . DS
20 . $this->action . '.php';
21 }
22 }
If we don’t pass any parameter or we pass true as the first one, the main layout will be displayed.
So, in the login method of the UserController we need to change the line:
1 $this->view->render();
To:
1 $this->view->render(false);
We can see our login page displayed, but it has no styles. This is because it was originally presented as a partial view. Let’s change the content as follows:
1 <html>
2 <head>
3 <link rel="stylesheet"
4 href="<?= SITE_BASE ?>css/main.css">
5 </head>
6 <body>
7 <div style="display: flex; justify-content: center">
8 <form action="<?= SITE_BASE ?>user/login"
9 method="POST">
10 <div>
11 <label for="username">Username:</label>
12 <input type="text" name="username" value="">
13 </div>
14 <div>
15 <label for="password">Password:</label>
16 <input type="password" name="password"
17 value="">
18 </div>
19 <button type="submit">Login</button>
20 </form>
21 </div>
22 </body>
23 </html>
Now the login screen is working as before.
Summary
In this chapter we have started working on a new application. We’ve copied the base folder from the previous chapter, set up the database, and incorporated the interface.
In the next chapter, we’ll start creating the app tables and the first CRUD operations.
Chapter 11: Clinic Management App Part II, Database
Introduction
In this chapter we’ll define the database structure. We’ll incorporate a template for the interface, and develop the first models and controllers.
Data Structure
Our application will need the following entities:
- doctors
- nurses
- patients
- appointments
- medical_records
- treatments
- specialties
We’ll map doctors and nurses to a single table named personnel. Here is the sql sentence to create the table:
1 CREATE TABLE `clinicmanagement`.`employees` (
2 `id` INT NOT NULL AUTO_INCREMENT ,
3 `firstname` VARCHAR(30) NOT NULL ,
4 `lastname` VARCHAR(30) NOT NULL ,
5 `type` TINYINT(1) NOT NULL ,
6 `userid` INT NOT NULL ,
7 PRIMARY KEY (`id`)
8 ) ENGINE = InnoDB;
And here is the patients table:
1 CREATE TABLE `clinicmanagement`.`patients` (
2 `id` INT NOT NULL AUTO_INCREMENT ,
3 `firstname` VARCHAR(30) NOT NULL ,
4 `lastname` VARCHAR(30) NOT NULL ,
5 `birthdate` DATE NOT NULL ,
6 `gender` VARCHAR(1) NOT NULL ,
7 `bloodtype` VARCHAR(3) NOT NULL ,
8 `phone` VARCHAR(20) NOT NULL ,
9 `email` VARCHAR(50) NOT NULL ,
10 `address` VARCHAR(255) NOT NULL ,
11 PRIMARY KEY (`id`)
12 ) ENGINE = InnoDB;
Employee Model
Based on our previous knowledge, the Employee model will be very simple:
1 <?php
2 namespace App\models;
3
4 use SimpleMVC\core\Model as Model;
5
6 class Employee extends Model {
7 public $id;
8 private $firstname;
9 private $lastname;
10 private $type;
11 private $userid;
12
13 public function __construct(string $table)
14 {
15 $this->table = $table;
16
17
18 parent::__construct($this->table, $this->db);
19 $this->key = 'id';
20 }
21
22 public function setFirstName($firstName)
23 {
24 $this->firstname = $firstName;
25 }
26
27 public function setLastName($lastName)
28 {
29 $this->lastname = $lastName;
30 }
31
32 public function setType($type)
33 {
34 $this->type = $type;
35 }
36
37 public function setUserId($userId)
38 {
39 $this->userid = $userId;
40 }
41
42 public function getFirstName()
43 {
44 return $this->firstname;
45 }
46
47 public function getLastName()
48 {
49 return $this->lastname;
50 }
51
52 public function getType()
53 {
54 return $this->type;
55 }
56
57 public function getUserId()
58 {
59 return $this->userid;
60 }
61 }
Likewise, the EmployeeController is very similar to the ClientController:
1 <?php
2 namespace App\controllers;
3
4 use SimpleMVC\core\Controller as Controller;
5 use App\models\Employee as Employee;
6 use SimpleMVC\core\View as View;
7 use SimpleMVC\widgets\DataTable as DataTable;
8 use SimpleMVC\core\db as db;
9
10 class EmployeeController extends Controller {
11 private $employee;
12 private $view;
13 private $db;
14
15 public function __construct(
16 Employee $employee,
17 View $view
18 )
19 {
20 $this->employee = $employee;
21 $this->view = $view;
22 }
23
24 public function index()
25 {
26 $dataTable = new DataTable(
27 ['firstname', 'lastname', 'type', 'id'],
28 'id', 'employee'
29 );
30
31 $this->view->setAction("index");
32 $this->view->set('grid', $dataTable);
33
34 $scripts = <<<scripts
35 $( document ).ready(function() {
36 table = $('#data-table').DataTable({
37 "ajax":{
38 url :"/employee/data", // json datasource
39 type: "post" // type of method, GET/POST/DELETE
40 },
41 columns: [
42 {"data": 0},{"data": 1},{"data": 2}, {
43 data: null,
44 orderable: false,
45 searchable: false,
46 className: "center",
47 render: function (data, type, full, meta) {
48 return '<a href="/employee/view/'
49 +data[3]+'" title="View">View</a>' + ' ' +
50 '<a href="/employee/edit/'
51 +data[3]+'" title="Edit">Edit</a>' + ' ' +
52 '<a href="javascript: void(0);"
53 title="Delete"
54 onclick="del('+data[3]+')">Delete</a>';
55 }
56 }
57 ]
58 });
59 });
60 scripts;
61 return $this->view->render(true, $scripts);
62 }
63
64 public function data()
65 {
66 $params = $_REQUEST;
67
68 $where = "";
69
70
71 $columns = array(
72 0 =>'firstname',
73 1 =>'lastname',
74 2 =>'type',
75 3 =>'id'
76 );
77
78 $data = [];
79
80 $queryTot =
81 $queryRec = "SELECT firstname, lastname, type, id
82 FROM employees";
83
84 // check search value exist
85 if( !empty($params['search']['value']) ) {
86 $where .=" WHERE ";
87 $where .=" ( firstname LIKE '"
88 .$params['search']['value']."%' ";
89 $where .=" OR lastname LIKE '"
90 .$params['search']['value']."%' ";
91 $where .=" OR type LIKE '"
92 .$params['search']['value']."%' )";
93
94 $queryTot .= $where;
95 $queryRec .= $where;
96 }
97
98 if( !empty($params['order'][0]) ) {
99 $queryRec .= " ORDER BY "
100 . $columns[$params['order'][0]['column']]." "
101 .$params['order'][0]['dir']." LIMIT "
102 .$params['start']." ,".$params['length']." ";
103 }
104
105 $this->db = new db(CONFIG);
106
107 $employees = $this->db->query($queryRec);
108
109 foreach ($employees as $employee) {
110 foreach ($employee as $key => $value) {
111 $item[] = $value;
112 }
113 $data[] = $item;
114 $item = [];
115 }
116
117 $totalRecords = count($this->db->query($queryTot));
118
119 $draw = ( !empty($params['draw']) )
120 ? intval( $params['draw'] ) : false;
121
122 $json_data = array(
123 "draw" => $draw,
124 "recordsTotal" => intval( $totalRecords ),
125 "recordsFiltered" => intval($totalRecords),
126 "data" => $data // total data array
127 );
128
129 echo json_encode($json_data);
130 exit;
131 }
132
133 public function view($id)
134 {
135 $employee = $this->employee->loadModel($id);
136
137 if ($employee) {
138 $this->view->setAction('view');
139 $this->view->set('employee', $employee);
140 $this->view->render();
141 }
142 }
143
144 public function add()
145 {
146 if ($_SERVER["REQUEST_METHOD"] == 'POST') {
147 $data = [
148 'firstname' => $_POST["firstname"],
149 'lastname' => $_POST["lastname"],
150 'type' => $_POST["type"]
151 ];
152
153
154 $this->employee->load($data);
155 $this->employee->save();
156
157 header('Location: '.SITE_BASE.'employee/index/');
158 exit;
159 }
160
161 $this->view->setAction('add');
162 $this->view->set('employee', $this->employee);
163 $this->view->render();
164 }
165
166 public function edit($id)
167 {
168 if ($_SERVER["REQUEST_METHOD"] == 'POST') {
169 $data = [
170 'firstname' => $_POST["firstname"],
171 'lastname' => $_POST["lastname"],
172 'type' => $_POST["type"]
173 ];
174
175 $this->employee->load($data);
176 $this->employee->save($id);
177
178 header('Location: '.SITE_BASE.'employee/index/');
179 exit;
180 }
181
182 $this->employee->loadModel($id);
183 $this->view->setAction('edit');
184 $this->view->set('employee', $this->employee);
185 $this->view->render();
186 }
187
188 public function delete()
189 {
190 if (!isset($_REQUEST["id"])) {
191 echo "error";
192 } else {
193 if ($this->employee->del("id", $_REQUEST["id"])) {
194 echo "success";
195 } else {
196 echo "error";
197 }
198 }
199 exit;
200 }
201 }
I recommend you that you copy the code from this gist instead of trying to fix the code of the book.
Now, we need to add a new folder in views. Following the convention, we’ll name it employees. In that folder, we need an index.php file with just one line of content:
1 <?php $grid->render(); ?>
But if you visit http://clinicmanagement.test/employee/index it won’t work. That is because we haven’t included the necessary javascript and css files in our main layout.
After this line:
1 <script src="dist/js/adminlte.js"></script>
Place these:
1 <!-- Datatable -->
2 <script
3 src="plugins/datatables/jquery.dataTables.min.js">
4 </script>
5 <!-- SweetAlert2 -->
6 <script
7 src="plugins/sweetalert2/sweetalert2.all.js"></script>
8 <script type="text/javascript">
9 <?= $scripts; ?>
10 </script>
The scripts come included with the adminlte template. In the case of SweetAlert2, the sweetalert2.all.js takes care of the css as well.
Then, just before the closing tag we need to add:
1 <link rel="stylesheet"
2 href=
3 '//cdn.datatables.net/1.13.4/css/jquery.dataTables.min
4 .css'
5 >
Note: the above should be one line in your code, I had to split it to avoid the text wordwrap.
Go ahead and add a couple of records to the table as shown in Figure 54.
It looks too close to the borders. Go to the index view and change the content to this:
1 <section class="content">
2 <div class="container-fluid">
3 <?php $grid->render(); ?>
4 </div>
5 </section>
Now it should look better (Figure 55):
It looks better, but we can improve it. Change the index view from employees to the following:
1 <section class="content">
2 <div class="container-fluid">
3 <div class="card">
4 <div class="card-header">
5 <h3 class="card-title">Staff</h3>
6 </div>
7 <div class="card-body">
8 <?php $grid->render(); ?>
9 </div>
10 </div>
11 </div>
12 </section>
It should look like this now (Figure 56):
One final touch. Let ’s add a title. Again, change index.php to:
1 <section class="content-header">
2 <div class="container-fluid">
3 <div class="row mb-2">
4 <div class="col-sm-6">
5 <h1>Employees</h1>
6 </div>
7 </div>
8 </div><!-- /.container-fluid -->
9 </section>
10 <section class="content">
11 <div class="container-fluid">
12 <div class="card">
13 <div class="card-header">
14 <h3 class="card-title">Staff</h3>
15 </div>
16 <div class="card-body">
17 <?php $grid->render(); ?>
18 </div>
19 </div>
20 </div>
21 </section>
Now we have the final result (Figure 57):
The View and Edit options don’t work, also, we don’t have an option to add a new professional. Let ’s fix that.
Inside views -> employees, add a new file called view.php with the following content:
1 <!-- Content Header (Page header) -->
2 <section class="content-header">
3 <div class="container-fluid">
4 <div class="row mb-2">
5 <div class="col-sm-6">
6 <h1>Profile</h1>
7 </div>
8 <div class="col-sm-6">
9 <ol class="breadcrumb float-sm-right">
10 <li class="breadcrumb-item">
11 <a href="employee/index">Employee</a>
12 </li>
13 <li class="breadcrumb-item active">Profile</li>
14 </ol>
15 </div>
16 </div>
17 </div><!-- /.container-fluid -->
18 </section>
19 <section class="content">
20 <div class="container-fluid">
21 <div>
22 <div>
23 <!-- Profile Image -->
24 <div class="card card-primary card-outline">
25 <div class="card-body box-profile">
26 <div class="text-center">
27 <img
28 class="profile-user-img img-fluid img-circle"
29 src="dist/img/user4-128x128.jpg"
30 alt="User profile picture">
31 </div>
32
33 <h3 class="profile-username text-center">
34 <?= $employee->firstname . ' '
35 . $employee->lastname ?>
36 </h3>
37
38 <p class="text-muted text-center">
39 <?= $employee->type ?>
40 </p>
41
42 <a href="employee/edit/<?= $employee->id ?>"
43 class="btn btn-primary btn-block">
44 <b>Edit</b>
45 </a>
46 </div>
47 <!-- /.card-body -->
48 </div>
49 <!-- /.card -->
50 </div>
51 </div>
52 </div>
53 </section>
First, we’ll add a new button. In the index view, right after:
1 <h3 class="card-title">Staff</h3>
Add the following:
1 <div class="float-right">
2 <a href="<?= SITE_BASE ?>employee/add"
3 class="btn btn-primary">
4 New Professional
5 </a>
6 </div>
We should see a new button floating at the right (Figure 58).
As we did with the clients in previous chapters, we’ll add a partial with the form. Create a file called _form.php:
1 <div class="form-group">
2 <label for="firstname">First Name:</label>
3 <input type="text" name="firstname"
4 class="form-control"
5 value="<?= $employee->firstname ?>">
6 </div>
7 <div class="form-group">
8 <label for="lastname">Last Name:</label>
9 <input type="text" name="lastname"
10 class="form-control"
11 value="<?= $employee->lastname ?>">
12 </div>
13 <div class="form-group">
14 <label for="type">Type:</label>
15 <select name="type" id="option"
16 class="form-control">
17 <option value="1"
18 <?php echo ($employee->type == 1)
19 ? "selected": "" ?> >
20 Doctor</option>
21 <option value="2"
22 <?php echo ($employee->type == 2)
23 ? "selected": "" ?>>
24 Nurse</option>
25 <option value="3"
26 <?php echo ($employee->type == 3)
27 ? "selected": "" ?>>
28 Administrative</option>
29 </select>
30 </div>
31 <button type="submit" class="btn btn-primary btn-block">
32 Save
33 </button>
Let’s add another partial to display called _form_header.php:
1 <!-- Content Header (Page header) -->
2 <section class="content-header">
3 <div class="container-fluid">
4 <div class="row mb-2">
5 <div class="col-sm-6">
6 <h1>Employee</h1>
7 </div>
8 <div class="col-sm-6">
9 <ol class="breadcrumb float-sm-right">
10 <li class="breadcrumb-item">
11 <a href="employee/index">
12 Employee
13 </a>
14 </li>
15 <li class="breadcrumb-item active">
16 <?= $action ?>
17 </li>
18 </ol>
19 </div>
20 </div>
21 </div><!-- /.container-fluid -->
22 </section>
We’ll use it to avoid code duplication in the add and edit views.
Now it’s time for the add.php file:
1 <?php
2 $action = 'Add';
3 include '_form_header.php';
4 ?>
5 <section class="content">
6 <div class="container-fluid">
7 <div class="card">
8 <div class="card-body">
9 <form action="<?= SITE_BASE ?>employee/add"
10 method="POST">
11 <?php include '_form.php'; ?>
12 </form>
13 </div>
14 </div>
15 </div>
16 </section>
And now the edit.php file:
1 <?php
2 $action = 'Edit';
3 include '_form_header.php';
4 ?>
5 <section class="content">
6 <div class="container-fluid">
7 <div class="card">
8 <div class="card-body">
9 <form
10 action="<?= SITE_BASE ?>employee/edit/<?= $employee->\
11 id ?>"
12 method="POST">
13 <?php include '_form.php'; ?>
14 </form>
15 </div>
16 </div>
17 </div>
18 </section>
You can try adding, editing and deleting employees. Of course, we need to restrict these operations, and we’ll implement the corresponding security measures later. But for now, it’s time to move on to the CRUD operations on patients.
Patient Model
1 <?php
2 namespace App\models;
3
4 use SimpleMVC\core\Model as Model;
5
6 class Patient extends Model {
7 public $id;
8 private $firstname;
9 private $lastname;
10 private $birthdate;
11 private $gender;
12 private $bloodtype;
13 private $phone;
14 private $email;
15 private $address;
16
17 public function __construct(string $table)
18 {
19 $this->table = $table;
20
21
22 parent::__construct($this->table, $this->db);
23 $this->key = 'id';
24 }
25
26 public function setFirstName($firstName)
27 {
28 $this->firstname = $firstName;
29 }
30
31 public function setLastName($lastName)
32 {
33 $this->lastname = $lastName;
34 }
35
36 public function setGender($gender)
37 {
38 $this->gender = $gender;
39 }
40
41 public function setBirthdate($birthdate)
42 {
43 $this->birthdate = $birthdate;
44 }
45
46 public function setBloodtype($bloodtype)
47 {
48 $this->bloodtype = $bloodtype;
49 }
50
51 public function setPhone($phone)
52 {
53 $this->phone = $phone;
54 }
55
56 public function setEmail($email)
57 {
58 $this->email = $email;
59 }
60
61 public function setAddress($address)
62 {
63 $this->address = $address;
64 }
65
66 public function getFirstName()
67 {
68 return $this->firstname;
69 }
70
71 public function getLastName()
72 {
73 return $this->lastname;
74 }
75
76 public function getBirthdate()
77 {
78 return $this->birthdate;
79 }
80
81 public function getGender()
82 {
83 return $this->gender;
84 }
85
86 public function getBloodtype()
87 {
88 return $this->bloodtype;
89 }
90
91 public function getPhone()
92 {
93 return $this->phone;
94 }
95
96 public function getEmail()
97 {
98 return $this->email;
99 }
100
101 public function getAddress()
102 {
103 return $this->address;
104 }
105
106 public function getAge()
107 {
108 return
109 date('Y')
110 - date('Y', strtotime($this->birthdate));
111 }
112 }
The only thing worth mentioning is the getAge method. We’ll use it to display the age of the patient. Thanks to our base model, we can call it as a property: $patient->age.
PatientController
1 <?php
2 namespace App\controllers;
3
4 use SimpleMVC\core\Controller as Controller;
5 use App\models\Patient as Patient;
6 use SimpleMVC\core\View as View;
7 use SimpleMVC\widgets\DataTable as DataTable;
8 use SimpleMVC\core\db as db;
9
10 class PatientController extends Controller {
11 private $patient;
12 private $view;
13 private $db;
14
15 public function __construct(
16 Patient $patient,
17 View $view
18 )
19 {
20 $this->patient = $patient;
21 $this->view = $view;
22 }
23
24 public function index()
25 {
26 $dataTable = new DataTable(
27 ['firstname', 'lastname', 'birthdate',
28 'gender', 'bloodtype', 'id'],
29 'id', 'patient'
30 );
31
32 $this->view->setAction("index");
33 $this->view->set('grid', $dataTable);
34
35 $scripts = <<<scripts
36 $( document ).ready(function() {
37 table = $('#data-table').DataTable({
38 "ajax":{
39 url :"/patient/data",
40 type: "post"
41 },
42 columns: [
43 {"data": 0},
44 {"data": 1},
45 {"data": 2},
46 {"data": 3},
47 {"data": 4}, {
48 data: null,
49 orderable: false,
50 searchable: false,
51 className: "center",
52 render: function (data, type, full, meta) {
53 return '<a href="/patient/view/'+data[5]
54 +'" title="View">View</a>' + ' ' +
55 '<a href="/patient/edit/'+data[5]
56 +'" title="Edit">Edit</a>' + ' ' +
57 '<a href="javascript: void(0);"
58 title="Delete"
59 onclick="del('+data[5]+')">
60 Delete
61 </a>';
62 }
63 }
64 ]
65 });
66 });
67 scripts;
68 return $this->view->render(true, $scripts);
69 }
70
71 public function data()
72 {
73 $params = $_REQUEST;
74
75 $where = "";
76
77 $columns = array(
78 0 =>'firstname',
79 1 =>'lastname',
80 2 =>'birthdate',
81 3 =>'gender',
82 4 =>'bloodtype',
83 5 =>'id'
84 );
85
86 $data = [];
87
88 $queryTot = $queryRec = "SELECT
89 firstname, lastname, birthdate, gender, bloodtype,
90 id
91 FROM patients";
92
93 // check search value exist
94 if( !empty($params['search']['value']) ) {
95 $where .=" WHERE ";
96 $where .=" ( firstname LIKE '"
97 .$params['search']['value']."%' ";
98 $where .=" OR lastname LIKE '"
99 .$params['search']['value']."%' ";
100 $where .=" OR birthdate LIKE '"
101 .$params['search']['value']."%' ";
102 $where .=" OR gender LIKE '"
103 .$params['search']['value']."%' ";
104 $where .=" OR bloodtype LIKE '"
105 .$params['search']['value']."%' )";
106
107 $queryTot .= $where;
108 $queryRec .= $where;
109 }
110
111 if( !empty($params['order'][0]) ) {
112 $queryRec .= " ORDER BY "
113 . $columns[$params['order'][0]['column']]." "
114 .$params['order'][0]['dir']." LIMIT "
115 .$params['start']
116 ." ,".$params['length']." ";
117 }
118
119 $this->db = new db(CONFIG);
120
121 $patients = $this->db->query($queryRec);
122
123 foreach ($patients as $patient) {
124 foreach ($patient as $key => $value) {
125 $item[] = $value;
126 }
127 $data[] = $item;
128 $item = [];
129 }
130
131 $totalRecords = count($this->db->query($queryTot));
132
133 $draw = ( !empty($params['draw']) )
134 ? intval( $params['draw'] ) : false;
135
136 $json_data = array(
137 "draw" => $draw,
138 "recordsTotal" => intval( $totalRecords ),
139 "recordsFiltered" => intval($totalRecords),
140 "data" => $data // total data array
141 );
142
143 echo json_encode($json_data);
144 exit;
145 }
146
147 public function view($id)
148 {
149 $patient = $this->patient->loadModel($id);
150
151 if ($patient) {
152 $this->view->setAction('view');
153 $this->view->set('patient', $patient);
154 $this->view->render();
155 }
156 }
157
158 public function add()
159 {
160 if ($_SERVER["REQUEST_METHOD"] == 'POST') {
161 $_POST['birthdate'] = date_format(
162 new \DateTime($_POST['birthdate']), 'Y-m-d'
163 );
164 $data = [
165 'firstname' => $_POST["firstname"],
166 'lastname' => $_POST["lastname"],
167 'birthdate' => $_POST["birthdate"],
168 'gender' => $_POST["gender"],
169 'bloodtype' => $_POST["bloodtype"],
170 'phone' => $_POST["phone"],
171 'email' => $_POST["email"],
172 'address' => $_POST["address"]
173 ];
174
175 $this->patient->load($data);
176 $this->patient->save();
177
178 header('Location: ' . SITE_BASE . 'patient/index/');
179 exit;
180 }
181
182 $scripts = <<<scripts
183 //Date picker
184 $( document ).ready(function() {
185 $('#birthdate').datetimepicker({
186 format: 'L'
187 })
188 });
189 scripts;
190
191 $this->view->setAction('add');
192 $this->view->set('patient', $this->patient);
193 $this->view->render(true, $scripts);
194 }
195
196 public function edit($id)
197 {
198 if ($_SERVER["REQUEST_METHOD"] == 'POST') {
199 $_POST['birthdate'] = date_format(
200 new \DateTime($_POST['birthdate']), 'Y-m-d'
201 );
202 $data = [
203 'firstname' => $_POST["firstname"],
204 'lastname' => $_POST["lastname"],
205 'birthdate' => $_POST["birthdate"],
206 'gender' => $_POST["gender"],
207 'bloodtype' => $_POST["bloodtype"],
208 'phone' => $_POST["phone"],
209 'email' => $_POST["email"],
210 'address' => $_POST["address"]
211 ];
212
213 $this->patient->load($data);
214 $this->patient->save($id);
215
216 header('Location: '.SITE_BASE.'patient/index/');
217 exit;
218 }
219
220 $this->patient->loadModel($id);
221 $this->view->setAction('edit');
222 $this->view->set('patient', $this->patient);
223 $this->view->render();
224 }
225
226 public function delete()
227 {
228 if (!isset($_REQUEST["id"])) {
229 echo "error";
230 } else {
231 if ($this->patient->del("id", $_REQUEST["id"])) {
232 echo "success";
233 } else {
234 echo "error";
235 }
236 }
237 exit;
238 }
239 }
Again, it’s probably better to give you the gist
Nothing new in the controller code. Next the views. As you already know, you need to add the patients folder.
The index.php file:
1 <section class="content-header">
2 <div class="container-fluid">
3 <div class="row mb-2">
4 <div class="col-sm-6">
5 <h1>Patients</h1>
6 </div>
7 </div>
8 </div><!-- /.container-fluid -->
9 </section>
10 <section class="content">
11 <div class="container-fluid">
12 <div class="card">
13 <div class="card-header">
14 <h3 class="card-title">Patients</h3>
15 <div class="float-right">
16 <a href="<?= SITE_BASE ?>patient/add"
17 class="btn btn-primary">
18 New Patient
19 </a>
20 </div>
21 </div>
22 <div class="card-body">
23 <?php $grid->render(); ?>
24 </div>
25 </div>
26 </div>
27 </section>
The _form_header.php file:
1 <!-- Content Header (Page header) -->
2 <section class="content-header">
3 <div class="container-fluid">
4 <div class="row mb-2">
5 <div class="col-sm-6">
6 <h1>Patient</h1>
7 </div>
8 <div class="col-sm-6">
9 <ol class="breadcrumb float-sm-right">
10 <li class="breadcrumb-item">
11 <a href="patient/index">Patients</a>
12 </li>
13 <li class="breadcrumb-item active">
14 <?= $action ?>
15 </li>
16 </ol>
17 </div>
18 </div>
19 </div><!-- /.container-fluid -->
20 </section>
The _form.php file:
1 <div class="form-group">
2 <label for="firstname">First Name:</label>
3 <input type="text" name="firstname"
4 class="form-control"
5 value="<?= $patient->firstname ?>">
6 </div>
7 <div class="form-group">
8 <label for="lastname">Last Name:</label>
9 <input type="text" name="lastname"
10 class="form-control"
11 value="<?= $patient->lastname ?>">
12 </div>
13 <div class="form-group">
14 <label>Birthdate:</label>
15 <div class="input-group date" id="birthdate"
16 data-target-input="nearest">
17 <input type="text" name="birthdate"
18 class="form-control datetimepicker-input"
19 data-target="#birthdate"
20 value="<?= $patient->birthdate ?>"/>
21 <div class="input-group-append"
22 data-target="#birthdate"
23 data-toggle="datetimepicker">
24 <div class="input-group-text">
25 <i class="fa fa-calendar"></i>
26 </div>
27 </div>
28 </div>
29 </div>
30 <div class="form-group">
31 <label for="gender">Gender:</label>
32 <select name="gender" id="option"
33 class="form-control" required>
34 <option value="">--Select--</option>
35 <option value="F"
36 <?php
37 echo
38 ($patient->gender == "F") ? "selected": "" ?>>
39 F</option>
40 <option value="M"
41 <?php
42 echo
43 ($patient->gender == "M") ? "selected": "" ?>>
44 M
45 </option>
46 <option value="O"
47 <?php
48 echo
49 ($patient->gender == "O") ? "selected": "" ?>>
50 O
51 </option>
52 </select>
53 </div>
54 <div class="form-group">
55 <label for="bloodtype">Bloodtype:</label>
56 <select name="bloodtype" id="option"
57 class="form-control">
58 <option value="">--Select--</option>
59 <option value="A+"
60 <?php
61 echo ($patient->bloodtype == "A+") ?
62 "selected": "" ?>>A+</option>
63 <option value="A-"
64 <?php
65 echo ($patient->bloodtype == "A-") ?
66 "selected": "" ?>>A-</option>
67 <option value="B+"
68 <?php
69 echo ($patient->bloodtype == "B+") ?
70 "selected": "" ?>>B+</option>
71 <option value="B-"
72 <?php
73 echo ($patient->bloodtype == "B-") ?
74 "selected": "" ?>>B-</option>
75 <option value="AB+"
76 <?php
77 echo ($patient->bloodtype == "AB+") ?
78 "selected": "" ?>>AB+</option>
79 <option value="AB-"
80 <?php
81 echo ($patient->bloodtype == "AB-") ?
82 "selected": "" ?>>AB-</option>
83 <option value="O+"
84 <?php
85 echo ($patient->bloodtype == "O+") ?
86 "selected": "" ?>>O+</option>
87 <option value="O-"
88 <?php
89 echo ($patient->bloodtype == "O-") ?
90 "selected": "" ?>>O-</option>
91 </select>
92 </div>
93 <div class="form-group">
94 <label for="phone">Phone:</label>
95 <input type="text" name="phone" class="form-control"
96 value="<?= $patient->phone ?>">
97 </div>
98 <div class="form-group">
99 <label for="email">Email:</label>
100 <input type="text" name="email" class="form-control"
101 value="<?= $patient->email ?>">
102 </div>
103 <div class="form-group">
104 <label for="address">Address:</label>
105 <input type="text" name="address" class="form-control"
106 value="<?= $patient->address ?>">
107 </div>
108 <button type="submit"
109 class="btn btn-primary btn-block">Save</button>
Here is the gist
The add.php file:
1 <?php
2 $action = 'Add';
3 include '_form_header.php';
4 ?>
5 <section class="content">
6 <div class="container-fluid">
7 <div class="card">
8 <div class="card-body">
9 <form
10 action="<?= SITE_BASE ?>patient/add"
11 method="POST">
12 <?php include '_form.php'; ?>
13 </form>
14 </div>
15 </div>
16 </div>
17 </section>
The edit.php file:
1 <?php
2 $action = 'Edit';
3 include '_form_header.php';
4 ?>
5 <section class="content">
6 <div class="container-fluid">
7 <div class="card">
8 <div class="card-body">
9 <form
10 action="<?= SITE_BASE ?>patient/edit/<?= $patient->\
11 id ?>"
12 method="POST">
13 <?php include '_form.php'; ?>
14 </form>
15 </div>
16 </div>
17 </div>
18 </section>
And the view.php. This would be a little bit longer, and it will have some placeholder space for now:
1 <?php
2 $action = 'Patient';
3 include '_form_header.php';
4 ?>
5
6 <!-- Main content -->
7 <section class="content">
8 <div class="container-fluid">
9 <div class="row">
10 <div class="col-md-3">
11
12 <!-- Profile Image -->
13 <div class="card card-primary card-outline">
14 <div class="card-body box-profile">
15 <div class="text-center">
16 <img
17 class="profile-user-img img-fluid
18 img-circle"
19 src="../../dist/img/user4-128x128.jpg"
20 alt="User profile picture">
21 </div>
22
23 <h3 class="profile-username text-center">
24 <?= $patient->firstname
25 . ' ' . $patient->lastname ?>
26 </h3>
27
28 <ul
29 class="list-group
30 list-group-unbordered mb-3">
31 <li class="list-group-item">
32 <b>Age</b>
33 <a class="float-right">
34 <?= $patient->age ?>
35 </a>
36 </li>
37 <li class="list-group-item">
38 <b>Bloodtype</b>
39 <a class="float-right">
40 <?= $patient->bloodtype ?>
41 </a>
42 </li>
43 </ul>
44
45 <a
46 href=
47 "<?= SITE_BASE ?>patient/edit/<?= $patient->i\
48 d ?>"
49 class="btn btn-primary btn-block">
50 <b>Edit</b>
51 </a>
52 </div>
53 <!-- /.card-body -->
54 </div>
55 <!-- /.card -->
56
57 <!-- About Me Box -->
58 <div class="card card-primary">
59 <div class="card-header">
60 <h3 class="card-title">Contact</h3>
61 </div>
62 <!-- /.card-header -->
63 <div class="card-body">
64 <strong><i class="fas fa-phone mr-1"></i>
65 Phone
66 </strong>
67
68 <p class="text-muted">
69 <?= $patient->phone ?>
70 </p>
71
72 <hr>
73
74 <strong>
75 <i class="fas fa-map-marker-alt mr-1">
76 </i> Address
77 </strong>
78
79 <p class="text-muted">
80 <?= $patient->address ?>
81 </p>
82
83 <hr>
84
85 <strong>
86 <i class="fas fa-envelope mr-1"></i> Email
87 </strong>
88
89 <p class="text-muted">
90 <?= $patient->email ?>
91 </p>
92 </div>
93 <!-- /.card-body -->
94 </div>
95 <!-- /.card -->
96 </div>
97 <!-- /.col -->
98 <div class="col-md-9">
99 <div class="card">
100 <div class="card-header p-2">
101 <ul class="nav nav-pills">
102 <li class="nav-item">
103 <a class="nav-link active"
104 href="#visits"
105 data-toggle="tab">Visits</a>
106 </li>
107 <li class="nav-item">
108 <a class="nav-link" href="#exams"
109 data-toggle="tab">Exams</a>
110 </li>
111 </ul>
112 </div><!-- /.card-header -->
113 <div class="card-body">
114 <div class="tab-content">
115 <div class="active tab-pane" id="visits">
116 <!-- The Timeline -->
117 <div>
118
119 </div>
120 <!-- /.timeline -->
121 </div>
122 <!-- /.tab-pane -->
123 <div class="tab-pane" id="exams">
124 <!-- Post -->
125 <div class="post">
126
127 </div>
128 <!-- /.post -->
129 <!-- /.tab-pane -->
130 </div>
131 <!-- /.tab-content -->
132 </div><!-- /.card-body -->
133 </div>
134 <!-- /.card -->
135 </div>
136 <!-- /.col -->
137 </div>
138 <!-- /.row -->
139 </div><!-- /.container-fluid -->
140 </section>
141 <!-- /.content -->
Here is the gist
We are reusing our _form_header.php. It’s probably a good idea to rename the file as _patient_header.php, let’s do that. Then we need to alter the include sentences in add.php, edit.php and view.php to:
1 include '_patient_header.php';
We’ve made a lot of work in this chapter. It’s better to leave it like this for the moment. I’ll give you the gists to the files to make sure everything is working.
Summary
In this chapter we’ve defined the database structure. We’ve also incorporated a template for the interface, and developed the first models and controllers.
Our application is growing, we have a lot of work to do, but the progress has been noticeable. In the next chapter we’ll work on the CRUD of specialties and medical records.
See you soon!
Chapter 12: Clinic Management App Part III, Medical Records
Introduction
In this chapter we’ll be working on the specialties CRUD, and linking professionals to one or more specialties. Then we’ll work on the logic behind adding new medical records for patients. In the process, we’ll be adding new capabilities to our framework, such as defining relations between models.
Specialities table
The structure is very simple, only two fields:
1 CREATE TABLE `clinicmanagement`.`specialties` (
2 `id` INT NOT NULL AUTO_INCREMENT ,
3 `description` VARCHAR(50) NOT NULL ,
4 PRIMARY KEY (`id`)
5 ) ENGINE = InnoDB;
We can insert the records already:
1 INSERT INTO `specialties` (`id`, `description`) VALUES
2 (1, 'Work medicine'),
3 (2, 'General clinic'),
4 (3, 'Gynecology'),
5 (4, 'Pediatrics'),
6 (5, 'Dermatology'),
7 (6, 'Gastroenterology');
We are not going to create a Controller yet, but we need a Model. Create a file called Specialty.php:
1 <?php
2 namespace App\models;
3
4 use SimpleMVC\core\Model as Model;
5
6 class Specialty extends Model {
7 public $id;
8 private $description;
9
10 public function __construct()
11 {
12 $this->table = 'specialties';
13
14
15 parent::__construct($this->table, $this->db);
16 $this->key = 'id';
17 }
18
19 public function setDescription($description)
20 {
21 $this->description = $description;
22 }
23
24 public function getDescription()
25 {
26 return $this->description;
27 }
28 }
We also need a pivot table to link professionals to specialties:
1 CREATE TABLE `clinicmanagement`.`employees_specialties` (
2 `employee_id` INT NOT NULL ,
3 `specialty_id` INT NOT NULL
4 ) ENGINE = InnoDB;
Insert a couple of records so we have something to test.
Model’s Relations
In the case of the professionals, they could have one or more specialties, and one specialty can be assigned to one or more professionals; this is a many to many relation. If we consider the patients, they can have one or more visits to the clinic, that is a one to many relation.
In other applications, a user can have a profile, that is, a one to one relation.
In every project, we could include the logic necessary to obtain related models, but it would be very convenient to have this capability in the base model.
For example, Laravel has methods specifically for that, such as hasOne, hasMany, belongsTo and belongsToMany.
We’ll recreate this functionality in our framework.
One to one relation
In the Model.php file of our framework, add the following method:
1 protected function hasOne($relatedModel, $foreign_key)
2 {
3 $relatedTable = $relatedModel->table;
4
5 return $this->db->getOne(
6 $relatedTable, [], $foreign_key, $this->id
7 );
8 }
As you can see, we are using the getOne method of the db class. You can take a look to refresh what that method does.
With this method in place, we could have a method Profile in a User model such as:
1 public function getProfile()
2 {
3 return
4 $this->hasOne(new Profile('profiles'), 'user_id');
5 }
And then make a call such as $user->profile.
This is simple, but powerful and very convenient.
One to Many
Add the following method in the base Model:
1 protected function hasMany($relatedModel, $foreign_key)
2 {
3 $relatedTable = $relatedModel->table;
4
5 $query = "SELECT *
6 FROM $relatedTable
7 WHERE $foreign_key = '$this->id'";
8 return $this->db->query($query);
9 }
In this way, and supposing we have a Visit model, we could add the following method in the Patient model:
1 public function getVisits()
2 {
3 return $this->hasMany(
4 new Visit('visits'), 'patientid'
5 );
6 }
And use it like this $patient->visits to obtain all the visits that conform the medical records.
Many to Many
Add the following method to the base Model:
1 protected function belongsToMany(
2 $relatedModel,
3 $pivotTable,
4 $foreign_key,
5 $related_key
6 )
7 {
8 $relatedTable = $relatedModel->table;
9
10 $query = "SELECT $relatedTable.* FROM $relatedTable
11 INNER JOIN $pivotTable
12 ON $relatedTable."
13 .$relatedModel->key
14 ." = $pivotTable.$related_key
15 WHERE $pivotTable.$foreign_key = '$this->id'";
16
17 return $this->db->query($query);
18 }
We are going to test this method.
Since a professional can have many specialties, and a specialty can be assigned to many professionals, we have a many to many relationship.
Go to the Employee model and add the following use sentence:
1 use App\models\Specialty as Specialty;
Add the following method to the Employee model:
1 public function getSpecialties()
2 {
3 return $this->belongsToMany(
4 new Specialty('specialties'),
5 'employees_specialties',
6 'employee_id',
7 'specialty_id'
8 );
9 }
We are going to use this in the view.php file:
Right above this line:
1 <a href="employee/edit/<?= $employee->id ?>"
2 class="btn btn-primary btn-block"><b>Edit</b></a>
Add the following lines:
1 <hr>
2 <h3>Specialties</h3>
3 <?php foreach ($employee->specialties as $specialty): ?>
4 <p><?= $specialty['description'] ?></p>
5 <?php endforeach ?>
6 <hr>
We should see something similar to the Figure 59:
We’re going to make some changes so we can select what specialties a professional has at the moment of adding and editing.
Let’s change the add method of EmployeeController:
1 public function add()
2 {
3 if ($_SERVER["REQUEST_METHOD"] == 'POST') {
4 $data = [
5 'firstname' => $_POST["firstname"],
6 'lastname' => $_POST["lastname"],
7 'type' => $_POST["type"]
8 ];
9
10 $this->employee->load($data);
11 $this->employee->save();
12
13 $this->db = new db(CONFIG);
14
15 $this->employee->id
16 = $this->db->getConnection()->lastInsertId();
17
18 $specialties = $_POST["specialties"];
19
20 $this->employee->saveSpecialties($specialties);
21
22 header('Location: ' . SITE_BASE . 'employee/index/');
23 exit;
24 }
25
26 $this->db = new db(CONFIG);
27
28 $specialties = $this->db->query(
29 'SELECT * FROM specialties'
30 );
31 $this->view->setAction('add');
32 $this->view->set('employee', $this->employee);
33 $this->view->set('specialties', $specialties);
34 $this->view->render();
35 }
And the edit method:
1 public function edit($id)
2 {
3 if ($_SERVER["REQUEST_METHOD"] == 'POST') {
4 $data = [
5 'firstname' => $_POST["firstname"],
6 'lastname' => $_POST["lastname"],
7 'type' => $_POST["type"]
8 ];
9
10
11 $this->employee->load($data);
12 $this->employee->save($id);
13 $this->employee->id = $id;
14
15
16 $specialties = $_POST["specialties"];
17
18
19 $this->employee->saveSpecialties($specialties);
20
21 header('Location: '.SITE_BASE.'employee/index/');
22 exit;
23 }
24
25
26 $this->db = new db(CONFIG);
27
28 $specialties = $this->db->query('SELECT *
29 FROM specialties');
30 $this->employee->loadModel($id);
31 $this->view->setAction('edit');
32 $this->view->set('employee', $this->employee);
33 $this->view->set('specialties', $specialties);
34 $this->view->render();
35 }
And in the _form.php, right before the submit button:
1 <div class="form-group">
2 <?php $spec_ids = array_column(
3 $employee->specialties, 'id'
4 ) ?>
5 <label for="specialties">Specialties:</label>
6 <select name="specialties" id="specialties"
7 class="form-control" multiple>
8 <?php foreach($specialties as $specialty): ?>
9 <option value="<?= $specialty['id'] ?>"
10 <?php
11 echo (
12 in_array(
13 $specialty['id'], $spec_ids)
14 ) ? 'selected' : '' ?>>
15 <?= $specialty['description'] ?>
16 </option>
17 <?php endforeach ?>
18 </select>
19 </div>
array_column gives us an array with the values corresponding to the field pass as a second parameter.
With this in place, the add and edit functionality should work. But there is something not quite right yet.
In the add method we have these two lines:
1 $this->db = new db(CONFIG);
2
3 $this->employee->id = $this
4 ->db
5 ->getConnection()
6 ->lastInsertId();
We are doing this, because we need the id assigned to the model to save the related specialties, but the id is not being set.
Let’s go to the base Model and the save method:
1 public function save($id = null)
2 {
3 if ($id) {
4 $result = $this->db->update(
5 $this->data, $this->table, $this->key, $id
6 );
7 } else {
8 $result = $this->db->insert(
9 $this->data, $this->table
10 );
11 }
12
13 return $result;
14 }
Change it like this:
1 public function save($id = null)
2 {
3 if ($id) {
4 $result = $this->db->update(
5 $this->data, $this->table, $this->key, $id
6 );
7 } else {
8 $result = $this->db->insert(
9 $this->data, $this->table
10 );
11 $this->id = $this->db->getConnection()
12 ->lastInsertId();
13 }
14
15 return $result;
16 }
Another problem in the add method, these two lines:
1 $this->db = new db(CONFIG);
2
3 $specialties = $this
4 ->db
5 ->query('SELECT * FROM specialties');
We shouldn’t be making a query when we could use the Specialty model. In the EmployeeController add this use sentence:
1 use App\models\Specialty as Specialty;
And this property:
1 private $specialties;
And then change the constructor:
1 public function __construct(
2 Employee $employee,
3 View $view,
4 Specialty $specialties
5 )
6 {
7 $this->employee = $employee;
8 $this->view = $view;
9 $this->specialties = $specialties;
10 }
We are making use of the dependency injection in order to avoid the new operator.
Now we can rewrite the add method as follows:
1 public function add()
2 {
3 if ($_SERVER["REQUEST_METHOD"] == 'POST') {
4 $data = [
5 'firstname' => $_POST["firstname"],
6 'lastname' => $_POST["lastname"],
7 'type' => $_POST["type"]
8 ];
9
10 $this->employee->load($data);
11 $this->employee->save();
12
13 $specialties = $_POST["specialties"];
14
15 $this->employee->saveSpecialties($specialties);
16
17 header('Location: '.SITE_BASE.'employee/index/');
18 exit;
19 }
20
21 $this->view->setAction('add');
22 $this->view->set('employee', $this->employee);
23 $this->view->set(
24 'specialties', $this->specialties->all()
25 );
26 $this->view->render();
27 }
And the edit method:
1 public function edit($id)
2 {
3 if ($_SERVER["REQUEST_METHOD"] == 'POST') {
4 $data = [
5 'id' => $id,
6 'firstname' => $_POST["firstname"],
7 'lastname' => $_POST["lastname"],
8 'type' => $_POST["type"]
9 ];
10
11
12 $this->employee->load($data);
13 $this->employee->save($id);
14
15
16 $specialties = $_POST["specialties"];
17
18
19 $this->employee->saveSpecialties($specialties);
20
21 header('Location: '.SITE_BASE.'employee/index/');
22 exit;
23 }
24
25 $this->employee->loadModel($id);
26 $this->view->setAction('edit');
27 $this->view->set('employee', $this->employee);
28 $this->view->set(
29 'specialties', $this->specialties->all()
30 );
31 $this->view->render();
32 }
Just to be sure, here is the complete code of the EmployeeController.
We can make another little refactor. In the Employee model, add this property:
1 private $specialty;
And modify the constructor:
1 public function __construct(
2 string $table,
3 Specialty $specialty
4 )
5 {
6 $this->table = $table;
7 $this->specialty = $specialty;
8
9
10 parent::__construct($this->table, $this->db);
11 $this->key = 'id';
12 }
We are relying now on dependency injection, and now we can rework the getSpecialties method:
1 public function getSpecialties()
2 {
3 return $this->belongsToMany(
4 $this->specialty,
5 'employees_specialties',
6 'employee_id',
7 'specialty_id'
8 );
9 }
And just to be sure, here is the updated Employee Model.
Patient Medical History
It’s time to start adding the structure and logic to register patients visits, that will compose their medical record.
Run the following sql sentence:
1 CREATE TABLE `visits` (
2 `id` int(11) NOT NULL AUTO_INCREMENT,
3 `appointmentid` int(11) DEFAULT NULL,
4 `datetime` datetime DEFAULT NULL,
5 `patientid` int(11) DEFAULT NULL,
6 `doctorid` int(11) DEFAULT NULL,
7 `complaints` text,
8 `diagnosis` varchar(250) DEFAULT NULL,
9 `prescription` text,
10 PRIMARY KEY (`id`)
11 ) ENGINE=InnoDB DEFAULT CHARSET=utf8;
Create the Visit model with the following content:
1 <?php
2 namespace App\models;
3
4 use SimpleMVC\core\Model as Model;
5
6 class Visit extends Model {
7 public $id;
8 private $appointmentid;
9 private $datetime;
10 private $patientid;
11 private $doctorid;
12 private $complaints;
13 private $diagnosis;
14 private $prescription;
15
16 public function __construct()
17 {
18 $this->table = 'visits';
19
20
21 parent::__construct($this->table, $this->db);
22 $this->key = 'id';
23 }
24
25 public function setAppointmentId($appointmentid)
26 {
27 $this->appointmentid = $appointmentid;
28 }
29
30 public function setDateTime($datetime)
31 {
32 $this->datetime = $datetime;
33 }
34
35 public function setPatientId($patientid)
36 {
37 $this->patientid = $patientid;
38 }
39
40 public function setDoctortId($doctorid)
41 {
42 $this->doctorid = $doctorid;
43 }
44
45 public function setComplaints($complaints)
46 {
47 $this->complaints = $complaints;
48 }
49
50 public function setDiagnosis($diagnosis)
51 {
52 $this->diagnosis = $diagnosis;
53 }
54
55 public function setPrescription($prescription)
56 {
57 $this->prescription = $prescription;
58 }
59
60 public function getAppointmentId()
61 {
62 return $this->appointmentid;
63 }
64
65 public function getDatetime()
66 {
67 return $this->datetime;
68 }
69
70 public function getPatientId()
71 {
72 return $this->patientid;
73 }
74
75 public function getDoctorId()
76 {
77 return $this->doctorid;
78 }
79
80 public function getComplaints()
81 {
82 return $this->complaints;
83 }
84
85 public function getDiagnosis()
86 {
87 return $this->diagnosis;
88 }
89
90 public function getPrescription()
91 {
92 return $this->prescription;
93 }
94 }
We need to make several changes to the Patient model in order to get the visits. First, add this use sentence:
1 use App\models\Visit as Visit;
Then add a private property:
1 private $visits;
And change the constructor like this:
1 public function __construct(string $table, Visit $visits)
2 {
3 $this->table = $table;
4 $this->visits = $visits;
5
6
7 parent::__construct($this->table, $this->db);
8 $this->key = 'id';
9 }
Lastly, the method that defines the relation with the Visit model:
1 public function getVisits()
2 {
3 return $this->hasMany($this->visits, 'patientid');
4 }
Now it’s the turn of the PatientController. Modify the view method as follows:
1 public function view($id)
2 {
3 $patient = $this->patient->loadModel($id);
4
5
6 $scripts = <<<scripts
7 $( document ).ready(function() {
8 $('#visits-table').DataTable()
9 .order( [ 1, 'desc' ] ).draw(false);
10 });
11 scripts;
12
13
14 if ($patient) {
15 $this->view->setAction('view');
16 $this->view->set('patient', $patient);
17 $this->view->render(true, $scripts);
18 }
19 }
Pay attention to:
1 $scripts = <<<scripts
2 $( document ).ready(function() {
3 $('#visits-table').DataTable()
4 .order( [ 1, 'desc' ] ).draw(false);
5 });
6 scripts;
We are initializing a datatable, but in this case, the ordering and searching capabilities won’t be provided on the server side. You could change this, of course, but we don’t expect that many records for a patient. The table will be displayed in the corresponding view.php file, so the next step is to change the view.php file. It’s too much code, so it’s better to give you the gist.
The relevant part is this:
1 <table id="visits-table" class="display"
2 style="width:100%">
3 <thead>
4 <tr>
5 <th>Datetime</th>
6 <th>Complaints</th>
7 <th>Diagnosis</th>
8 <th>Prescription</th>
9 </tr>
10 </thead>
11 <tbody>
12 <?php foreach($patient->visits as $visit): ?>
13 <tr>
14 <td><?= $visit['datetime'] ?></td>
15 <td><?= $visit['complaints'] ?></td>
16 <td><?= $visit['diagnosis'] ?></td>
17 <td><?= $visit['prescription'] ?></td>
18 </tr>
19 <?php endforeach; ?>
20 </tbody>
21 </table>
We are displaying a table with all the patient’s visits.
If you add some records to the visits table, you should see something similar to Figure 60:
Looks pretty good. We can add a New Visit button, let’s do that:
Right below:
1 <div class="active tab-pane" id="visits">
Add:
1 <div class="float-right">
2 <button class="btn btn-success btn-sm mb-2"
3 data-toggle="modal"
4 data-target="#modal-visit">New Visit</button>
5 </div>
The button will toggle a modal that we need to add. Before the closing tag add the following:
1 <div class="modal fade" id="modal-visit">
2 <div class="modal-dialog">
3 <div class="modal-content">
4 <div class="modal-header">
5 <h4 class="modal-title">New Visit</h4>
6 <button type="button" class="close"
7 data-dismiss="modal" aria-label="Close">
8 <span aria-hidden="true">×</span>
9 </button>
10 </div>
11 <div class="modal-body">
12 <form id="visitForm">
13 <div class="form-group">
14 <input type="hidden"
15 name="patientid" id="patientid"
16 value="<?= $patient->id ?>"
17 class="form-control">
18 </div>
19 <div class="form-group">
20 <label for="complaints">
21 Complaints:
22 </label>
23 <input type="text"
24 name="complaints" id="complaints"
25 class="form-control" required>
26 </div>
27 <div class="form-group">
28 <label for="diagnosis">
29 Diagnosis:
30 </label>
31 <input type="text"
32 name="diagnosis" id="diagnosis"
33 class="form-control" required>
34 </div>
35 <div class="form-group">
36 <label for="prescription">
37 Prescription:
38 </label>
39 <textarea
40 name="prescription"
41 id="prescription"
42 rows="5"
43 class="form-control"
44 required>
45 </textarea>
46 </div>
47 <div class="form-group">
48 <label for="doctor">Doctor:</label>
49 <select
50 name="doctorid"
51 id="doctorid"
52 class="form-control" required>
53 <option
54 value="">--Select--</option>
55 <?php foreach($doctors as $doctor):\
56 ?>
57 <option value="<?= $doctor["id"] \
58 ?>">
59 <?= $doctor["fullname"] ?>
60 </option>
61 <?php endforeach; ?>
62 </select>
63 </div>
64 <div
65 class="modal-footer
66 justify-content-between">
67 <button type="button"
68 class="btn btn-default"
69 data-dismiss="modal">
70 Close
71 </button>
72 <button
73 type="submit"
74 class="btn btn-primary">
75 Save
76 </button>
77 </div>
78 </form>
79 </div>
80 </div>
81 <!-- /.modal-content -->
82 </div>
83 <!-- /.modal-dialog -->
84 </div>
85 <!-- /.modal -->
Here is the gist
The modal has a form that we’ll submit via ajax. It’s necessary to alter the view method of the PatientController to add the required scripts:
1 public function view($id)
2 {
3 $patient = $this->patient->loadModel($id);
4
5
6 $scripts = <<<scripts
7 function submitForm(table){
8 $.ajax({
9 type: "POST",
10 url: "/patient/addvisit",
11 cache:false,
12 data: $('form#visitForm').serialize(),
13 success: function(response){
14 data = JSON.parse(response);
15 table.row
16 .add([
17 data.datetime,
18 data.complaints,
19 data.diagnosis,
20 data.prescription
21 ])
22 .order( [ 1, 'desc' ] )
23 .draw(false);
24 $("#complaints").val("");
25 $("#diagnosis").val("");
26 $("#prescription").val("");
27 $("#doctorid").val("");
28 $("#modal-visit").modal('hide');
29 },
30 error: function(){
31 alert("Error");
32 }
33 });
34 }
35 $( document ).ready(function() {
36 let table = $('#visits-table').DataTable();
37 table.order( [ 1, 'desc' ] ).draw(false);
38 $("#visitForm").submit(function(event){
39 submitForm(table);
40 return false;
41 });
42 });
43 scripts;
44
45 $this->db = new db(CONFIG);
46
47 $doctors = $this
48 ->db
49 ->query("SELECT id,
50 CONCAT(firstname, ' ', lastname) as fullname
51 FROM employees WHERE type=1");
52
53 if ($patient) {
54 $this->view->setAction('view');
55 $this->view->set('patient', $patient);
56 $this->view->set('doctors', $doctors);
57 $this->view->render(true, $scripts);
58 }
59 }
The ajax call sends a request to /patient/addvisit. We don’t have the addvisit method. Let’s create it:
1 public function addvisit()
2 {
3 if ($_SERVER["REQUEST_METHOD"] == 'POST') {
4 $data = [
5 'appointmentid' => null,
6 'datetime' => date('Y-m-d h:i:s'),
7 'patientid' => $_POST["patientid"],
8 'doctorid' => $_POST["doctorid"],
9 'complaints' => $_POST["complaints"],
10 'diagnosis' => $_POST["diagnosis"],
11 'prescription' => $_POST["prescription"]
12 ];
13
14 $this->db = new db(CONFIG);
15
16 $this->db->save($data, 'visits');
17
18 echo json_encode($data);
19 }
20 }
Go ahead and try to add a few records, they should appear at the top of the table. The code responsible is this:
1 table.row
2 .add([
3 data.datetime,
4 data.complaints,
5 data.diagnosis,
6 data.prescription
7 ])
8 .order( [ 1, 'desc' ] )
9 .draw(false);
For now this is everything we need. Later we could include the patient exams but we have made a lot of progress.
Summary
In this chapter we’ve worked on the specialties CRUD, and linking professionals to one or more specialties. Then we built the logic behind adding new medical records for patients. In the process, we’ve added new capabilities to our framework, such as defining relations between models.
In the next chapter we’ll focus on registering appointments for patients. We’ll work on generating the doctors schedule, and then adding the functionalities to book appointments.
Chapter 13: Patients Appointments
Introduction
In this chapter we’ll focus on two things: adding the functionality to generate the appointment slots for the doctors, and register appointments for the patients.
We’ll use fullcalendar to display and select available dates for patients visits. This widget is included in the AdminLTE template, so it’s reasonable to make use of it.
Availability table
This table will represent medical appointments. An appointment will have a doctorid, indicating the professional that will treat the patient, and a patientid indicating the patient to be treated. At first, the patientid will be null because the appointment will not be assigned to any patient. The structure is this:
1 CREATE TABLE `clinicmanagement`.`appointments` (
2 `id` INT NOT NULL AUTO_INCREMENT ,
3 `patientid` INT DEFAULT NULL ,
4 `doctorid` INT NOT NULL ,
5 `date` DATE NOT NULL ,
6 `start` DATETIME NOT NULL ,
7 `end` DATETIME NOT NULL , PRIMARY KEY (`id`)
8 ) ENGINE = InnoDB;
Later we’ll need a tabla to store the doctors schedule (days and hours to work from monday to friday), and with that information generate the appointments records, originally without a patient assigned.
Before starting with the models and controllers, let’s add the necessary js files and style sheets to include fullcalendar and the select2 widget in the main layout.
Go to main.php and add these lines before the closing tag:
1 <!-- fullCalendar -->
2 <link rel="stylesheet"
3 href="plugins/fullcalendar/main.css">
4 <!-- Select2 -->
5 <link rel="stylesheet"
6 href="plugins/select2/css/select2.min.css">
7 <link rel="stylesheet"
8 href
9 ='plugins/select2-bootstrap4-theme/select2-bootstrap4.min
10 .css'
11 >
Note: every css reference above should be one line in your code, I had to split them to avoid the text wordwrap.
And at the bottom of the page, after the SweetAlert2 script, add:
1 <!-- fullCalendar 2.2.5 -->
2 <script src="plugins/moment/moment.min.js"></script>
3 <script src="plugins/fullcalendar/main.js"></script>
4 <!-- Select2 -->
5 <script src="plugins/select2/js/select2.full.min.js">
6 </script>
Appointment model
Now we can start with the Appointment model:
1 <?php
2 namespace App\models;
3
4 use SimpleMVC\core\Model as Model;
5
6 class Appointment extends Model {
7 public $id;
8 private $doctorid;
9 private $date;
10 private $start;
11 private $end;
12
13 public function setDoctorId($doctorid)
14 {
15 $this->doctorid = $doctorid;
16 }
17
18 public function setDate($date)
19 {
20 $this->date = $date;
21 }
22
23 public function setStart($start)
24 {
25 $this->start = $start;
26 }
27
28 public function setEnd($end)
29 {
30 $this->end = $end;
31 }
32
33 public function getDoctorId()
34 {
35 return $this->doctorid;
36 }
37
38 public function getDate()
39 {
40 return $this->date;
41 }
42
43 public function getStart()
44 {
45 return $this->start;
46 }
47
48 public function getEnd()
49 {
50 return $this->end;
51 }
52 }
Employee appointments relationship
In the Employee model, add the following use sentence:
1 use App\models\Appointment as Appointment;
And a private property:
1 private $appointments;
Then change the constructor as follows:
1 public function __construct(
2 string $table,
3 Specialty $specialty,
4 Appointment $appointments
5 )
6 {
7 $this->table = $table;
8 $this->specialty = $specialty;
9 $this->appointments = $appointments;
10
11
12 parent::__construct($this->table, $this->db);
13 $this->key = 'id';
14 }
Now we can define the relationship:
1 public function getAppointments()
2 {
3 return
4 $this->hasMany($this->appointments, 'doctorid');
5 }
Now, in EmployeeController the view method changes significantly. The code is very long, so I will give you the gist.
Let’s see what happens:
1 $slots = $this->employee->getAppointments();
We use the relationship to get all the appointments for the current professional. Then we loop through them adding javascript objects representing the events that the calendar needs:
1 $events = '';
2
3 foreach($slots as $slot) {
4 $events .= "
5 {
6 id: " . $slot['id'] . ",
7 title: '" . $slot['title'] . "',
8 start: new Date('".$slot['start']."'),
9 end: new Date('".$slot['end']."'),
10 extendedProps: {
11 patientid: '" . $slot['patientid'] . "'
12 }
13 },
14 ";
15 }
id, title, start and end are standard properties of the event object that fullcalendar expects. We also add one extra property that we’ll use to assign the appointments.
Later in the calendar initialization we see how an array of events is defined:
1 events: [
2 $events
3 ]
Then we have a function that is called whenever the user clicks on an event:
1 eventClick: function(info) {
2 endtime = moment(info.event.end)
3 .format('YYYY-MM-DD HH:mm:ss');
4 starttime = moment(info.event.start)
5 .format('YYYY-MM-DD HH:mm:ss');
6
7 if (info.event.title == 'AVAILABLE') {
8 $('#modal-edit #modal-title')
9 .html('Assign Appointment');
10 $('#modal-edit #id').val(info.event.id);
11 $('#modal-edit #action').val('edit');
12 $('#modal-edit #start').val(starttime);
13 $('#modal-edit #end').val(endtime);
14 $('#modal-edit #patientid').val(null).trigger('change');
15 $('#modal-edit #patientid').prop('disabled', false);
16 $('#modal-edit #send').removeClass('btn-danger');
17 $('#modal-edit #send').addClass('btn-primary');
18 $('#modal-edit').modal('show');
19 } else {
20 $('#modal-edit #modal-title')
21 .html('Cancel Appointment');
22 $('#modal-edit #id').val(info.event.id);
23 $('#modal-edit #action').val('cancel');
24 $('#modal-edit #start').val(starttime);
25 $('#modal-edit #end').val(endtime);
26 $('#modal-edit #patientid')
27 .val(info.event.extendedProps.patientid)
28 .trigger('change');
29 $('#modal-edit #patientid').prop('disabled', true);
30 $('#modal-edit #send').removeClass('btn-primary');
31 $('#modal-edit #send').addClass('btn-danger');
32 $('#modal-edit').modal('show');
33 }
34 }
info.event is an object that contains the information about the selected event. So, we use that information to populate:
Set the modal title accordingly, to indicate that we are assigning or canceling an appointment. Then we fill the fields of the form that goes inside the modal.
We need to change the view.php file of the employees folder. I’ll give you the gist to the complete view file
You can see the modal at the end of the file.
Insert a couple of records in the appointments table to test how it works. The value of patientid should be null, and the title as ‘AVAILABLE’ as shown in Figure 61.

Later, we’ll build an interface to generate this available appointments for a doctor.
The appointments should display in the calendar as shown in Figure 62.
If you click on any of the available appoitntment, the modal will allow to select the patient to be assigned to the appointment (Figure 63).
After the appointment was assigned, the name of the patient will be displayed as the title of the calendar event (Figure 64).
Clicking on an assigned appointment, shows the modal with the selected patient and dives the opportunity to cancel the appointment (Figure 65).
Working hours for professionals
Before we can generate the available appointments for the professionals, we need a table to store the working hours for everyone of them:
1 CREATE TABLE `availability` (
2 `id` int(11) NOT NULL AUTO_INCREMENT,
3 `doctorid` int(11) NOT NULL,
4 `day` int(11) NOT NULL,
5 `morning_start_shift` time DEFAULT NULL,
6 `morning_end_shift` time DEFAULT NULL,
7 `afternoon_start_shift` time DEFAULT NULL,
8 `afternoon_end_shift` time DEFAULT NULL
9 );
The day field will store a value from 1 to 6, where 1 represents monday, 2 tuesday and so one.
Then we’ll make a change in the _form.php from the employees views folder, in order to display the fields to store the working hours. I’ll provide the gist of the complete file just in case.
The relevant part is this:
1 <ul class="nav nav-pills">
2 <li class="nav-item"><a class="nav-link active"
3 href="#monday" data-toggle="tab">Monday</a>
4 </li>
5 <li class="nav-item"><a class="nav-link"
6 href="#tuesday" data-toggle="tab">Tuesday</a>
7 </li>
8 <li class="nav-item"><a class="nav-link"
9 href="#wednesday" data-toggle="tab">Wednesday</a>
10 </li>
11 <li class="nav-item"><a class="nav-link"
12 href="#thursday" data-toggle="tab">Thursday</a>
13 </li>
14 <li class="nav-item"><a class="nav-link"
15 href="#friday" data-toggle="tab">Friday</a>
16 </li>
17 <li class="nav-item"><a class="nav-link"
18 href="#saturday" data-toggle="tab">Saturday</a>
19 </li>
20 </ul>
21 </div><!-- /.card-header -->
22 <div class="card-body">
23 <div class="tab-content">
24 <?php
25 $days = array(
26 'monday',
27 'tuesday',
28 'wednesday',
29 'thursday',
30 'friday',
31 'saturday'
32 );
33 ?>
34 <?php foreach ($days as $day): ?>
35 <div class="<?= ($day == 'monday') ? 'active' : '' ?>
36 tab-pane" id="<?= $day ?>">
37 <div class="form-group">
38 <label for="<?= $day ?>"><?= ucfirst($day) ?>:</label>
39 <input type="time" class="time-input"
40 name="<?= $day ?>_m_start" step="900"
41 inputmode="numeric"> to
42 <input type="time" class="time-input"
43 name="<?= $day ?>_m_end" step="900"
44 inputmode="numeric"> (morning) |
45 <input type="time" class="time-input"
46 name="<?= $day ?>_a_start" step="900"
47 inputmode="numeric"> to
48 <input type="time" class="time-input"
49 name="<?= $day ?>_a_end" step="900"
50 inputmode="numeric"> (afternoon)
51 </div>
52 </div>
53 <?php endforeach; ?>
54 </div>
55 <!-- /.tab-content -->
56 </div><!-- /.card-body -->
We display the days in tabs, and for each day we show four inputs to enter the working hours. If we edit one of the professionals, we should see something similar a what’s shown in figure 66:
Let’s modify the edit method to process this data.
1 public function edit($id)
2 {
3 if ($_SERVER["REQUEST_METHOD"] == 'POST') {
4 $data = [
5 'id' => $id,
6 'firstname' => $_POST["firstname"],
7 'lastname' => $_POST["lastname"],
8 'type' => $_POST["type"]
9 ];
10
11 $this->employee->load($data);
12 $this->employee->save($id);
13
14 $specialties = $_POST["specialties"];
15
16 $this->employee->saveSpecialties($specialties);
17
18 $days = array(
19 'monday',
20 'tuesday',
21 'wednesday',
22 'thursday',
23 'friday',
24 'saturday'
25 );
26
27 $this->db = new db(CONFIG);
28
29 $this->db->getConnection()->query(
30 "DELETE FROM availability
31 WHERE doctorid=".$this->employee->id
32 );
33
34 foreach ($days as $day) {
35 $dayNumber = array_search($day, $days) + 1;
36
37 $morning_start_shift = $_POST[$day . '_m_start'];
38 $morning_end_shift = $_POST[$day . '_m_end'];
39 $afternoon_start_shift = $_POST[$day . '_a_start'];
40 $afternoon_end_shift = $_POST[$day . '_a_end'];
41
42 if (
43 $morning_start_shift != ''
44 || $afternoon_start_shift != ''
45 ) {
46
47 $stmt = $this
48 ->db
49 ->getConnection()
50 ->prepare(
51 "INSERT INTO availability
52 (day,
53 doctorid,
54 morning_start_shift,
55 morning_end_shift,
56 afternoon_start_shift,
57 afternoon_end_shift)
58 VALUES (?, ?, ?, ?, ?, ?)"
59 );
60 $stmt->execute(
61 [
62 $dayNumber,
63 $this->employee->id,
64 $morning_start_shift,
65 $morning_end_shift,
66 $afternoon_start_shift,
67 $afternoon_end_shift
68 ]
69 );
70 }
71 }
72
73 header('Location: ' . SITE_BASE . 'employee/index/');
74 exit;
75 }
76
77 $this->employee->loadModel($id);
78 $this->view->setAction('edit');
79 $this->view->set('employee', $this->employee);
80 $this->view->set(
81 'specialties', $this->specialties->all()
82 );
83 $this->view->render();
84 }
Here is the gist
These are the exact lines we are adding:
1 $days = array(
2 'monday', 'tuesday', 'wednesday', 'thursday',
3 'friday', 'saturday'
4 );
5
6 $this->db = new db(CONFIG);
7
8
9 $this
10 ->db
11 ->getConnection()
12 ->query("DELETE FROM availability
13 WHERE doctorid=".$this->employee->id);
14
15 foreach ($days as $day) {
16 $dayNumber = array_search($day, $days) + 1;
17
18 $morning_start_shift = $_POST[$day . '_m_start'];
19 $morning_end_shift = $_POST[$day . '_m_end'];
20 $afternoon_start_shift = $_POST[$day . '_a_start'];
21 $afternoon_end_shift = $_POST[$day . '_a_end'];
22
23 if (
24 $morning_start_shift != ''
25 || $afternoon_start_shift != ''
26 ) {
27
28 $stmt = $this
29 ->db
30 ->getConnection()
31 ->prepare("INSERT INTO availability (
32 day,
33 doctorid,
34 morning_start_shift,
35 morning_end_shift,
36 afternoon_start_shift,
37 afternoon_end_shift
38 ) VALUES (?, ?, ?, ?, ?, ?)");
39 $stmt->execute([
40 $dayNumber,
41 $this->employee->id,
42 $morning_start_shift,
43 $morning_end_shift,
44 $afternoon_start_shift,
45 $afternoon_end_shift
46 ]);
47 }
48 }
All of the above should look familiar. We obtain the connection, delete the records corresponding to the doctor, and then traverse the array of days with a foreach. The content of the inputs where no time has been entered we’ll arrive empty, so we need to check for that case.
You can try and add the working hours for the professionals. You will see the records in the table, although we won’t see them in the edit view. Don’t worry, we’ll fix that later.
Showing the hours already registered in the edit form
But we have so far works, but every time we select one professional to edit, we lose the working hours already entered.
We’ll fix this now.
Our first step is to create an Availability model. Add a file named Availability.php with the following content:
1 <?php
2 namespace App\models;
3
4 use SimpleMVC\core\Model as Model;
5
6 class Availability extends Model {
7 public $id;
8 private $doctorid;
9 private $morning_start_shift;
10 private $morning_end_shift;
11 private $afternoon_start_shift;
12 private $afternoon_end_shift;
13
14 public function __construct()
15 {
16 $this->table = 'availability';
17
18
19 parent::__construct($this->table, $this->db);
20 $this->key = 'id';
21 }
22
23 public function getMorningStartShift()
24 {
25 return $this->morning_start_shift;
26 }
27
28 public function getMorningEndShift()
29 {
30 return $this->morning_End_shift;
31 }
32
33 public function getAfternoonStartShift()
34 {
35 return $this->afternoon_start_shift;
36 }
37
38 public function getAfternoonEndShift()
39 {
40 return $this->afternoon_end_shift;
41 }
42 }
We’ve used this approach many times before. As you may have figured out, we’ll define a relationship between the new model and the Employee model. In models -> Employee.php, add the corresponding use sentence:
1 use App\models\Availability;
Then modify the constructor as follows:
1 public function __construct(
2 string $table,
3 Specialty $specialty,
4 Appointment $appointments,
5 Availability $availability
6 )
7 {
8 $this->table = $table;
9 $this->specialty = $specialty;
10 $this->appointments = $appointments;
11 $this->availability = $availability;
12
13
14 parent::__construct($this->table, $this->db);
15 $this->key = 'id';
16 }
We can now define the relationship:
1 public function getHours()
2 {
3 return $this->hasMany($this->availability, 'doctorid');
4 }
Then, in the edit method, we can add the following line before rendering the view:
1 $this->view->set('hours', $this->employee->hours);
Just to be sure, here is the complete edit method
This takes care of editing an employee, but if we try to add one, we’ll see warnings regarding an undefined $hours variable.
We need to modify the add method. First, we add the line:
1 $this->view->set('hours', $this->employee->hours);
Of course, we also need to process the working hours selected for the professional. After this line:
1 $this->employee->saveSpecialties($specialties);
We need to add:
1 $days = array(
2 'monday', 'tuesday', 'wednesday', 'thursday', 'friday',
3 'saturday'
4 );
5
6 $this->db = new db(CONFIG);
7
8 $this->db->getConnection()->query(
9 "DELETE FROM availability
10 WHERE doctorid=".$this->employee->id
11 );
12
13
14 foreach ($days as $day) {
15 $dayNumber = array_search($day, $days) + 1;
16
17 $morning_start_shift = $_POST[$day . '_m_start'];
18 $morning_end_shift = $_POST[$day . '_m_end'];
19 $afternoon_start_shift = $_POST[$day . '_a_start'];
20 $afternoon_end_shift = $_POST[$day . '_a_end'];
21
22 if (
23 $morning_start_shift != ''
24 || $afternoon_start_shift != ''
25 ) {
26
27 $stmt = $this
28 ->db
29 ->getConnection()
30 ->prepare(
31 "INSERT INTO availability
32 (day,
33 doctorid,
34 morning_start_shift,
35 morning_end_shift,
36 afternoon_start_shift,
37 afternoon_end_shift)
38 VALUES (?, ?, ?, ?, ?, ?)"
39 );
40 $stmt->execute([
41 $dayNumber,
42 $this->employee->id,
43 $morning_start_shift,
44 $morning_end_shift,
45 $afternoon_start_shift,
46 $afternoon_end_shift
47 ]);
48 }
49 }
As you may have observed, there is a lot of code repetition. We can abstract the repeated functionality to another method. Add the following to EmployeeController:
1 private function saveAvailabilty($employee)
2 {
3 $db = new db(CONFIG);
4
5
6 $days = array(
7 'monday',
8 'tuesday',
9 'wednesday',
10 'thursday',
11 'friday',
12 'saturday'
13 );
14
15 $db->getConnection()->query("DELETE FROM availability
16 WHERE doctorid=".$employee->id);
17
18 foreach ($days as $day) {
19 $dayNumber = array_search($day, $days) + 1;
20
21 $morning_start_shift = $_POST[$day . '_m_start'];
22 $morning_end_shift = $_POST[$day . '_m_end'];
23 $afternoon_start_shift = $_POST[$day . '_a_start'];
24 $afternoon_end_shift = $_POST[$day . '_a_end'];
25
26 if (
27 $morning_start_shift != ''
28 || $afternoon_start_shift != ''
29 ) {
30 $stmt = $db
31 ->getConnection()
32 ->prepare(
33 "INSERT INTO availability
34 (
35 day,
36 doctorid,
37 morning_start_shift,
38 morning_end_shift,
39 afternoon_start_shift,
40 afternoon_end_shift
41 )
42 VALUES (?, ?, ?, ?, ?, ?)");
43 $stmt->execute(
44 [
45 $dayNumber,
46 $employee->id,
47 $morning_start_shift,
48 $morning_end_shift,
49 $afternoon_start_shift,
50 $afternoon_end_shift
51 ]
52 );
53 }
54 }
55 }
Now the add method is reduced significantly:
1 public function add()
2 {
3 if ($_SERVER["REQUEST_METHOD"] == 'POST') {
4 $data = [
5 'firstname' => $_POST["firstname"],
6 'lastname' => $_POST["lastname"],
7 'type' => $_POST["type"]
8 ];
9
10 $this->employee->load($data);
11 $this->employee->save();
12
13 $specialties = $_POST["specialties"];
14
15 $this->employee->saveSpecialties($specialties);
16
17 $this->saveAvailabilty($this->employee);
18
19 header('Location: '.SITE_BASE.'employee/index/');
20 exit;
21 }
22
23 $this->view->setAction('add');
24 $this->view->set('employee', $this->employee);
25 $this->view->set(
26 'specialties',
27 $this->specialties->all()
28 );
29 $this->view->set('hours', $this->employee->hours);
30 $this->view->render();
31 }
And the edit method:
1 public function edit($id)
2 {
3 if ($_SERVER["REQUEST_METHOD"] == 'POST') {
4 $data = [
5 'id' => $id,
6 'firstname' => $_POST["firstname"],
7 'lastname' => $_POST["lastname"],
8 'type' => $_POST["type"]
9 ];
10
11 $this->employee->load($data);
12 $this->employee->save($id);
13
14 $specialties = $_POST["specialties"];
15
16 $this->employee->saveSpecialties($specialties);
17
18 $this->saveAvailabilty($this->employee);
19
20 header('Location: '.SITE_BASE.'employee/index/');
21 exit;
22 }
23
24 $this->employee->loadModel($id);
25 $this->view->setAction('edit');
26 $this->view->set('employee', $this->employee);
27 $this->view->set(
28 'specialties', $this->specialties->all()
29 );
30 $this->view->set('hours', $this->employee->hours);
31 $this->view->render();
32 }
Generating doctors available appointments
We have come very far, but now we need a way to generate the available appointments. In this occasion, we’ll start with the view. In the employees folder, add a file named appointments.php with the following content:
1 <?php
2 $action = "Generate Doctor's Available Appointments";
3 include '_form_header.php';
4 ?>
5 <section class="content">
6 <div class="container-fluid">
7 <div class="card">
8 <div class="card-body">
9 <h2>Generate Doctor's Available Appointments</h2>
10 <form
11 action
12 ="<?= SITE_BASE ?>employee/appointments/
13 <?= $employee->id ?>"
14 method="post">
15 <input type="hidden" name="doctor_id"
16 value="<?= $employee->id ?>">
17 <div class="form-group">
18 <label for="start_date">Start Date:</label>
19 <input type="date" name="start_date"
20 class="form-control">
21 </div>
22 <div class="form-group">
23 <label for="end_date">End Date:</label>
24 <input type="date" name="end_date"
25 class="form-control">
26 </div>
27 <input type="hidden" name="appointment_duration"
28 value="15">
29 <button type="submit" class="btn btn-primary">
30 Generate Available Appointments
31 </button>
32 </form>
33 </div>
34 </div>
35 </div>
36 </section>
And here is the gist
There is not much to it, we have two fields to enter the start and end dates, plus a hidden input holding the id of the doctor.
Then add this method to EmployeeController:
1 public function appointments($id)
2 {
3 if ($_SERVER["REQUEST_METHOD"] == "POST") {
4 // Retrieve form data
5 $doctorId = $_POST["doctor_id"];
6 $startDate = $_POST["start_date"];
7 $endDate = $_POST["end_date"];
8 $appointmentDuration = $_POST["appointment_duration"];
9
10 $this->db = new db(CONFIG);
11 $connection = $this->db->getConnection();
12
13 // Call the function to generate appointments
14 $this->saveAppointments(
15 $connection,
16 $doctorId,
17 $startDate,
18 $endDate,
19 $appointmentDuration
20 );
21
22 header('Location: '.SITE_BASE.'employee/index/');
23 exit;
24 }
25
26 $this->employee->loadModel($id);
27 $this->view->setAction('appointments');
28 $this->view->set('employee', $this->employee);
29 $this->view->render();
30 }
The pattern is similar to other methods. If there is post, we process the data, if there is not post data, we render the view.
We don’t have the saveAppointments method yet. But if you write a blank method, such as:
1 private function saveAppointments(
2 $connection,
3 $doctor_id,
4 $start_date,
5 $end_date,
6 $appointment_duration
7 ) {}
There is no need for the method to be public, since it will only be called from another method.
If we visit http://clinicmanagement.test/employee/appointments/2 where the last number represents the id of an existing doctor, we should see the form presented in Figure 67:
We can complete the saveAppointments method now
1 private function saveAppointments(
2 $connection,
3 $doctor_id,
4 $start_date,
5 $end_date,
6 $appointment_duration
7 )
8 {
9 // Function to obtain the "Y-m-d H:i:s" format
10 // given a date and time in "Y-m-d"
11 // and "H:i:s" formats
12 function getDateTimeFormat($date, $time) {
13 return $date . ' ' . $time->format('H:i:s');
14 }
15
16 // Delete records for the doctor in the dates
17 // range selected
18 $connection->query("DELETE
19 FROM appointments
20 WHERE doctorid=$doctor_id
21 AND date >= '$start_date'
22 AND date <= '$end_date'");
23
24 // Retrieve selected days and corresponding timings
25 // from the database
26 $db = new db(CONFIG);
27 $selected_days_data = $db->query("SELECT *
28 FROM availability
29 WHERE doctorid = $doctor_id");
30
31 // Loop through each selected day and generate
32 // appointments
33 foreach ($selected_days_data as $selected_day) {
34 $weekday = $selected_day['day'];
35 $morning_start_time
36 = $selected_day['morning_start_shift'];
37 $morning_end_time
38 = $selected_day['morning_end_shift'];
39 $afternoon_start_time
40 = $selected_day['afternoon_start_shift'];
41 $afternoon_end_time
42 = $selected_day['afternoon_end_shift'];
43
44 // Convert timings to DateTime objects
45 $morning_start
46 = DateTime::createFromFormat(
47 'H:i', $morning_start_time
48 );
49 $morning_end
50 = DateTime::createFromFormat(
51 'H:i', $morning_end_time
52 );
53 $afternoon_start
54 = DateTime::createFromFormat(
55 'H:i', $afternoon_start_time
56 );
57 $afternoon_end
58 = DateTime::createFromFormat(
59 'H:i', $afternoon_end_time
60 );
61
62 // Loop through dates within the range
63 $current_date = new DateTime($start_date);
64 $end_date_obj = new DateTime($end_date);
65
66 while ($current_date <= $end_date_obj) {
67 $current_weekday = $current_date->format('N');
68
69 // Check if the current weekday matches the selecte\
70 d weekday
71 if ($current_weekday == $weekday) {
72 // Get the date in "Y-m-d" format
73 $current_date_str
74 = $current_date->format('Y-m-d');
75
76 // Generate morning appointments
77 $morning_start
78 = DateTime::createFromFormat(
79 'H:i:s', $morning_start_time
80 );
81 $morning_end
82 = DateTime::createFromFormat(
83 'H:i:s', $morning_end_time
84 );
85
86 while ($morning_start < $morning_end) {
87 $morning_end_minutes = clone $morning_start;
88 $morning_end_minutes->modify(
89 "+$appointment_duration minutes"
90 );
91
92 // Insert the record into the "Availability"
93 // table
94 $stmt = $connection
95 ->prepare("INSERT INTO appointments (
96 title,
97 doctorid,
98 date,
99 start,
100 end
101 ) VALUES (?, ?, ?, ?, ?)");
102 $stmt->execute([
103 'AVAILABLE',
104 $doctor_id,
105 $current_date_str,
106 getDateTimeFormat(
107 $current_date_str, $morning_start
108 ),
109 getDateTimeFormat(
110 $current_date_str, $morning_end_minutes
111 )
112 ]);
113
114 // Move to the next appointment
115 $morning_start = $morning_end_minutes;
116 }
117
118 // Generate afternoon appointments
119 $afternoon_start
120 = DateTime::createFromFormat(
121 'H:i:s', $afternoon_start_time
122 );
123 $afternoon_end
124 = DateTime::createFromFormat(
125 'H:i:s', $afternoon_end_time
126 );
127
128 while ($afternoon_start < $afternoon_end) {
129 $afternoon_end_minutes = clone $afternoon_start;
130 $afternoon_end_minutes
131 ->modify("+$appointment_duration minutes");
132
133 // Insert the record into the "appointments"
134 // table
135 $stmt = $connection->prepare(
136 "INSERT INTO appointments (
137 title,
138 doctorid,
139 date,
140 start,
141 end
142 ) VALUES (?, ?, ?, ?, ?)");
143 $stmt->execute([
144 'AVAILABLE',
145 $doctor_id,
146 $current_date_str,
147 getDateTimeFormat(
148 $current_date_str, $afternoon_start
149 ),
150 getDateTimeFormat(
151 $current_date_str, $afternoon_end_minutes
152 )
153 ]);
154
155 // Move to the next appointment
156 $afternoon_start = $afternoon_end_minutes;
157 }
158 }
159
160 // Move to the next day
161 $current_date->modify('+1 day');
162 }
163 }
164 }
There are many lines of code, so it’s better if I provide you with the gist
Let’s see what happens here.
We have this function:
1 function getDateTimeFormat($date, $time)
2 {
3 return $date . ' ' . $time->format('H:i:s');
4 }
It’s very simple, the only thing worth noting is that it’s a function living inside another function. We do this because this function only has meaning in the context of the method, so we don’t need to be able to call it from anywhere else.
The next lines are commented for clarity, we delete the appointments in the range of the selected dates and read the data with the information of the working hours of the doctor.
Then we use a foreach to iterate through the working days and hours of the professional.
For each of these days, we go from the start date to the end date, which are the values entered in the form.
We use this:
1 $current_weekday = $current_date->format('N');
To take a number representing the current day (1 for monday, 2 for tuesday and so on).
If the current day matches the day of the outer foreach, then we need to generate the available appointments for the morning and afternoon shifts.
This gives us two other while loops, where the records are actually inserted.
It may take you a while, but you should be able to follow the code.
We’ll be adding a button linking to this appointments generator. Open the view.php file in the employees folder.
After this line:
1 <a href="employee/edit/<?= $employee->id ?>"
2 class="btn btn-primary btn-block"><b>Edit</b></a>
Add this:
1 <hr>
2 <a
3 href="employee/appointments/<?= $employee->id ?>"
4 class="btn btn-info btn-block">
5 <b>Generate Appointments</b>
6 </a>
Put the new route to test, enter two dates to generate the available appointments. Now return to the professional and you should see something similar to the Figure 68:
!Generated available appointments](13-8-generated-appointments.png)
We’ll finish the chapter with the gists to the relevant files so you can check that everything works.
Summary
In this chapter we focused on two things: adding the functionality to generate the appointment slots for the doctors, and registering appointments for the patients.
We used fullcalendar to display and select available dates for patients visits. Finally, we built the appointments generator.
We still have work to do, but we’ve come a long way. The next chapter will deal with protecting all the routes, providing a way to upload a profile image, and developing the sidebar menu.
Chapter 14: Routing
Introduction
In this chapter, we’ll focus on two topics. First, protecting all of our routes. At the moment, we can visit any place part of our application without the need of logging in. This is of course both unintended and insecure. Second, we have a matching mechanism for our routes that works but is somehow inflexible. We extract the name of the controller and action from the url. Most of the modern frameworks such as Laravel, use a file with the configuration for the routes. The file is called routes.php and allows to map url fragments to controllers, and even to name the routes.
Protecting our routes
If we go back to chapter 8, we’ll remember that the index method of the SiteController required an authenticated user. We accomplished that using a helper called SessionChecker. Let’s revisit the method:
1 public function index()
2 {
3 SessionChecker::check();
4
5 $this->view->setAction('index');
6 $this->view->render();
7 }
The static method check has the following content:
1 public static function check() {
2 session_id(APP_SESSION_ID);
3 session_start();
4
5
6 if (!isset($_SESSION["username"])) {
7 header('Location: '.SITE_BASE.'user/login');
8 exit;
9 }
10
11
12 if (time() - $_SESSION["login_time_stamp"] > 3600) {
13 session_unset();
14 session_destroy();
15 header('Location: '.SITE_BASE.'user/login');
16 exit;
17 }
18 }
We start the session identified with the constant APP_SESSION_ID, and check the session variables for a logged in user.
We should enforce such a control in our EmployeeController and in our PatientController.
Let’s go to http://clinicmanagement.test/employee/index
Accessing the menu containing the Logout option, we get the warnings shown in Figure 69.
It is expected, since we are trying to access session variables that are not defined.
Taking the example of the SiteController, we need to add the following use sentence in the EmployeeController:
1 use SimpleMVC\helpers\SessionChecker;
Now we need to add the call to the static method check() of the SessionChecker helper, but, where?
Well, since the access restriction should apply to every method, it’s probably a good idea add the following line to the constructor:
1 SessionChecker::check();
Now trying to access http://clinicmanagement.test/employee/index should take us to the login page.
The same goes for the PatientController.
Routes configuration
We’ll start by adding a file with the definition of the routes. The routes are application specific, it’s reasonable to create the file in the application folder, as shown in Figure 70.
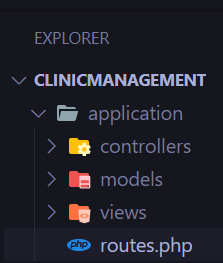
Put the following content:
1 <?php
2 $routes = [
3 '/' => [
4 'controller' => 'SiteController', 'action' => 'index'
5 ],
6 '/site/index' => [
7 'controller' => 'Site', 'action' => 'index'
8 ],
9 '/user/login' => [
10 'controller' => 'User', 'action' => 'login'
11 ],
12 '/user/logout' => [
13 'controller' => 'User', 'action' => 'logout'
14 ],
15 '/employee' => [
16 'controller' => 'Employee', 'action' => 'index'
17 ],
18 '/employee/index' => [
19 'controller' => 'Employee', 'action' => 'index'
20 ],
21 '/employee/data' => [
22 'controller' => 'Employee', 'action' => 'data'
23 ],
24 '/employee/view/{id}' => [
25 'controller' => 'Employee', 'action' => 'view'
26 ],
27 ];
It’s an associative array, with the application routes as the keys, and the pair controller-action as the values.
Note that for /employee/view/{id} we use a placeholder, since the id will vary.
Now we need to make some adjustments in our Application class, specifically in the run method.
Comment out or delete these lines:
1 $url = explode('/', $url);
2 $controller = array_shift($url);
3 $controllerClass = 'App\\controllers\\'
4 . ucwords($controller) . 'Controller';
5 $action = array_shift($url);
6 $queryString = $url;
And replace them with the following:
1 include_once ROOT . DIRECTORY_SEPARATOR
2 . 'application/routes.php';
3
4 $route_defined = false;
5
6 foreach ($routes as $route => $routeInfo) {
7 $pattern = str_replace('/', '\/', $route);
8 $pattern = preg_replace(
9 '/{([a-zA-Z]+)}/', '([^\/]+)', $pattern
10 );
11 if (
12 preg_match('/^' . $pattern . '$/', '/'.$url, $matches)
13 ) {
14 $controller = $routeInfo['controller'];
15 $controllerClass = 'App\\controllers\\'
16 . $controller . 'Controller';
17 $action = $routeInfo['action'];
18 $queryString = array_slice($matches, 1);
19 $route_defined = true;
20 break;
21 }
22 }
23
24 if (!$route_defined) {
25 $response = new Response();
26 $response->setResponseHeader(404, 'Not found');
27 }
Let’s analyze these two lines:
1 $pattern = str_replace('/', '\/', $route);
2 $pattern = preg_replace(
3 '/{([a-zA-Z]+)}/', '([^\/]+)', $pattern
4 );
1 $pattern = str_replace('/', '\/', $route);
This line is used to escape any forward slashes (/) that may be present in the route. This is important when using the preg_match function later, as the forward slash character is used as a delimiter in regular expressions. By escaping the forward slash with /, you ensure that the preg_match function works properly when searching for matches with the route.
1 $pattern = preg_replace(
2 '/{([a-zA-Z]+)}/', '([^\/]+)', $pattern
3 );
This line uses the preg_replace function to replace any route parameters with a more general matching pattern in the route. In this case, it’s looking for a matching pattern that matches any sequence of alphabetic characters, and then replacing it with ([^/]+), which matches any sequence of characters that does not contain a forward slash. This allows the route to match various types of dynamic segments, such as IDs or parameter names, rather than being restricted to just letters.
By making these transformations in the route pattern, you can ensure that the preg_match function can properly find and handle routes with dynamic parameters, allowing you to create more flexible and powerful routes in your application.
If you visit for example http://clinicmanagement.test/employee/index nothing has changed. You can go and view the details of any employee. But if you try to edit then you’ll get the error shown in Figure 71:
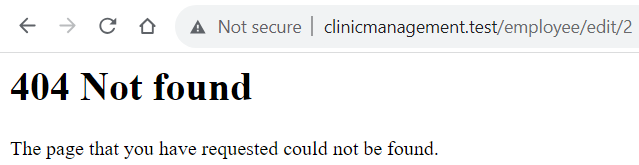
This is to be expected, because our routes.php file doesn’t have the necessary route definition. Let’s add it:
1 '/employee/edit/{id}' => [
2 'controller' => 'Employee', 'action' => 'edit'
3 ],
Now you should see the form.
You may be wondering if it’s worth the trouble of defining every route of our application, especially since there is a correspondence between the routes and the controller actions.
In my opinion, the answer depends upon the complexity of your application, but the approach of a route file is more flexible and is the one used in frameworks such as Laravel. In the case of Laravel, the advantages are clearer because of the use of named routes
Named routes
In Laravel, and other frameworks, there is something called named routes. Basically, the concept is to assign a name to a route, which can be different from the url. Think or named routes as an alias. What are the advantages? Well, let’s see an example.
We have the url employee/view/{id}. We have different parts in our application where we are referencing this route. At some point, we decide that it’s better to define the url as employee/show/{id}. Now we have to look in our code and change all the references.
But, if you use a name for a route, you can leave the alias as it is and change the route definition as you like.
Go to the routes.php file and change the $routes array like this:
1 $routes = [
2 '/' => ['url' => '/', 'controller' => 'Site',
3 'action' => 'index'],
4 'home' => ['url' => '/site/index', 'controller' => 'Sit\
5 e',
6 'action' => 'index'],
7 'user.login' => ['url' => '/user/login',
8 'controller' => 'User', 'action' => 'login'],
9 'user.logout' => ['url' => '/user/logout',
10 'controller' => 'User', 'action' => 'logout'],
11 'employee' => ['url' => '/employee/index',
12 'controller' => 'Employee', 'action' => 'index'],
13 'employee.list' => ['url' => '/employee/index/',
14 'controller' => 'Employee', 'action' => 'index'],
15 'employee.data' => ['url' => '/employee/data',
16 'controller' => 'Employee', 'action' => 'data'],
17 'employee.view' => ['url' => '/employee/view/{id}',
18 'controller' => 'Employee', 'action' => 'view'],
19 'employee.edit' => ['url' => '/employee/edit/{id}',
20 'controller' => 'Employee', 'action' => 'edit'],
21 ];
As you can see, the keys of the arrays are the names of the routes. Then we have the values as arrays with url, controller and action.
Then we need to change the foreach like this:
1 foreach ($routes as $name => $routeInfo) {
2 $pattern = str_replace('/', '\/', $routeInfo['url']);
3 $pattern = preg_replace(
4 '/{([a-zA-Z]+)}/', '([^\/]+)', $pattern
5 );
6 if (
7 preg_match('/^' . $pattern . '$/', '/'.$url, $matches)
8 ) {
9 $controller = $routeInfo['controller'];
10 $controllerClass = 'App\\controllers\\'
11 . $controller . 'Controller';
12 $action = $routeInfo['action'];
13 $queryString = array_slice($matches, 1);
14 $route_defined = true;
15 break;
16 }
17 }
In fact, the only change foreach ($routes as $name => $routeInfo) is instead of foreach ($routes as $routeInfo)
Now, how can we use the name of a route?
Let’s take for example the employee edit form definition:
We need to replace the action with the alias, along with a method to retrieve the url. We can accomplish that with another class.
Create a new file in simplemvc -> helpers named Route.php with the following content:
1 <?php
2 namespace SimpleMVC\helpers;
3
4 class Route
5 {
6 public static function getUrl(
7 $routeName, $parameters = []
8 )
9 {
10 include ROOT . DIRECTORY_SEPARATOR
11 . 'application/routes.php';
12
13 if (array_key_exists($routeName, $routes)) {
14 $url = $routes[$routeName]['url'];
15
16 if (count($parameters) > 0) {
17 $urlParts = explode('/', $url);
18 foreach ($urlParts as $key => $part) {
19 if (strpos($part, '{')
20 !== false && strpos($part, '}')
21 !== false) {
22 $urlParts[$key] = array_shift($parameters);
23 }
24 }
25 $url = implode('/', $urlParts);
26 }
27
28 return $url;
29 } else {
30 return '/';
31 }
32 }
33 }
Here is the gist
In the only method, we include the routes files, then we check the existence of the route name which is the key of the routes array. If the name exists we extract the url from the value, and divide it in parts. The only thing that could look strange is this line:
1 if (
2 strpos($part, '{')
3 !== false && strpos($part, '}')
4 !== false
5 )
We are checking if the url fragment starts and finishes with curly braces, which indicates that is a placeholder. If it’s a placeholder, we extract the value from the parameters array.
In this way we can accommodate a variable number of parameters.
Now, one thing to remember is that we are using composer and PSR-4 for the autoloading of classes. So, in order for this new class to be available we need to open the terminal at the root of the project and run:
1 composer dump-autoload
Now, in our View class, we need to add the following line:
1 use SimpleMVC\helpers\Route as Route;
And in the render method, after this line:
1 extract($this->variables);
Add the following:
1 $route = new Route();
Then, going back to the edit form, we can change the form definition as:
1 <form
2 action="<?php echo $route::getUrl(
3 'employee.edit', [$employee->id]); ?>"
4 method="POST">
Everything should work as expected. Just to be sure, here is the complete code of the Application class
I hope you can see the advantages of using a file to define the routes, and we can take it even harder.
We’ll add a new method called match to our Route class, to take away a big part of the complexity of the run method in the Application class:
1 public static function match($url, $routes)
2 {
3 $result = [
4 'controller' => null,
5 'controllerClass' => null,
6 'action' => null,
7 'queryString' => null,
8 'route_defined' => false
9 ];
10
11
12 foreach ($routes as $name => $routeInfo) {
13 $pattern = str_replace('/', '\/', $routeInfo['url']);
14 $pattern = preg_replace(
15 '/{([a-zA-Z]+)}/', '([^\/]+)', $pattern
16 );
17 if (
18 preg_match('/^' . $pattern . '$/', '/' . $url, $match\
19 es)
20 ) {
21 $result['controller'] = $routeInfo['controller'];
22 $result['controllerClass'] = 'App\\controllers\\'
23 . $routeInfo['controller'] . 'Controller';
24 $result['action'] = $routeInfo['action'];
25 $result['queryString'] = array_slice($matches, 1);
26 $result['route_defined'] = true;
27 break;
28 }
29 }
30
31
32 if (!$result['route_defined']) {
33 $response = new Response();
34 $response->setResponseHeader(404, 'Not found');
35 }
36
37 return $result;
38 }
And we need to add this sentence:
1 use SimpleMVC\core\Response as Response;
We are using the logic that was in the run method of the Application class. Now, we can add this sentence to the Application class:
1 use SimpleMVC\helpers\Route as Route;
And then we can replace these lines:
1 $route_defined = false;
2
3 foreach ($routes as $name => $routeInfo) { \
4
5 $pattern = str_replace('/', '\/', $routeInfo['url']);
6 $pattern = preg_replace(
7 '/{([a-zA-Z]+)}/', '([^\/]+)', $pattern
8 );
9 if (
10 preg_match('/^' . $pattern . '$/', '/'.$url, $matches)
11 ) {
12 $controller = $routeInfo['controller'];
13 $controllerClass = 'App\\controllers\\'
14 . $controller . 'Controller';
15 $action = $routeInfo['action'];
16 $queryString = array_slice($matches, 1);
17 $route_defined = true;
18 break;
19 }
20 }
21
22
23 if (!$route_defined) {
24 $response = new Response();
25 $response->setResponseHeader(404, 'Not found');
26 }
With this line:
1 extract(Route::match($url, $routes));
Again, just to be sure, here is the code of the run method
Now we could go even farther and use the match method to define the allowed http method for every route. It’s an exercise that I leave to you, dear reader.
Finally, you may still prefer the simpler original routing mechanism. Go to the config folder and the config.php file. After this line:
1 define('DEVELOPMENT_ENVIRONMENT', true);
Add this one:
1 define('ROUTER', false);
Then in the run method of the Application class we can replace:
1 include_once ROOT . DIRECTORY_SEPARATOR
2 . 'application/routes.php';
3
4 extract(Route::match($url, $routes));
With:
1 if (ROUTER) {
2 include_once ROOT . DIRECTORY_SEPARATOR
3 . 'application/routes.php';
4
5 extract(Route::match($url, $routes));
6 } else {
7 $url = explode('/', $url);
8 $controller = array_shift($url);
9 $controllerClass = 'App\\controllers\\'
10 . ucwords($controller) . 'Controller';
11 $action = array_shift($url);
12 $queryString = $url;
13 }
Now we can decide which method of routing is better for our app.
Summary
This was a brief chapter. We are approaching the end of the book. We accomplished the goal of protecting our routes, thanks to the helper class, and then we went to define a robust routing mechanism. In the next chapter, we’ll deal with authorization, through role based access control (RBAC), and we’ll finish the sidebar menu, wrapping up our application.
Chapter 15: Role based access control
Introduction
We’ve come a long way, and still, there are many things to be done. Some of these things I will leave to you, dear reader, but we need to tackle the issue of authorization.
Authentication means to identify the user, and we already have the mechanism in place. Authorization, on the other hand, means to decide what parts of the application a user can access based on their identity.
To that end, we can use role based access control (RBAC) which grants authorization to a user group based on their role.
Roles table
We need a roles table, here is the sentence you can use to create it:
1 CREATE TABLE roles (
2 id INT AUTO_INCREMENT PRIMARY KEY,
3 role_name VARCHAR(255) NOT NULL,
4 description TEXT,
5 created_at TIMESTAMP DEFAULT CURRENT_TIMESTAMP,
6 updated_at TIMESTAMP DEFAULT CURRENT_TIMESTAMP
7 ON UPDATE CURRENT_TIMESTAMP
8 );
We also need to establish a relation between users and roles, and this opens a question. Does a user need more than one role in the context of our application? If the answer is yes, then we need a pivot table, users_roles. But if a user can have only one role, we need a field role_id in our users table.
Our application we’ll manage a single role per user, so here is the sentence to add a field to the users table.
1 ALTER TABLE users
2 ADD role_id INT AFTER confirmed_at;
Go ahead and add one record to the roles table:
1 INSERT INTO `roles` (
2 `id`,`role_name`,`description`,`created_at`,`updated_at`
3 )
4 VALUES (
5 '1','Admin','Admin',current_timestamp(),
6 current_timestamp()
7 );
Now choose one of the users and change the value of role_id to 1.
Changing the UserController
Currently our UserController has methods to logging in and out, and registering users. We’ll add the methods to list, view, add, edit and delete users.
Add the index method:
1 public function index()
2 {
3 $dataTable = new DataTable(
4 ['username', 'email', 'role_id', 'id'], 'id', 'users'
5 );
6
7 $this->view->setAction("index");
8 $this->view->set('grid', $dataTable);
9
10 $scripts = <<<scripts
11 $( document ).ready(function() {
12 table = $('#data-table').DataTable({
13 "ajax":{
14 url :"/user/data", // json datasource
15 type: "post" // type of method, GET/POST/DELETE
16 },
17 columns: [
18 {"data": 0},{"data": 1},{"data": 2}, {
19 data: null,
20 orderable: false,
21 searchable: false,
22 className: "center",
23 render: function (data, type, full, meta) {
24 return '<a href="/user/view/'+data[3]
25 +'" title="View">View</a>' + ' ' +
26 '<a href="/user/edit/'+data[3]
27 +'" title="Edit">Edit</a>' + ' '
28 +'<a href="javascript: void(0);"
29 title="Delete"
30 onclick="del('+data[3]+')">Delete</a>';
31 }
32 }
33 ]
34 });
35 });
36 scripts;
37 return $this->view->render(true, $scripts);
38 }
Here is the gist
And of course, we need the data method:
1 public function data()
2 {
3 $params = $_REQUEST;
4
5 $where = "";
6
7 $columns = array(
8 0 =>'username',
9 1 =>'email',
10 2 =>'role_id',
11 3 =>'id'
12 );
13
14 $data = [];
15
16 $queryTot =
17 $queryRec = "SELECT username, email, role_id, id
18 FROM users";
19
20
21 // check search value exist
22 if( !empty($params['search']['value']) ) {
23 $where .=" WHERE ";
24 $where .=" ( username LIKE '"
25 .$params['search']['value']."%' ";
26 $where .=" OR email LIKE '"
27 .$params['search']['value']."%' ";
28 $where .=" OR role_id LIKE '"
29 .$params['search']['value']."%' )";
30
31 $queryTot .= $where;
32 $queryRec .= $where;
33 }
34
35 if( !empty($params['order'][0]) ) {
36 $queryRec .=
37 " ORDER BY "
38 . $columns[$params['order'][0]['column']]." "
39 .$params['order'][0]['dir']
40 ." LIMIT ".$params['start']." ,"
41 .$params['length']." ";
42 }
43
44 $this->db = new db(CONFIG);
45
46 $users = $this->db->query($queryRec);
47
48 foreach ($users as $user) {
49 foreach ($user as $key => $value) {
50 $item[] = $value;
51 }
52 $data[] = $item;
53 $item = [];
54 }
55
56 $totalRecords = count($this->db->query($queryTot));
57
58 $draw =
59 (!empty($params['draw']) )
60 ? intval( $params['draw']) : false;
61
62 $json_data = array(
63 "draw" => $draw,
64 "recordsTotal" => intval( $totalRecords ),
65 "recordsFiltered" => intval($totalRecords),
66 "data" => $data // total data array
67 );
68
69 echo json_encode($json_data);
70 exit;
71 }
And the gist
Now it’s the turn of the views. There is already a users folder. Go ahead and add the index.php file:
1 <section class="content-header">
2 <div class="container-fluid">
3 <div class="row mb-2">
4 <div class="col-sm-6">
5 <h1>Users</h1>
6 </div>
7 </div>
8 </div><!-- /.container-fluid -->
9 </section>
10 <section class="content">
11 <div class="container-fluid">
12 <div class="card">
13 <div class="card-header">
14 <h3 class="card-title">Users</h3>
15 <div class="float-right">
16 <a href="<?= SITE_BASE ?>user/add"
17 class="btn btn-primary">New User</a>
18 </div>
19 </div>
20 <div class="card-body">
21 <?php $grid->render(); ?>
22 </div>
23 </div>
24 </div>
25 </section>
And again the gist
If we visit http://clinicmanagement.test/user/index we should be able to see users list as shown in Figure 72:
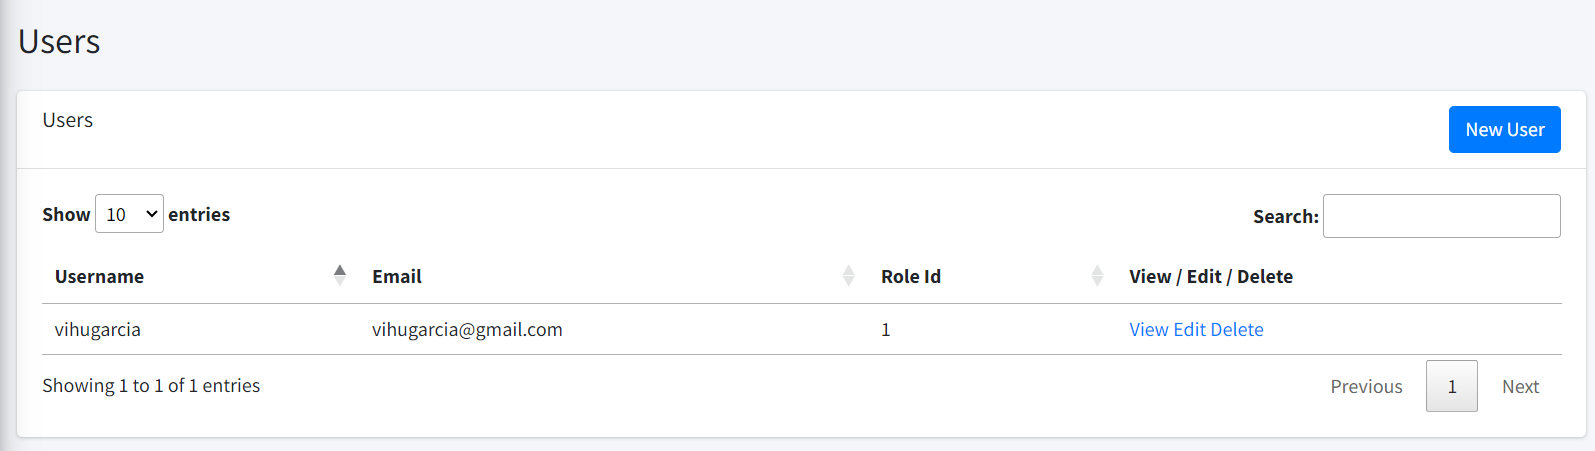
Finally the rest of the method:
1 public function view($id)
2 {
3 $user = $this->user->loadModel($id);
4
5 if ($user) {
6 $this->view->setAction('view');
7 $this->view->set('user', $user);
8 $this->view->render();
9 }
10 }
11
12
13 public function add()
14 {
15 if ($_SERVER["REQUEST_METHOD"] == 'POST') {
16 if (!empty($_POST["password"])) {
17 $data = [
18 'username' => $_POST["username"],
19 'email' => $_POST["email"],
20 'password' => password_hash(
21 $_POST["password"], PASSWORD_BCRYPT
22 ),
23 'role_id' => $_POST["role_id"]
24 ];
25
26
27 if ($_POST["password"]
28 != $_POST["confirm_password"]) {
29 $msg = "Password and Confirmed Password
30 doesn't match";
31 $this->user->load($data);
32 $this->view->setAction('add');
33 $this->view->set('user', $this->user);
34 $this->view->set('msg', $msg);
35 $this->view->render();
36 exit;
37 }
38 } else {
39 $data = [
40 'username' => $_POST["username"],
41 'email' => $_POST["email"],
42 'role_id' => $_POST["role_id"]
43 ];
44 }
45
46 $this->user->load($data);
47 $this->user->save();
48
49 header('Location: ' . SITE_BASE . 'user/index/');
50 exit;
51 }
52
53 $this->view->setAction('add');
54 $this->view->set('user', $this->user);
55 $this->view->render();
56 }
57
58 public function edit($id)
59 {
60 if ($_SERVER["REQUEST_METHOD"] == 'POST') {
61 if (!empty($_POST["password"])) {
62 $data = [
63 'email' => $_POST["email"],
64 'password' => password_hash(
65 $_POST["password"], PASSWORD_BCRYPT
66 ),
67 'role_id' => $_POST["role_id"]
68 ];
69
70 if ($_POST["password"]
71 != $_POST["confirm_password"]) {
72 $msg = "Password and Confirmed Password
73 doesn't match";
74 $this->user->load($data);
75 $this->view->setAction('edit');
76 $this->view->set('user', $this->user);
77 $this->view->set('msg', $msg);
78 $this->view->render();
79 exit;
80 }
81 } else {
82 $data = [
83 'email' => $_POST["email"],
84 'role_id' => $_POST["role_id"]
85 ];
86 }
87
88 $this->user->load($data);
89 $this->user->save($id);
90
91 header('Location: ' . SITE_BASE . 'user/index/');
92 exit;
93 }
94
95 $this->user->loadModel($id);
96 $this->view->setAction('edit');
97 $this->view->set('user', $this->user);
98 $this->view->render();
99 }
100
101 public function delete($id)
102 {
103 if (!isset($_REQUEST["id"])) {
104 echo "error";
105 } else {
106 if ($this->user->del("id", $_REQUEST["id"])) {
107 echo "success";
108 } else {
109 echo "error";
110 }
111 }
112 exit;
113 }
We don’t have the view files, but before we need to change the User model.
1 <?php
2 namespace App\models;
3
4 use SimpleMVC\core\Model as Model;
5
6 class User extends Model {
7 public $id;
8 private $username;
9 private $email;
10 private $password;
11 private $confirmed_at;
12 private $role_id;
13
14
15 public function __construct(string $table)
16 {
17 $this->table = $table;
18
19 parent::__construct($this->table, $this->db);
20 $this->key = 'id';
21 }
22
23 public function setUserName(String $username)
24 {
25 $this->username = $username;
26 }
27
28 public function getUserName()
29 {
30 return $this->username;
31 }
32
33 public function setEmail(String $email)
34 {
35 $this->email = $email;
36 }
37
38 public function setConfirmed_at($confirmed_at)
39 {
40 $this->confirmed_at = $confirmed_at;
41 }
42
43 public function setRole_id(int $role_id)
44 {
45 $this->role_id = $role_id;
46 }
47
48 public function getEmail()
49 {
50 return $this->email;
51 }
52
53 public function setPassword($password)
54 {
55 $this->password;
56 }
57
58 public function getPassword()
59 {
60 return $this->password;
61 }
62
63 public function getConfirmet_at()
64 {
65 return $this->confirmed_at;
66 }
67
68 public function getRole_id()
69 {
70 return $this->role_id;
71 }
72 }
With this in place, we can work with the rest of the views
Finishing the views
_user_header.php
1 <!-- Content Header (Page header) -->
2 <section class="content-header">
3 <div class="container-fluid">
4 <div class="row mb-2">
5 <div class="col-sm-6">
6 <h1>User</h1>
7 </div>
8 <div class="col-sm-6">
9 <ol class="breadcrumb float-sm-right">
10 <li class="breadcrumb-item">
11 <a href="user/index">Users</a>
12 </li>
13 <li class="breadcrumb-item active">
14 <?= $action ?>
15 </li>
16 </ol>
17 </div>
18 </div>
19 </div><!-- /.container-fluid -->
20 </section>
_form.php
1 <?php if ($action == "Add"): ?>
2 <div class="form-group">
3 <label for="username">Username:</label>
4 <input type="text" name="username"
5 class="form-control" value="<?= $user->username ?>">
6 </div>
7 <?php endif; ?>
8 <div class="form-group">
9 <label for="email">Email:</label>
10 <input type="text" name="email"
11 class="form-control" value="<?= $user->email ?>">
12 </div>
13 <div class="form-group">
14 <label for="password">Password:</label>
15 <input type="password" name="password"
16 class="form-control" value=""
17 <?php echo ($action == 'Add') ? "required": "" ?>>
18 </div>
19 <div class="form-group">
20 <label for="confirm_password">Confirm Password:</label>
21 <input type="password" name="confirm_password"
22 class="form-control" value=""
23 <?php echo ($action == 'Add') ? "required": "" ?>>
24 </div>
25 <div class="form-group">
26 <label for="role_id">Role:</label>
27 <select name="role_id" class="form-control">
28 <option value="">--Select--</option>
29 <option value="1"
30 <?php echo ($user->role_id == 1) ?
31 "selected": "" ?>>
32 Admin
33 </option>
34 <option value="2"
35 <?php echo ($user->role_id == 2) ?
36 "selected": "" ?>>
37 Secretary
38 </option>
39 <option value="3"
40 <?php echo ($user->role_id == 3) ?
41 "selected": "" ?>>
42 Doctor
43 </option>
44 <option value="4"
45 <?php echo ($user->role_id == 4) ?
46 "selected": "" ?>>
47 Nurse
48 </option>
49 </select>
50 </div>
51 <?php if (isset($msg)): ?>
52 <div class="alert alert-danger"><?= $msg ?></div>
53 <?php endif; ?>
54 <button type="submit" class="btn btn-primary btn-block">
55 Save
56 </button>
And here is the gist
add.php
1 <?php
2 $action = 'Add';
3 include '_user_header.php';
4 ?>
5 <section class="content">
6 <div class="container-fluid">
7 <div class="card">
8 <div class="card-body">
9 <form action="<?= SITE_BASE ?>user/add"
10 method="POST">
11 <?php include '_form.php'; ?>
12 </form>
13 </div>
14 </div>
15 </div>
16 </section>
edit.php
1 <?php
2 $action = 'Edit';
3 include '_user_header.php';
4 ?>
5 <section class="content">
6 <div class="container-fluid">
7 <div class="card">
8 <div class="card-body">
9 <form
10 action="<?= SITE_BASE ?>user/edit/<?= $user->id ?>"
11 method="POST">
12 <?php include '_form.php'; ?>
13 </form>
14 </div>
15 </div>
16 </div>
17 </section>
view.php
1 <?php
2 $action = 'User';
3 include '_user_header.php';
4 ?>
5
6 <!-- Main content -->
7 <section class="content">
8 <div class="container-fluid">
9 <div class="row">
10 <div class="col-md-12">
11
12 <!-- Profile Image -->
13 <div class="card card-primary card-outline">
14 <div class="card-body box-profile">
15 <div class="text-center">
16 <img
17 class="profile-user-img img-fluid
18 img-circle"
19 src="../../dist/img/user4-128x128.jpg"
20 alt="User profile picture">
21 </div>
22
23 <h3 class="profile-username text-center">
24 <?= $user->username ?>
25 </h3>
26
27 <ul class="list-group list-group-unbordered mb-3">
28 <li class="list-group-item">
29 <b>Age</b> <a class="float-right"></a>
30 </li>
31 </ul>
32
33 <a
34 href="<?= SITE_BASE ?>user/edit/<?= $user->id ?>"
35 class="btn btn-primary btn-block">
36 <b>Edit</b></a>
37 </div>
38 <!-- /.card-body -->
39 </div>
40 <!-- /.card -->
41
42 <!-- About Me Box -->
43 <div class="card card-primary">
44 <div class="card-header">
45 <h3 class="card-title">Contact</h3>
46 </div>
47 <!-- /.card-header -->
48 <div class="card-body">
49 <strong>
50 <i class="fas fa-phone mr-1"></i> Phone</strong>
51
52 <p class="text-muted">
53 </p>
54
55 <hr>
56
57 <strong>
58 <i class="fas fa-map-marker-alt mr-1"></i>
59 Address
60 </strong>
61
62 <p class="text-muted"></p>
63
64 <hr>
65
66 <strong>
67 <i class="fas fa-envelope mr-1"></i> Email
68 </strong>
69
70 <p class="text-muted"><?= $user->email ?></p>
71 </div>
72 <!-- /.card-body -->
73 </div>
74 <!-- /.card -->
75 </div>
76 </div>
77 <!-- /.row -->
78 </div><!-- /.container-fluid -->
79 </section>
80 <!-- /.content -->
And the gist
If we select a user to see the details, we should see something similar to what’s shown in Figure 72.
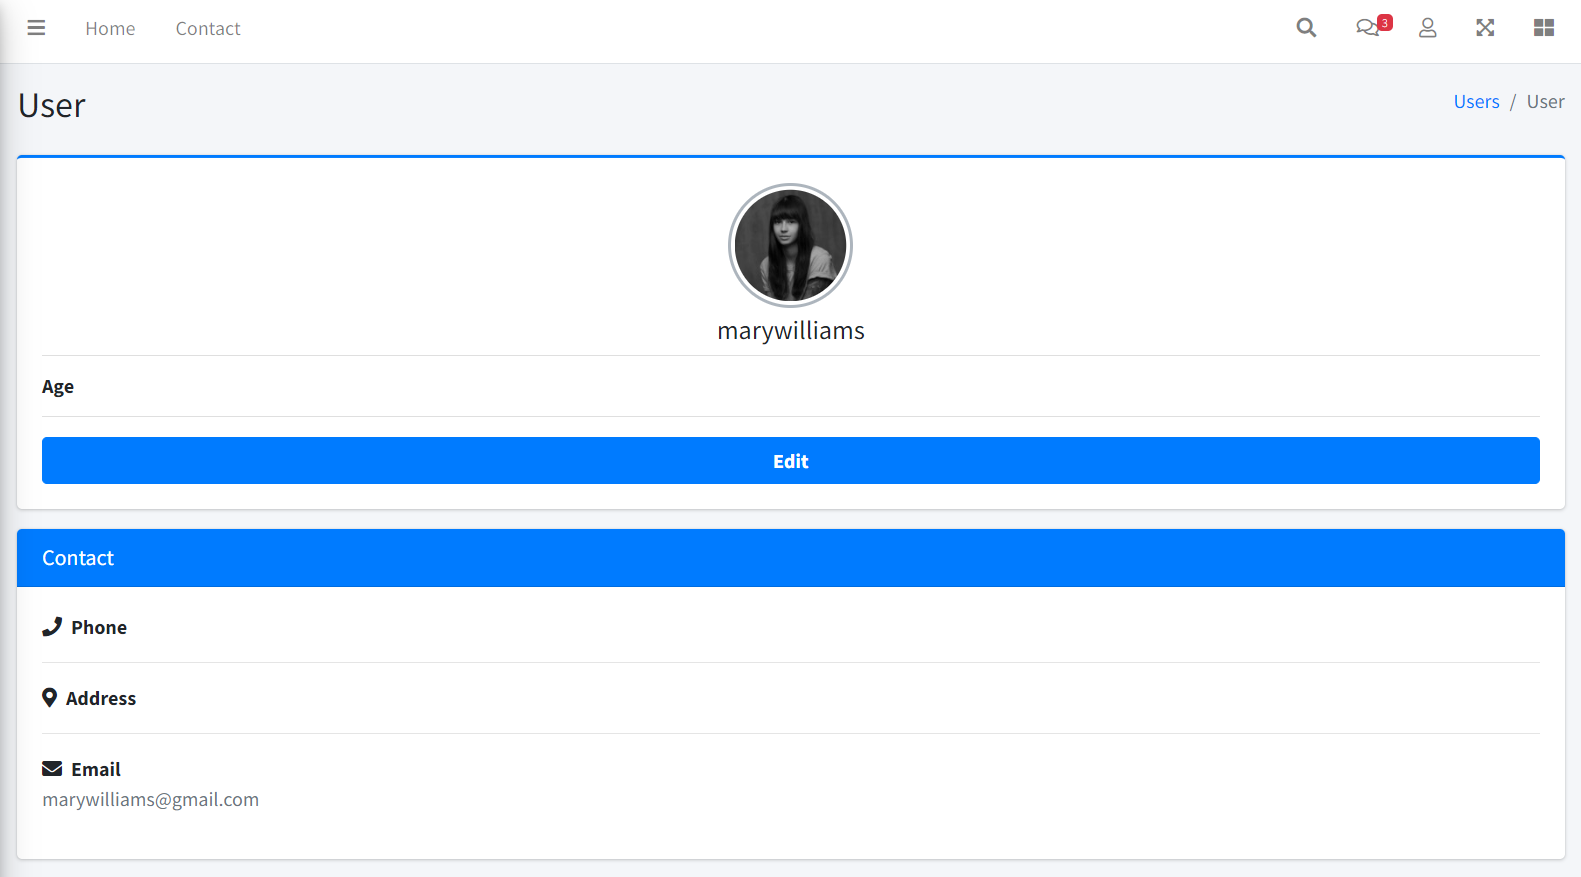
In the view, we have references to fields such as age, phone and address, which are not present in the users table. Normally, these will reside in a profiles table, with a 1 to 1 relationship to the users table. We could also add the corresponding fields to the employees table, since that table already has a user_id.
I’ll leave to you the task of implementing this functionality.
Checking Admin role
Add the following method to the UserController:
1 public function checkRole()
2 {
3 session_id(APP_SESSION_ID);
4 session_start();
5 $this->db = new db(CONFIG);
6
7 $user = $this->db->query("SELECT role_name
8 FROM users
9 LEFT JOIN roles ON users.role_id = roles.id
10 WHERE username = '".$_SESSION['username']."'");
11
12 $role = $user[0]['role_name'];
13
14 if ($role != 'Admin') {
15 $response = new Response();
16 $response->setResponseHeader(404, 'Not found');
17 }
18 }
Of course we need to add this use sentence:
1 use SimpleMVC\core\Response as Response;
With this method in place, we can add the following line in the index, add, edit, and delete methods:
1 $this->checkRole();
We have limited the access to those methods to the Admin role. This is a very simple implementation of role based access control, but you can easily extend it.
One last thing regarding our view method, is that, although we won’t be checking for an Admin role, we need to access the session variables Otherwise, if we access to the user menu we’ll see the error shown in figure 73:
To avoid this, first we need to add this use sentence:
1 use SimpleMVC\helpers\SessionChecker as SessionChecker;
And then we can include the call to the check method as the first line of the view method:
1 SessionChecker::check();
That’ll take care of the issue.
Change password functionality
The change password functionality is very similar to the edit functionality, but the form will only show the password and confirm_password fields. But first let’s define the change method:
1 public function change()
2 {
3 session_start();
4 $this->db = new db(CONFIG);
5
6 $user = $this->db->query("SELECT id
7 FROM users
8 WHERE username = '".$_SESSION['username']."'");
9
10 $id = $user[0]['id'];
11
12 if ($_SERVER["REQUEST_METHOD"] == 'POST') {
13 if (!empty($_POST["password"])) {
14 $data = [
15 'password'
16 => password_hash($_POST["password"],
17 PASSWORD_BCRYPT)
18 ];
19
20
21 if ($_POST["password"]
22 != $_POST["confirm_password"]) {
23 $msg = "Password and Confirmed Password
24 doesn't match";
25 $this->user->load($data);
26 $this->view->setAction('change');
27 $this->view->set('user', $this->user);
28 $this->view->set('msg', $msg);
29 $this->view->render();
30 exit;
31 }
32 } else {
33 $msg = "Password is required";
34 $this->view->setAction('change');
35 $this->view->set('user', $this->user);
36 $this->view->set('msg', $msg);
37 $this->view->render();
38 exit;
39 }
40
41 $this->user->load($data);
42 $this->user->save($id);
43
44 header('Location: ' . SITE_BASE . 'user/index/');
45 exit;
46 }
47
48 $this->user->loadModel($id);
49 $this->view->setAction('change');
50 $this->view->set('user', $this->user);
51 $this->view->render();
52 }
And here is the gist
We get the user id from the database using the username stored in the session, we verify that the password is present and that the confirm_password matches.
For the view, add a change.php file inside the users folder with the following content:
1 <?php
2 $action = 'Change password';
3 include '_user_header.php';
4 ?>
5 <section class="content">
6 <div class="container-fluid">
7 <div class="card">
8 <div class="card-body">
9 <form action="<?= SITE_BASE ?>user/change"
10 method="POST">
11 <div class="form-group">
12 <label for="password">Password:</label>
13 <input type="password" name="password"
14 class="form-control" value="" required>
15 </div>
16 <div class="form-group">
17 <label for="confirm_password">
18 Confirm Password:</label>
19 <input type="password"
20 name="confirm_password"
21 class="form-control" value="" required>
22 </div>
23 <?php if (isset($msg)): ?>
24 <div class="alert alert-danger">
25 <?= $msg ?></div>
26 <?php endif; ?>
27 <button type="submit"
28 class="btn btn-primary btn-block">
29 Save
30 </button>
31 </form>
32 </div>
33 </div>
34 </div>
35 </section>
Summary and last words
We are a step closer to having a working application. Still, some things are missing:
Change password functionality, user profile, a dashboard and a sidebar. Those things, my dear reader, I will also leave it to you.
The purpose of the book was to give you valuable knowledge about the inner workings of professional frameworks, developing in the process, one that is completely functional. Hopefully that goal has been reached. Now you are well prepared to work with pure php, or learn any modern framework and be productive.
I wish you the best.